Build a product recommendation chatbot for a Shopify store using OpenAI and Gadget
Topics covered: Shopify connections, AI + vector embeddings, HTTP routes
Time to build: ~30 minutes
Large Language Model (LLM) APIs allow developers to build apps that can understand and generate text. We can use the OpenAI APIs to build a chatbot that can understand a shopper's question and respond with product recommendations.
In this tutorial, you will learn how to:
- set up a Shopify and OpenAI connection in Gadget
- add custom data models and fields
- use OpenAI's text embedding API to generate vector embeddings for product descriptions
- use OpenAI's chat API to generate and stream a response to a shopper's question
- use a Shopify theme app extension to embed the chatbot into a storefront
Requirements
To get the most out of this tutorial, you will need:
- A Shopify Partners account
- A development store
You can fork this Gadget project and try it out yourself. You will still need to set up the Shopify Connection and theme app extension after forking. Read on to learn how to connect Gadget to a Shopify store!

Step 1: Create a Gadget app and connect to Shopify
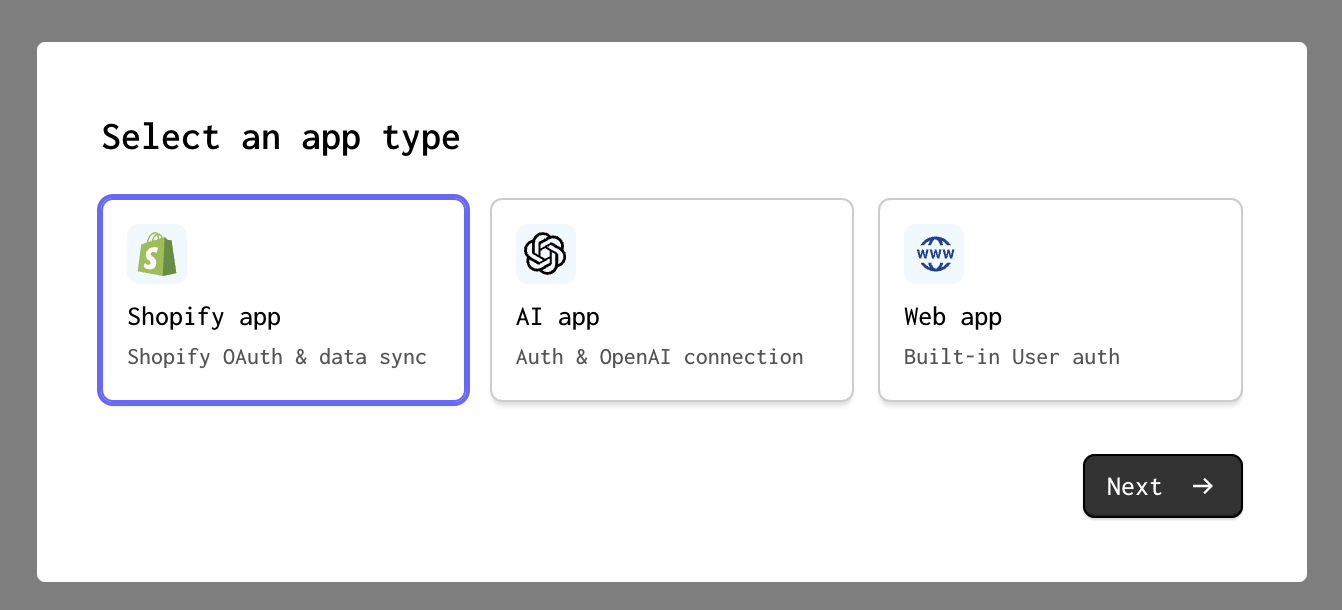
Your first step will be to set up a Gadget project and connect to a Shopify store via the Shopify connection. Create a new Gadget application at gadget.new and select the Shopify app template.
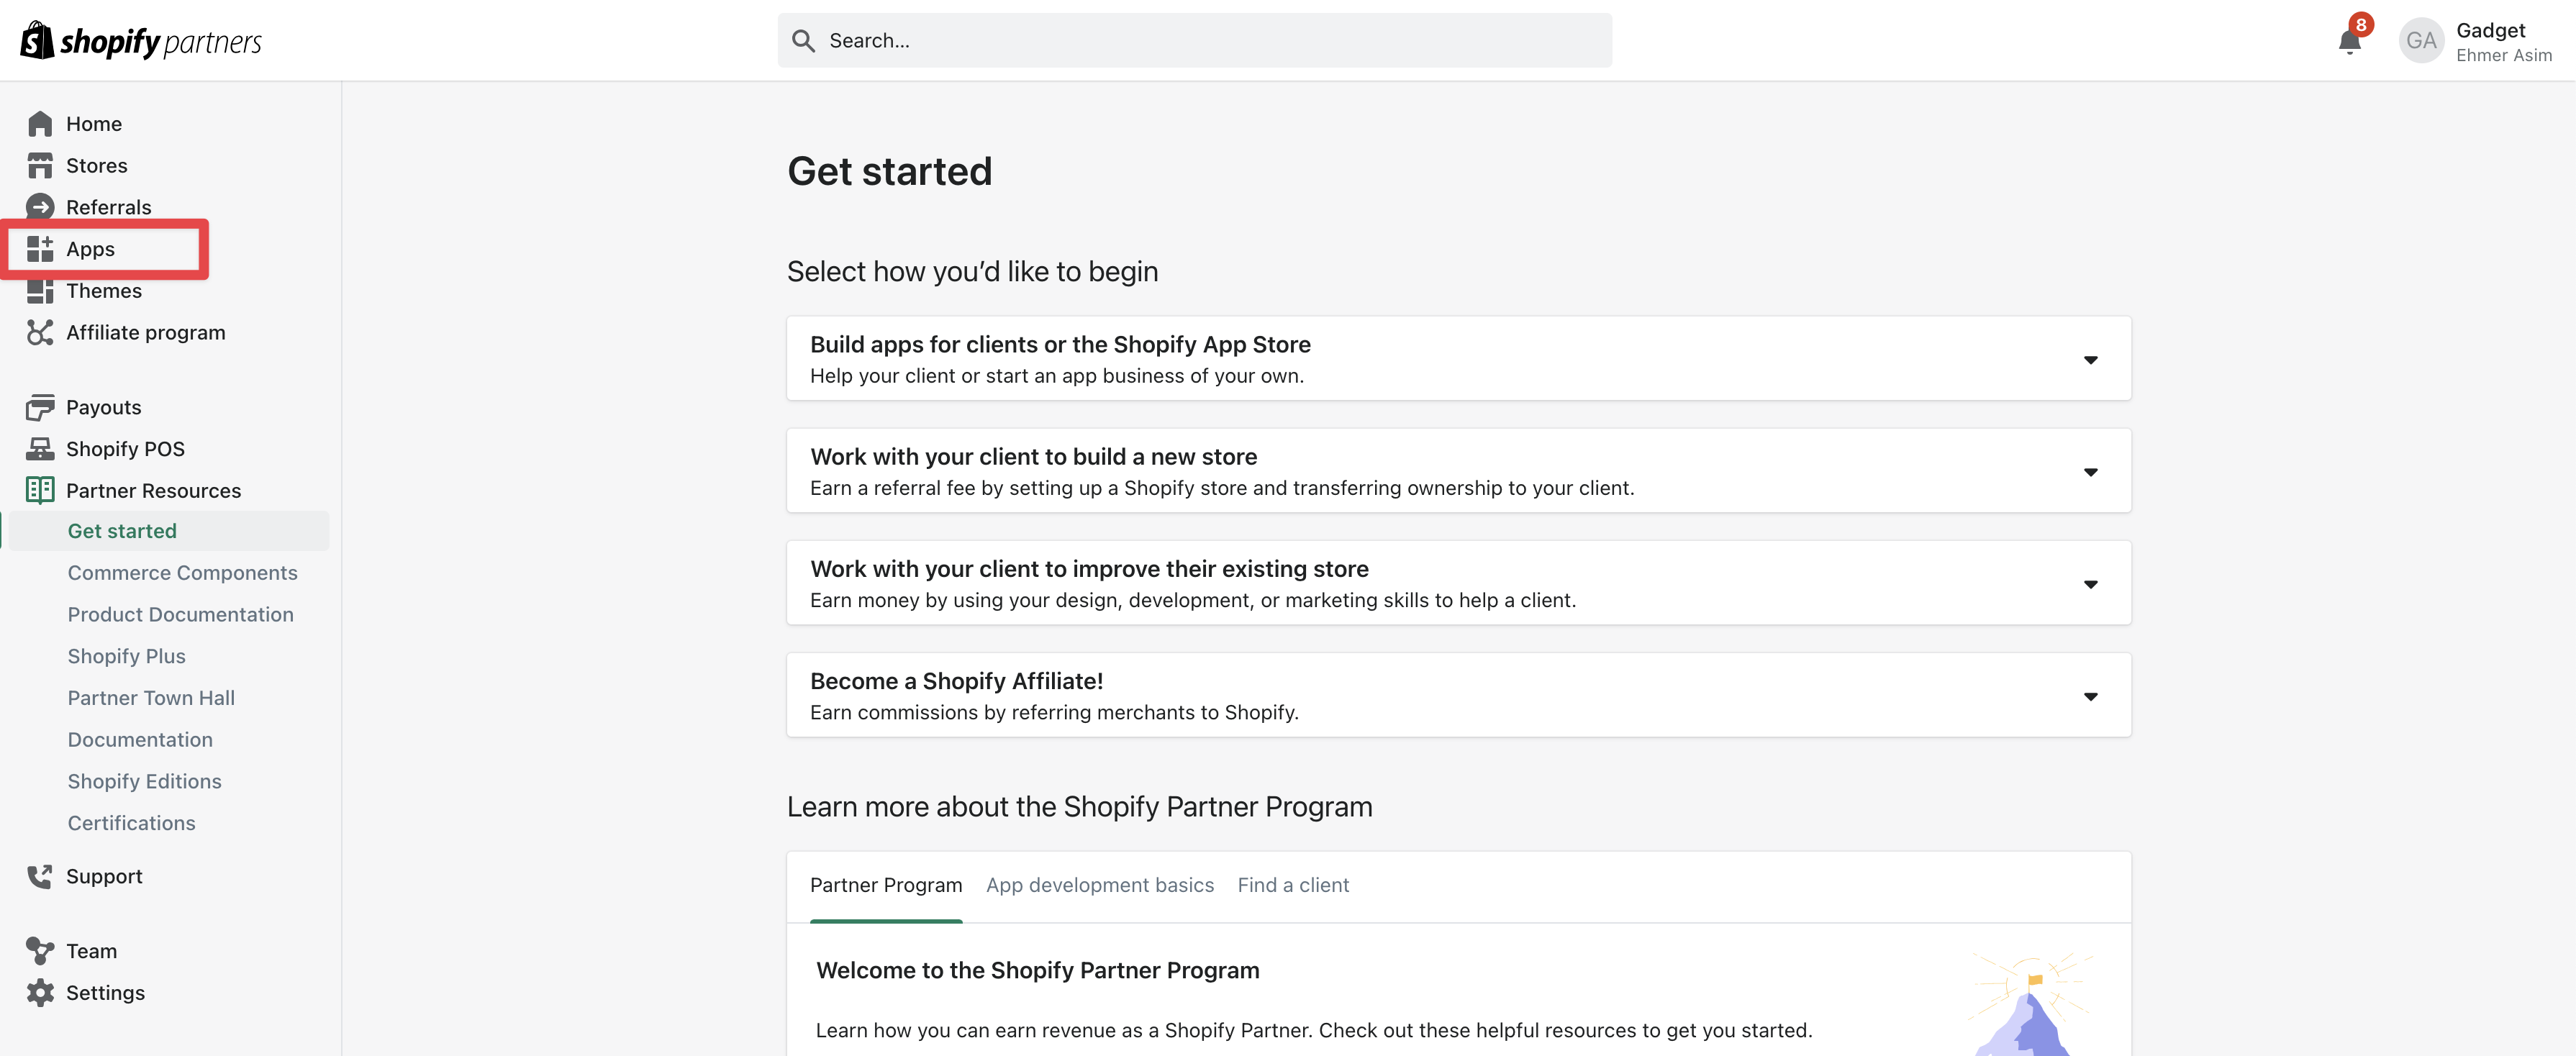
Our first step is going to be setting up a custom Shopify application in the Partner Dashboard.
- Go to the Shopify Partner Dashboard
- Click on the link to the Apps page
Both the Shopify admin and the Shopify Partner Dashboard have an Apps section. Ensure that you are on the Shopify Partner Dashboard before continuing.
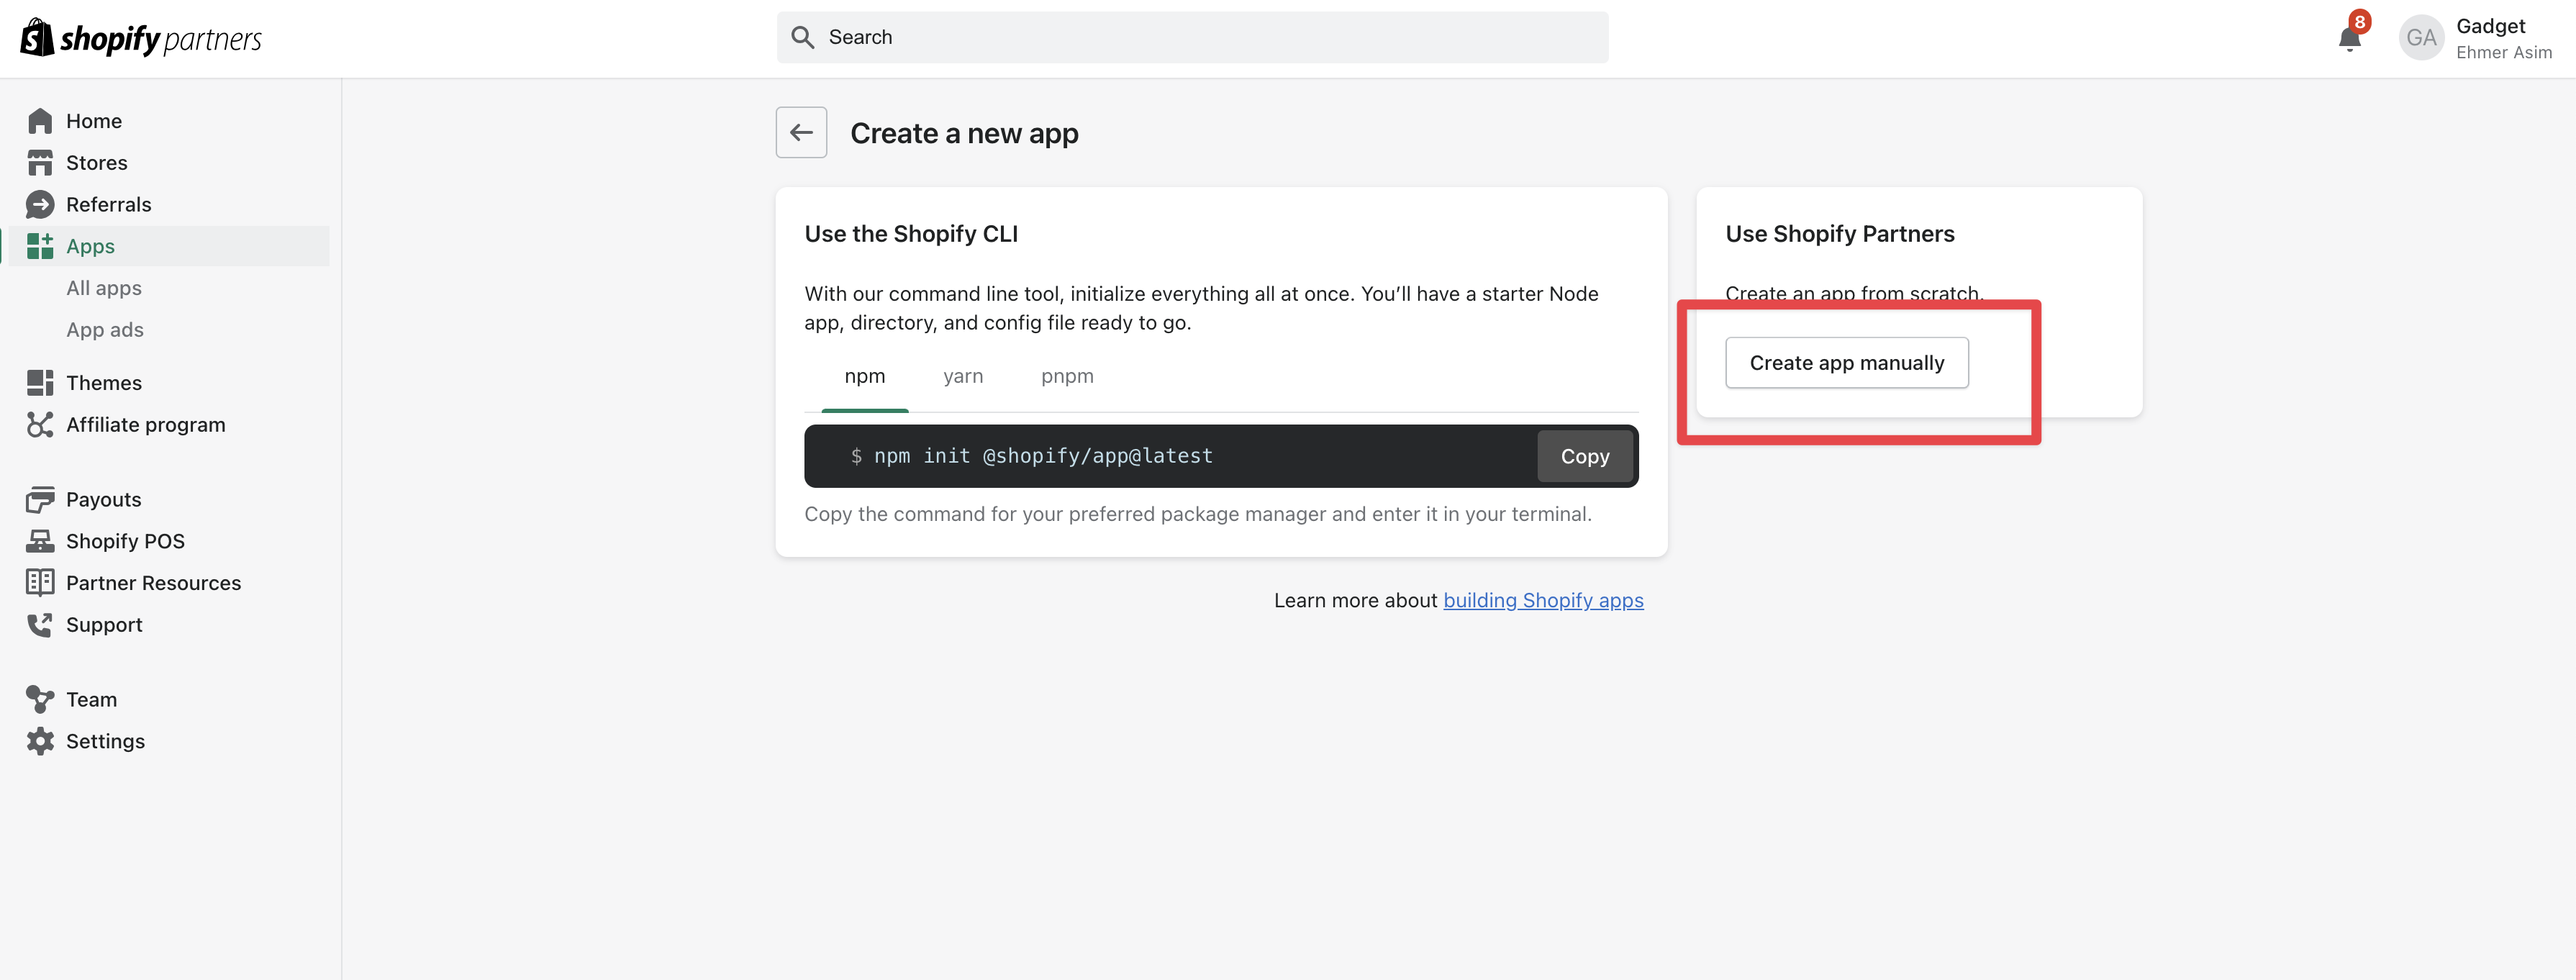
- Click the Create App button
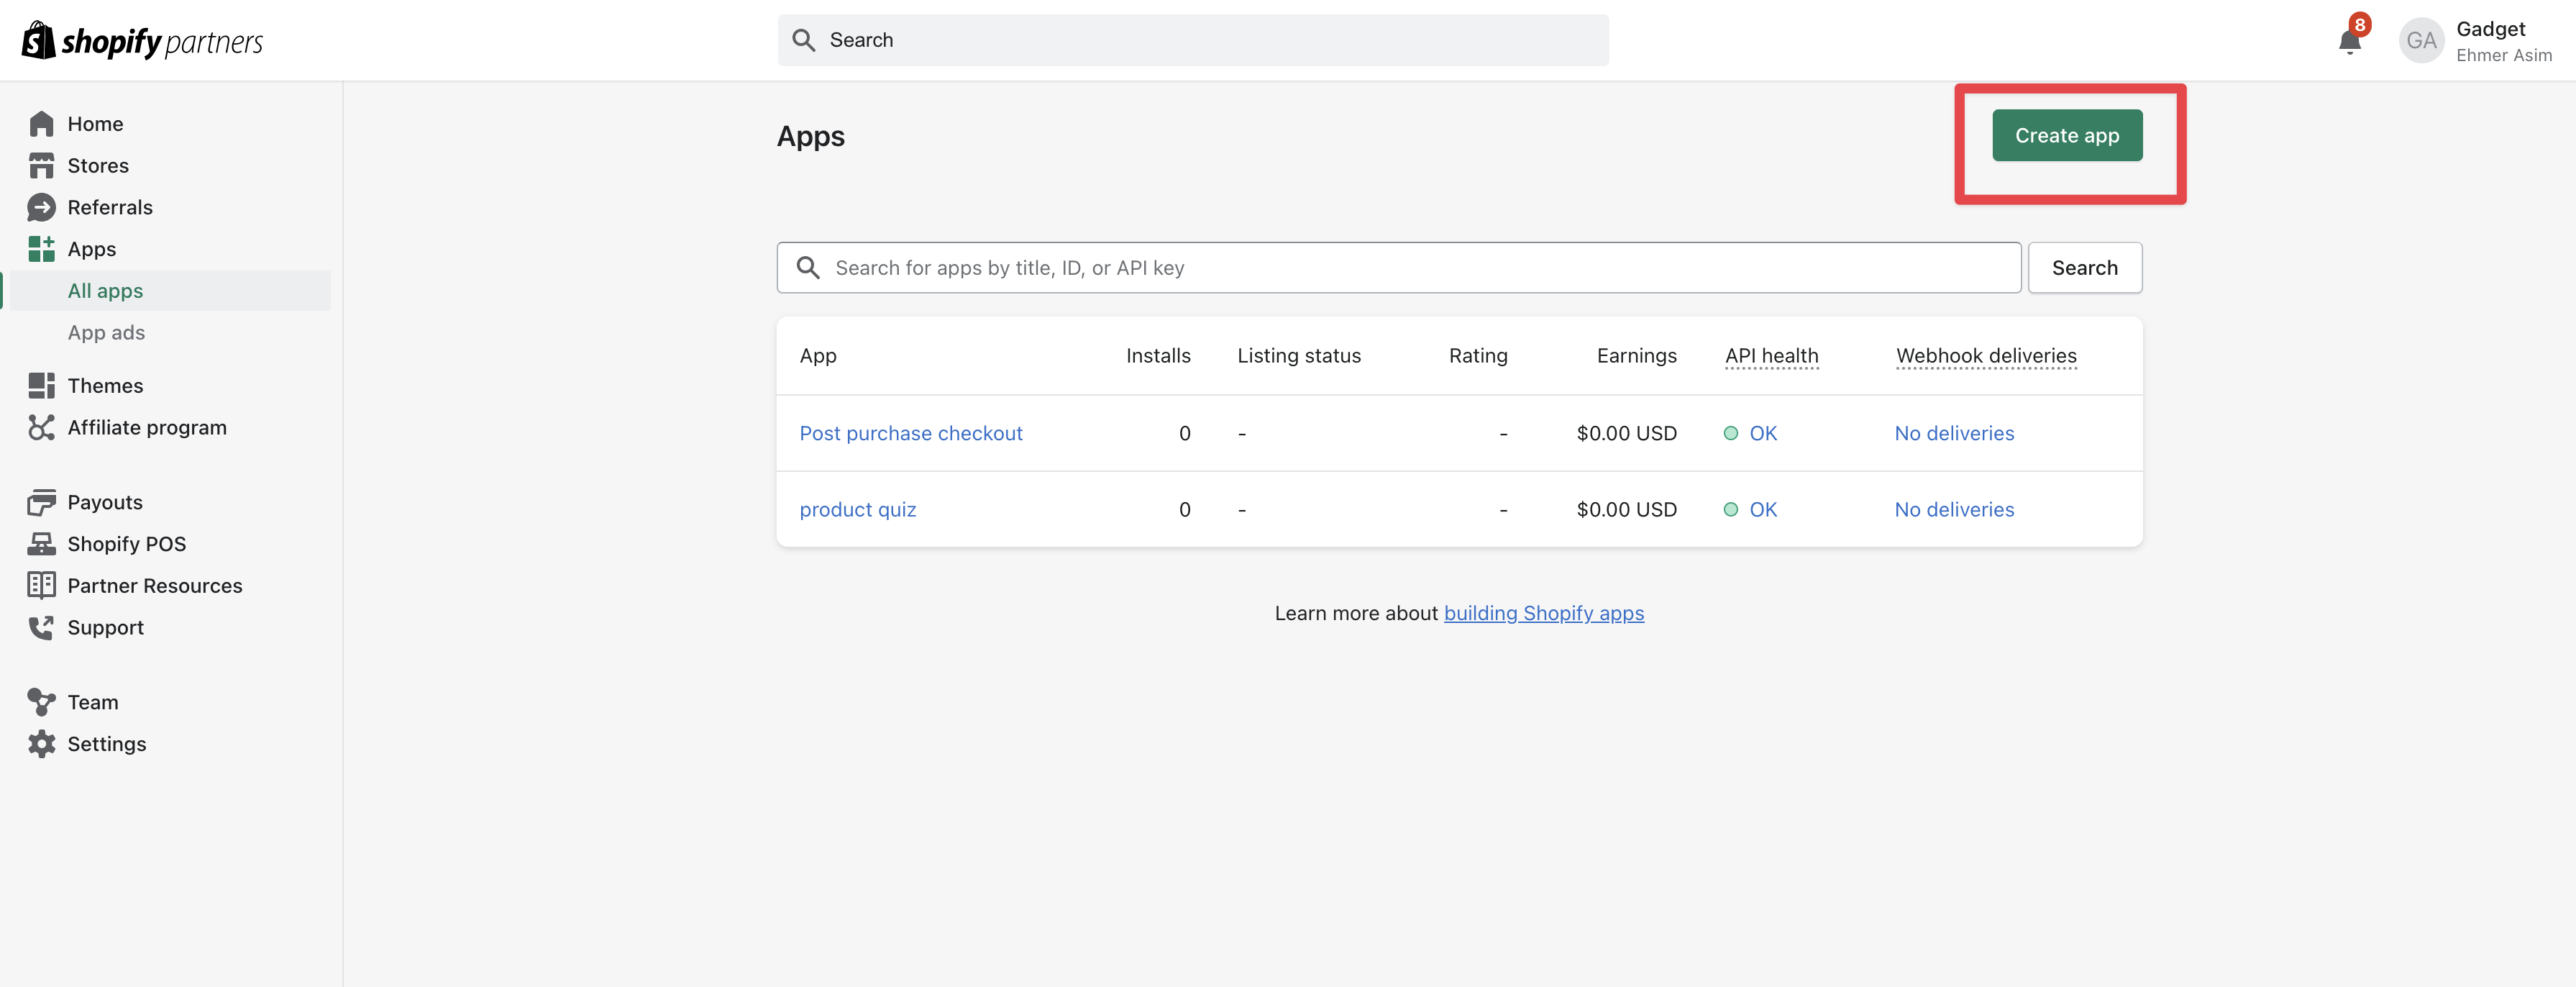
- Click the Create app manually button and enter a name for your Shopify app
- Go to Connections in Settings underneath the Plugins page in your Gadget app

- Copy the Client ID and Client secret from your newly created Shopify app and paste the values into the Gadget Connections page
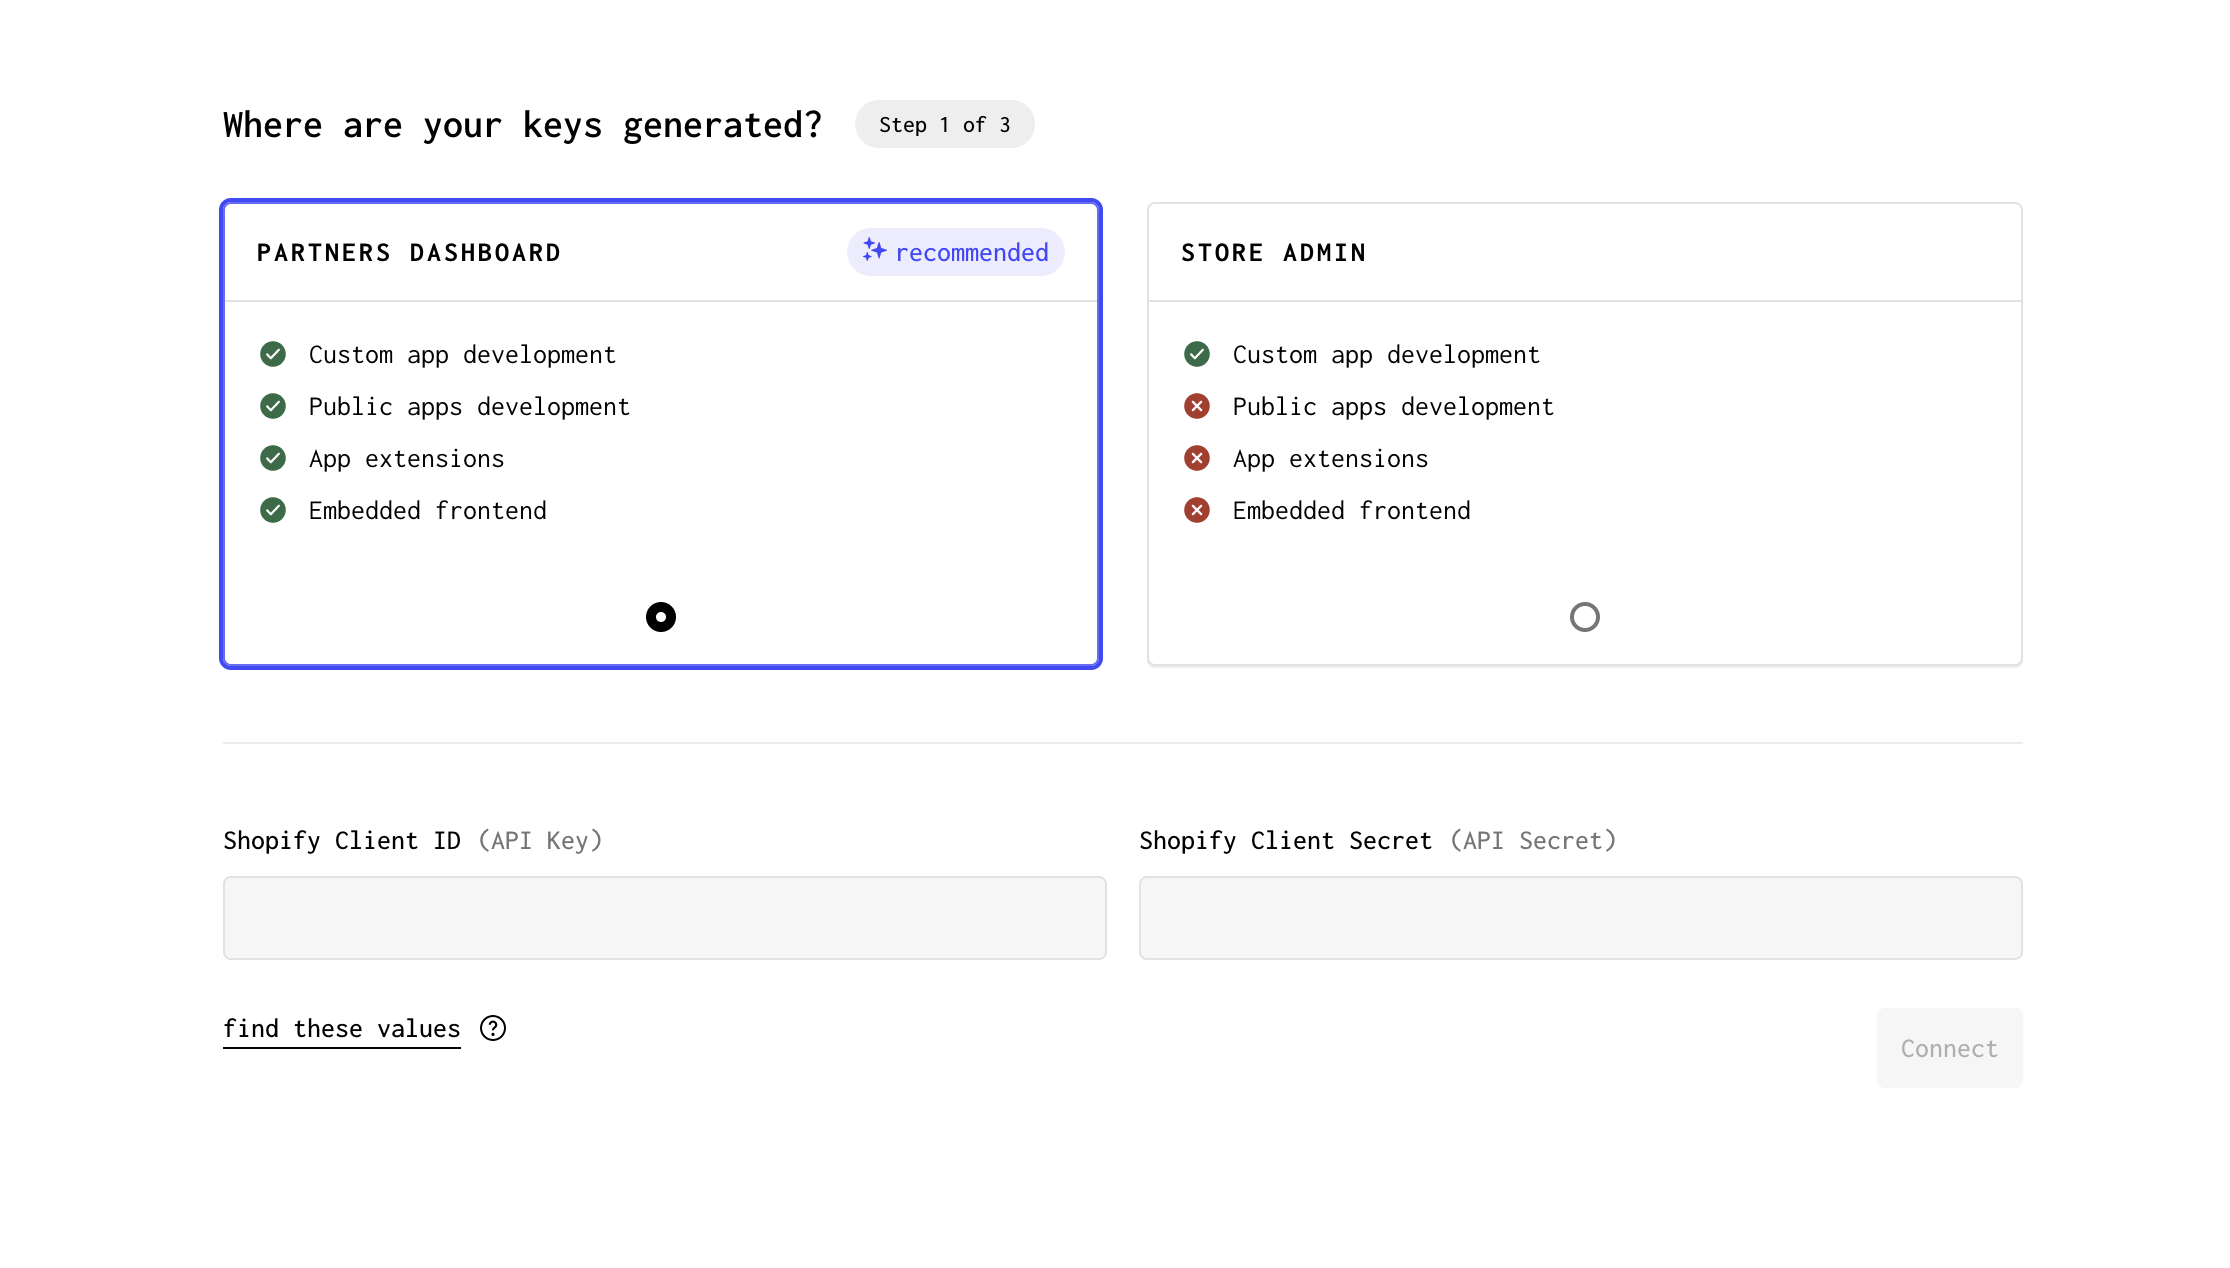
- Click Connect on the Gadget Connections page to move to scope and model selection
Now we get to select what Shopify scopes we give our application access to, while also picking what Shopify data models we want to import into our Gadget app.
- Enable the Products Read API scope, and select the underlying Product and Product Image models that we want to import into Gadget
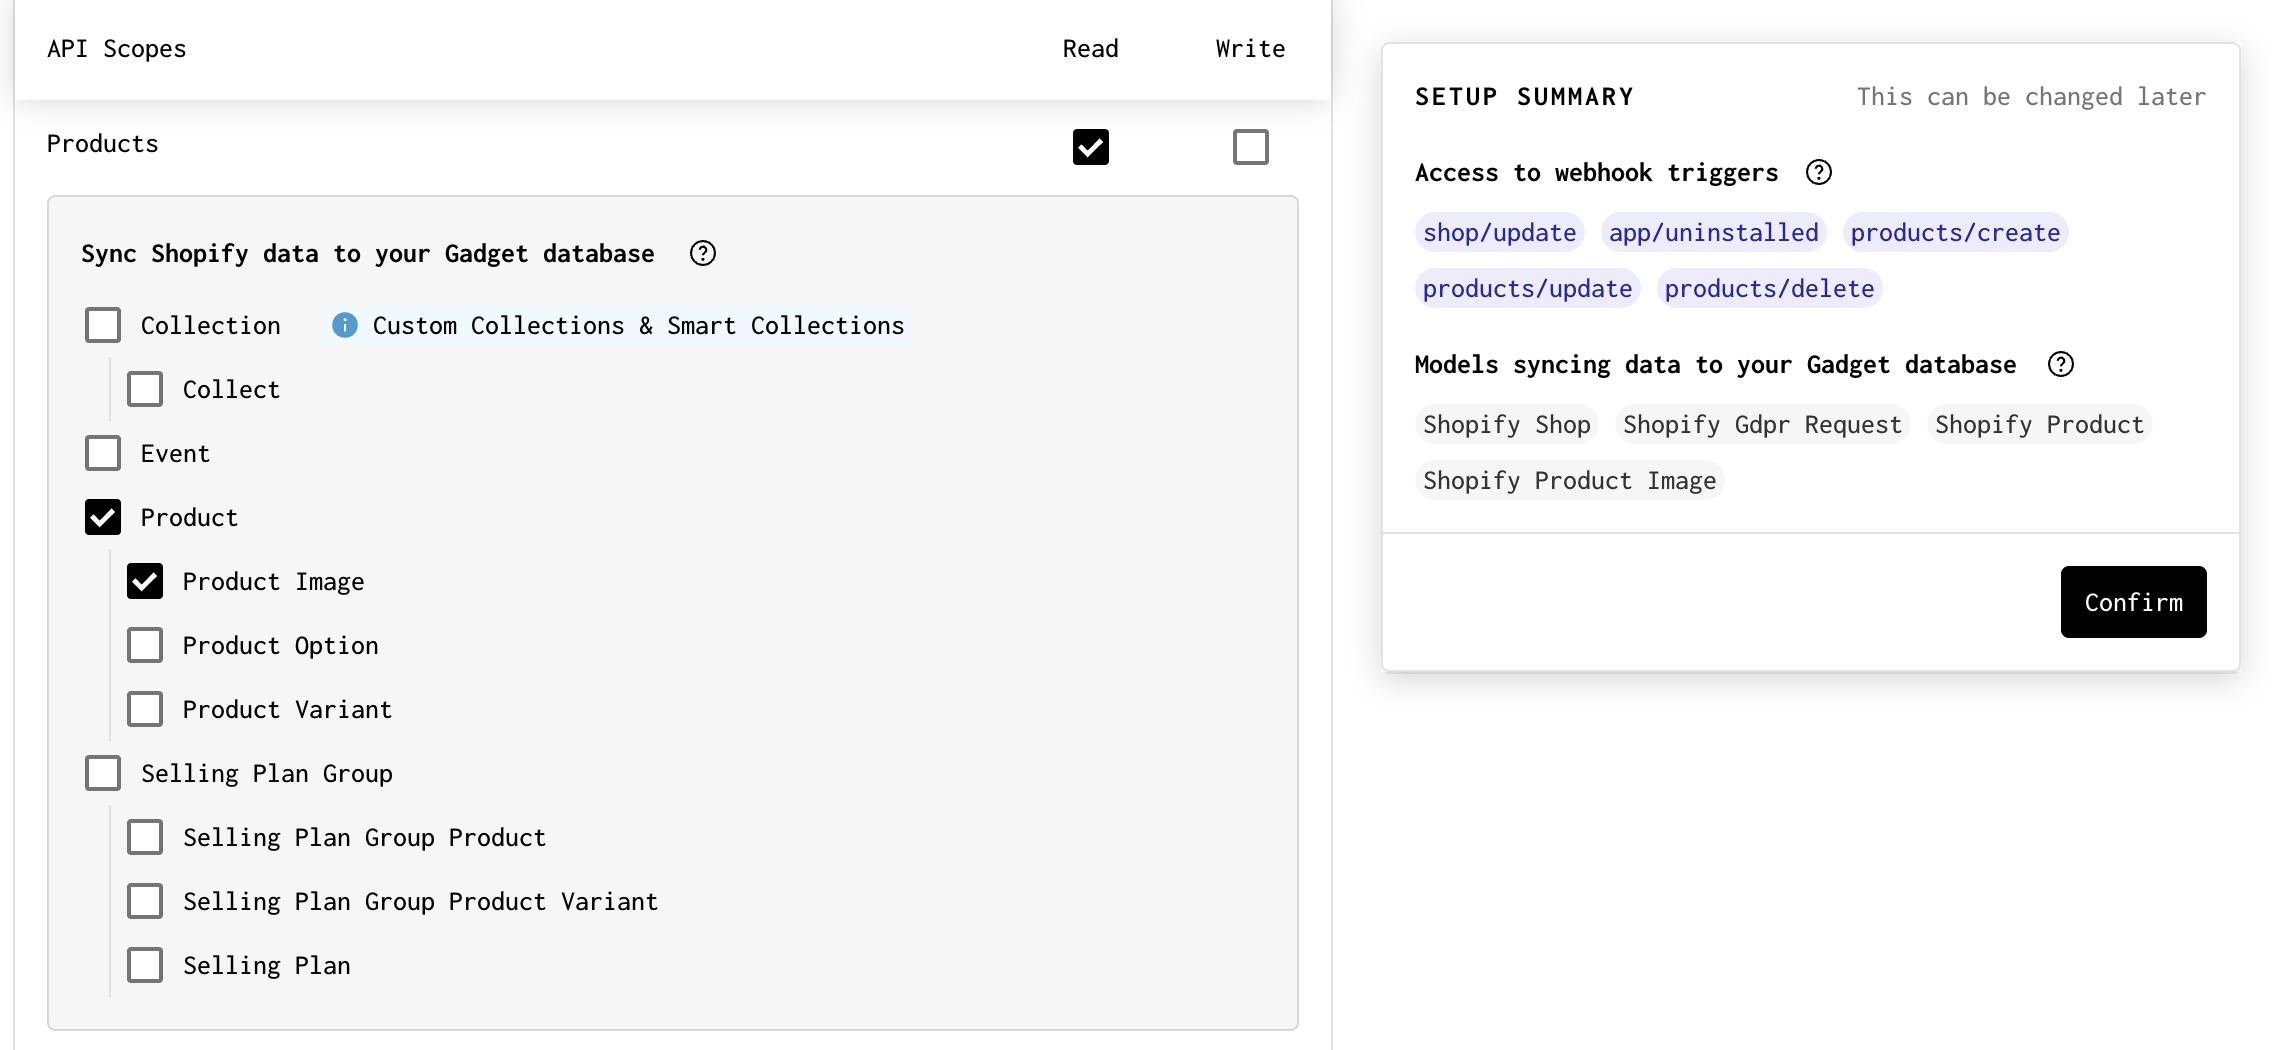
- Click Confirm
Now we want to connect our Gadget app to our custom app in the Partner Dashboard.
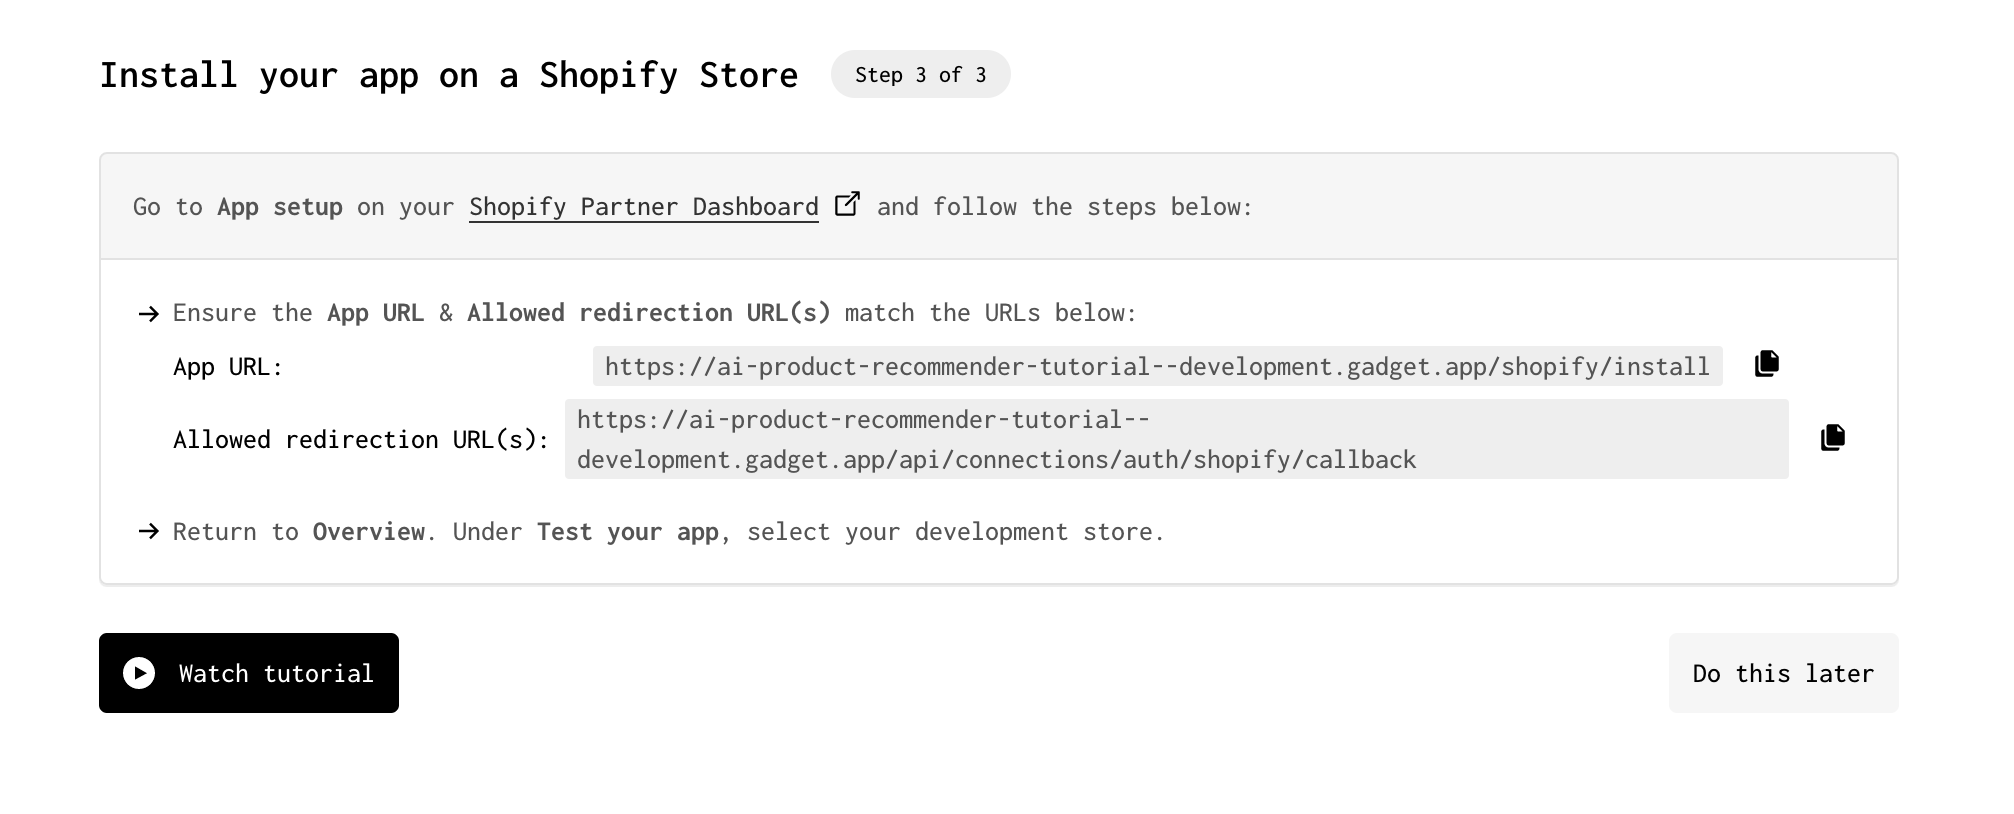
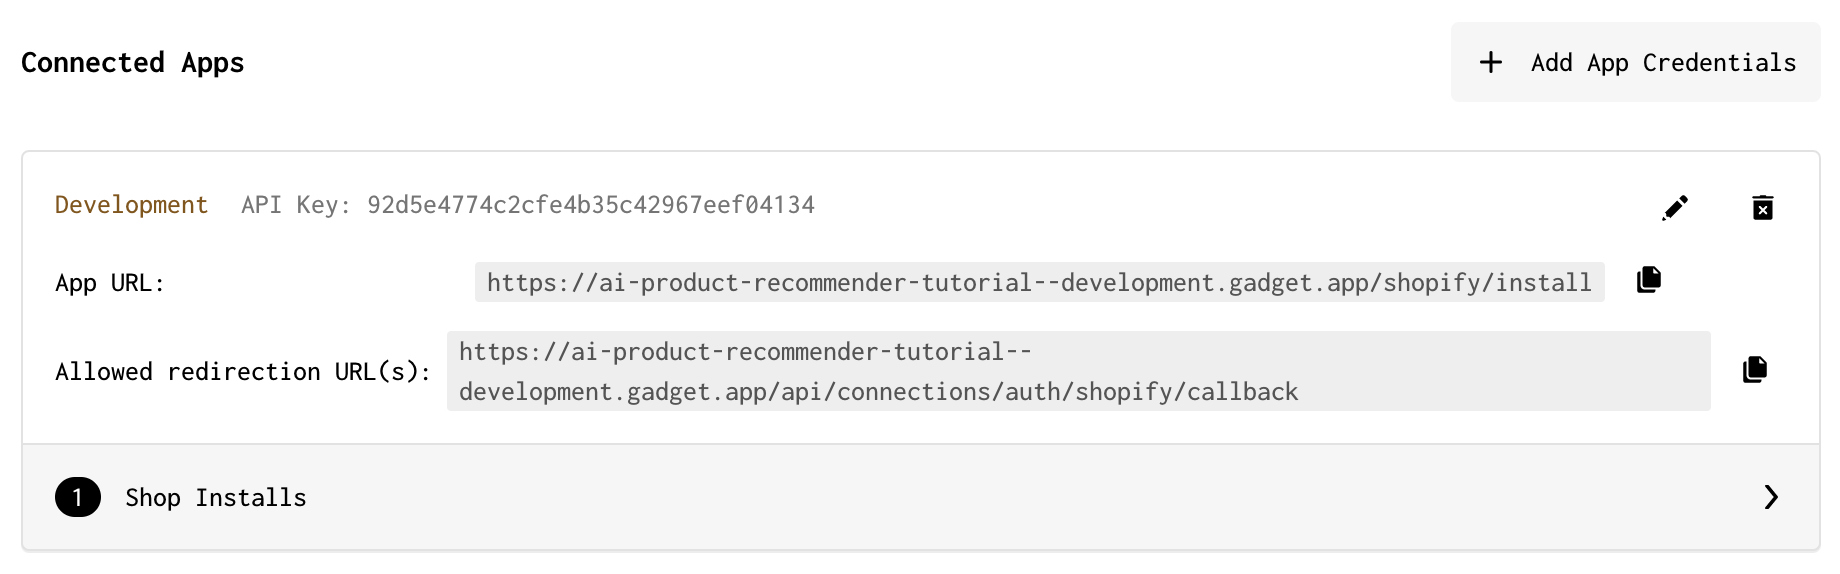
- In your Shopify app in the Partner Dashboard, click on App setup in the side nav bar so you can edit the App URL and Allowed redirection URL(s) fields
- Copy the App URL and Allowed redirection URL from the Gadget Connections page and paste them into your custom Shopify App
Now you can install your app on a store from the Partner Dashboard. Do not sync data yet! You're going to add some code to generate vector embeddings for your products before the sync is run.
Step 2: Set up OpenAI connection
Now that you are connected to Shopify, you can also set up the OpenAI connection that will be used to fetch embeddings for product descriptions. Gadget provides OpenAI credits for testing while building your app, so you don't need a personal OpenAI API key to get started.
- Click on Settings in the nav bar
- Click on Plugins
- Click on the OpenAI connection
- Select the Use Gadget's API keys option in the modal that appears OR enter your own OpenAI API key
Your OpenAI connection is now ready to be used!
Step 3: Add data models for chat responses
Now we need a new data model to capture the chat responses from OpenAI, and the products recommended to shoppers. We need to use a <inline-code>has many through<inline-code> relationship to relate the chat response to the recommended products.

- Click + next to DATA MODELS to add a new model
- Name the model <inline-code>chatLog<inline-code>
- Click + next to FIELDS to add a new field
- Name the field <inline-code>response<inline-code> and leave it as a string field
This string field will record the response coming back from OpenAI. We also want to keep track of the products that were recommended, so we need to add a has many through relationship to the <inline-code>shopifyProduct<inline-code> model.
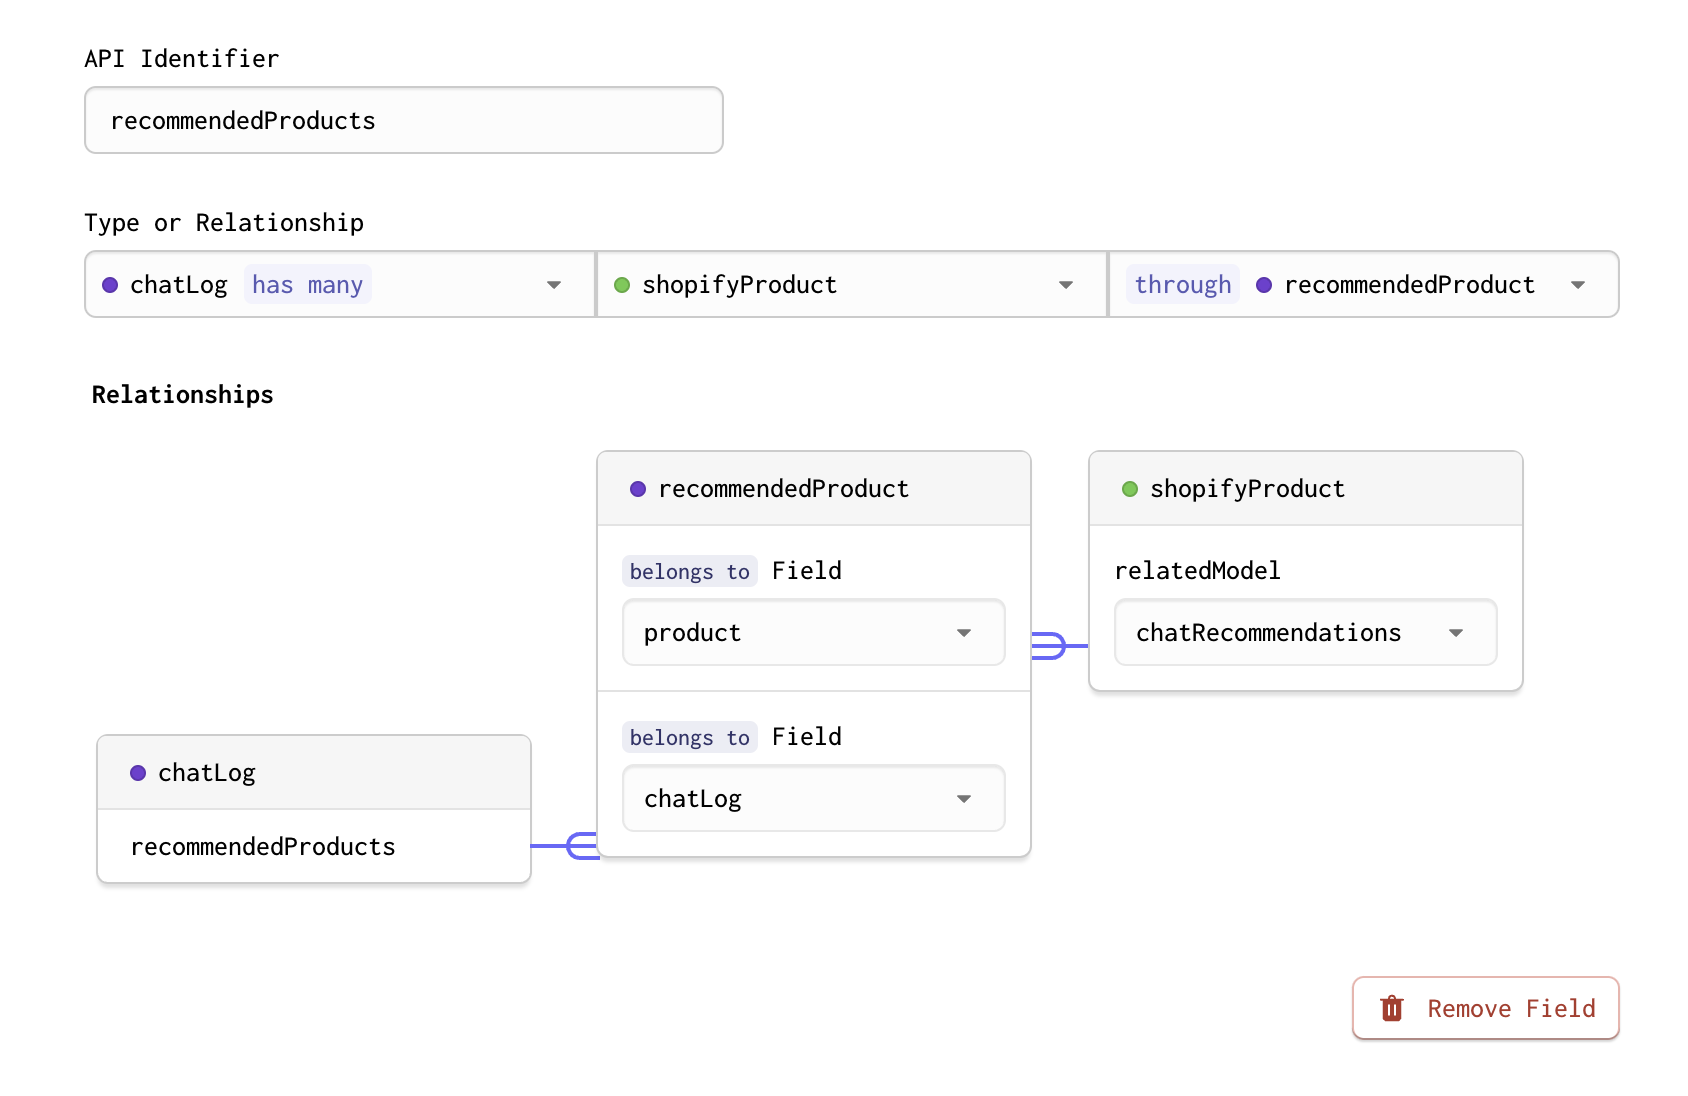
- Add another field to <inline-code>chatLog<inline-code> called <inline-code>recommendedProducts<inline-code>
- Set the field type to a <inline-code>has many through<inline-code> relationship
- Set the sibling to <inline-code>shopifyProduct<inline-code> and the <inline-code>joinModel<inline-code> to <inline-code>recommendedProduct<inline-code>, this will create a new <inline-code>recommendedProduct<inline-code> model
- Name the field in <inline-code>recommendedProduct<inline-code> that relates to the <inline-code>chatLog<inline-code> model, <inline-code>chatLog<inline-code>
- Name the field in <inline-code>recommendedProduct<inline-code> that relates to the <inline-code>shopifyProduct<inline-code> model, <inline-code>product<inline-code>
- Name the field in the <inline-code>shopifyProduct<inline-code> model that relates to the <inline-code>recommendedProduct<inline-code> model, <inline-code>chatRecommendations<inline-code>
Step 4: Add <inline-code>vector<inline-code> field to <inline-code>shopifyProduct<inline-code> model
Before you add code to create the embeddings from product descriptions, you need a place to store the generated embeddings. You can add a vector field to the <inline-code>shopifyProduct<inline-code> model to store the embeddings.
The vector field types store a vector, or array, of floats. It is useful for storing embeddings and will allow you to perform vector operations like cosine similarity, which helps you find the most similar products to a given chat message.
Learn more about OpenAI, LLMs, and vector embeddings
You are going to use Gadget's built-in OpenAI connection to generate vector embeddings for product descriptions. These embeddings will be used to perform a semantic search to find the products that best match a shopper's chat message.
LLMs and vector embeddings are relatively new technologies, and there are many resources available to learn more about them. Here are some resources to get you started:
- Building AI apps in Gadget
- Sorting by vector fields Gadget API docs
- OpenAI docs
To add a vector field to the <inline-code>shopifyProduct<inline-code> model:
- Go to the <inline-code>shopifyProduct<inline-code> model in the navigation bar
- Click on + in the FIELDS section to add a new field
- Name the field <inline-code>descriptionEmbedding<inline-code>
- Set the field type to <inline-code>vector<inline-code>
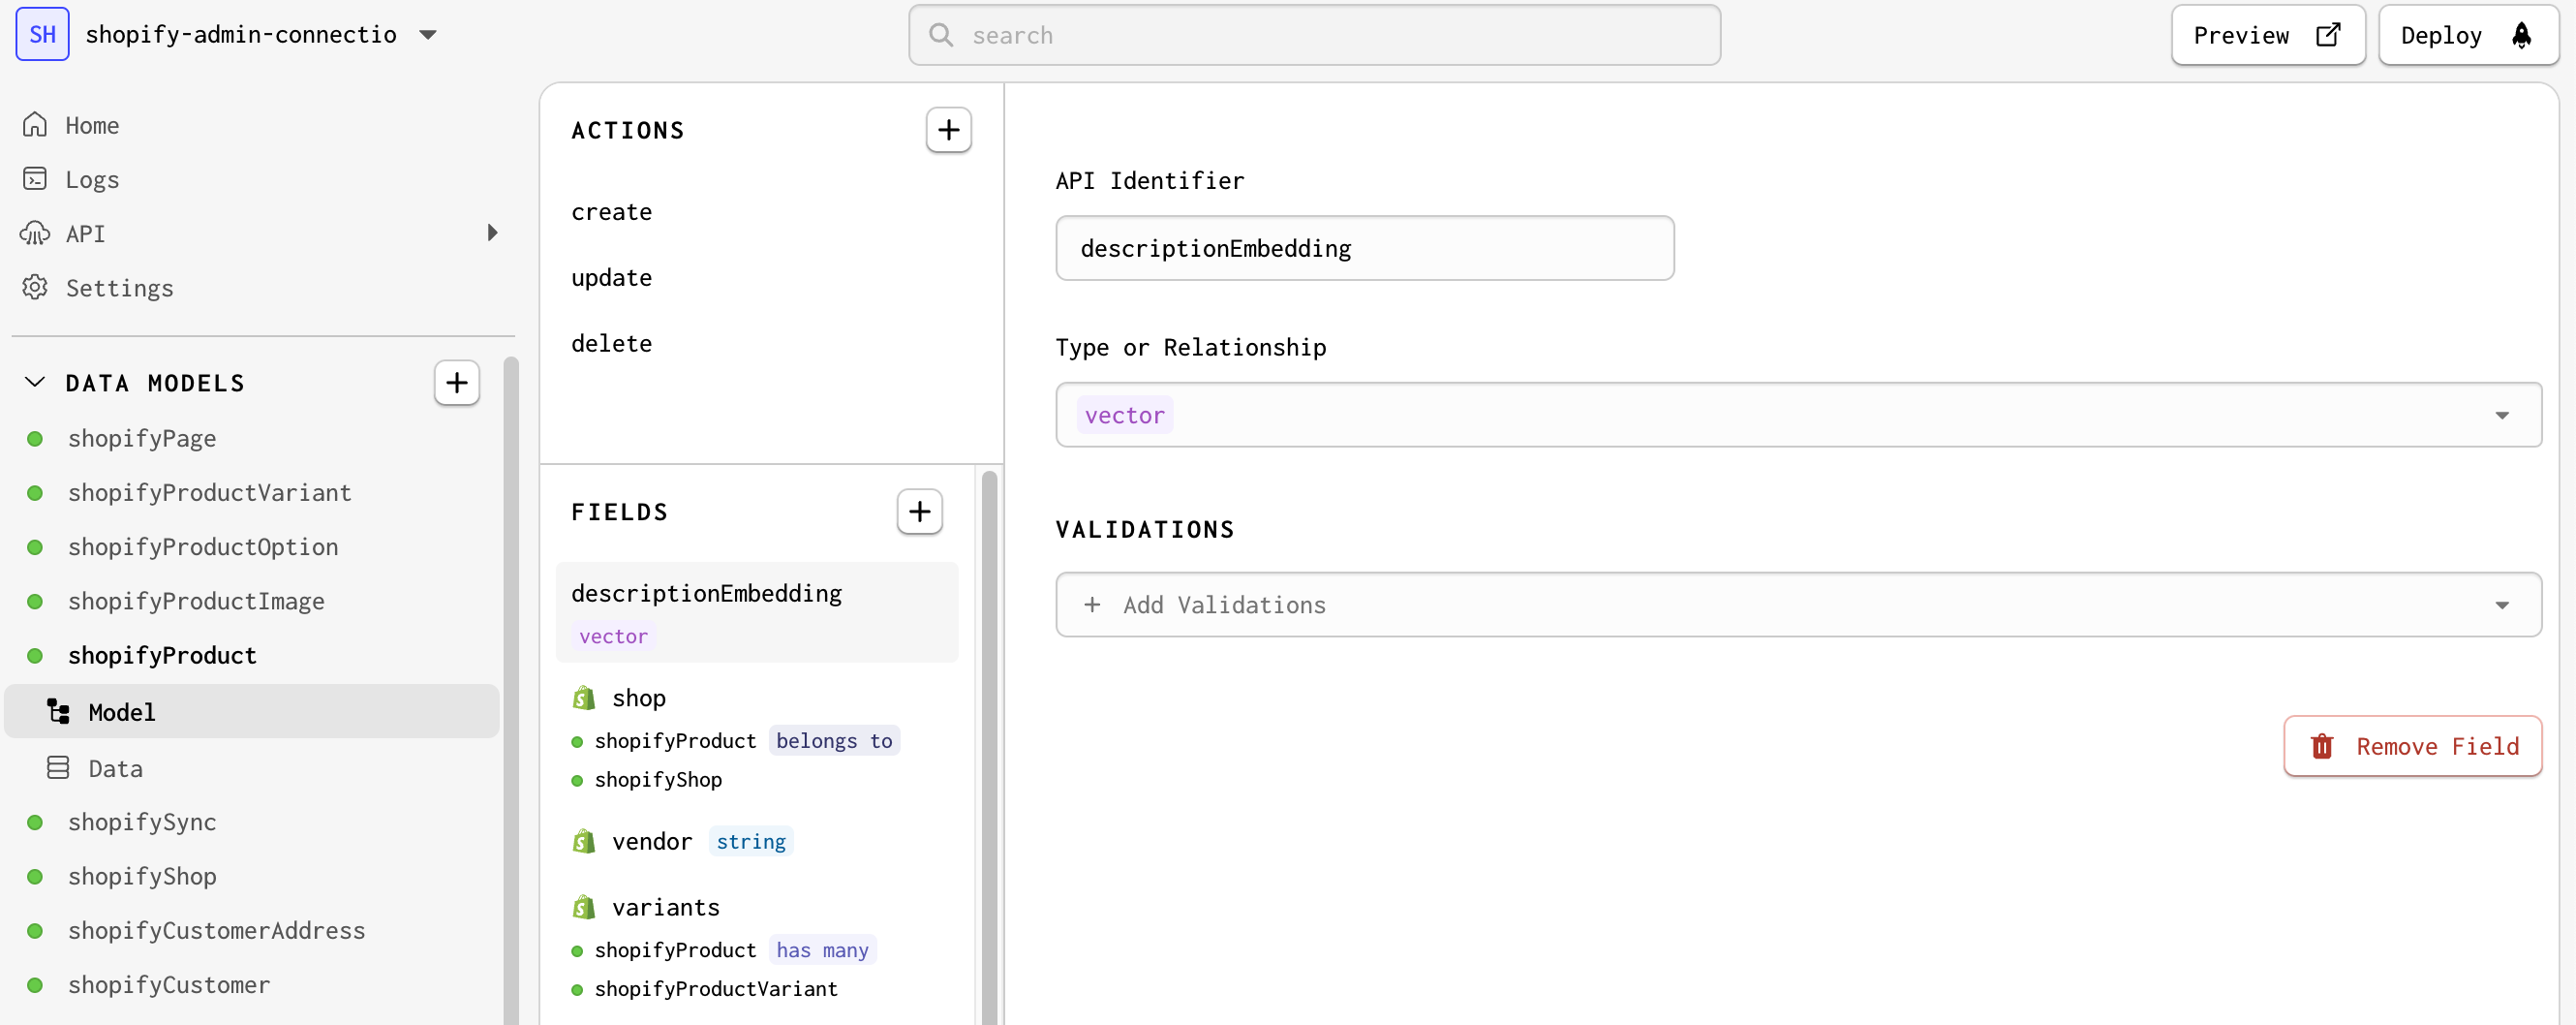
Now you are set up to store embeddings for products! The next step is adding code to generate these embeddings.
Step 5: Write code effect to create vector embedding
Now you can add some code to create vector embeddings for all products in your store. You will want to run this code when Shopify fires a <inline-code>products/create<inline-code> or <inline-code>products/update<inline-code> webhook. To do this, you will create a code effect that runs when a <inline-code>shopifyProduct<inline-code> is created or updated.
- In the FILES explorer, hover over the <inline-code>shopifyProduct<inline-code> folder and click on + to create a new file
- Name the file <inline-code>createEmbedding.js<inline-code>
- Paste the following code into <inline-code>shopifyProduct/createEmbedding.js:<inline-code>
In this snippet:
- the OpenAI connection is accessed through connections.openai and the embeddings.create() API is called
- the internal API is used in the <inline-code>onSuccess<inline-code> function to update the <inline-code>shopifyProduct<inline-code> model and set the <inline-code>descriptionEmbedding<inline-code> field
The internal API needs to be used because the <inline-code>shopifyProduct<inline-code> model does not have a Gadget API trigger on this action by default. You can read more about the internal API in the Gadget docs.
Now call this function from your <inline-code>shopifyProduct/actions/create.js<inline-code> and <inline-code>shopifyProduct/actions/update.js<inline-code> actions:
- Open <inline-code>shopifyProduct/actions/create.js<inline-code> and paste the following code:
- Open <inline-code>shopifyProduct/actions/update.js<inline-code> and paste the following code:
Now vector embeddings will be generated when a new product is created, or an existing product is updated.
Generate embeddings for existing products
Now that the code is in place to generate vector embeddings for products, you can sync existing Shopify products into your Gadget app's database. To do this:
- Click on Settings in the nav bar
- Click on the Plugins page
- Select the Shopify connection
- Click on Shop Installs for the connected Development app
- Click on the Sync button for the store you want to sync products from

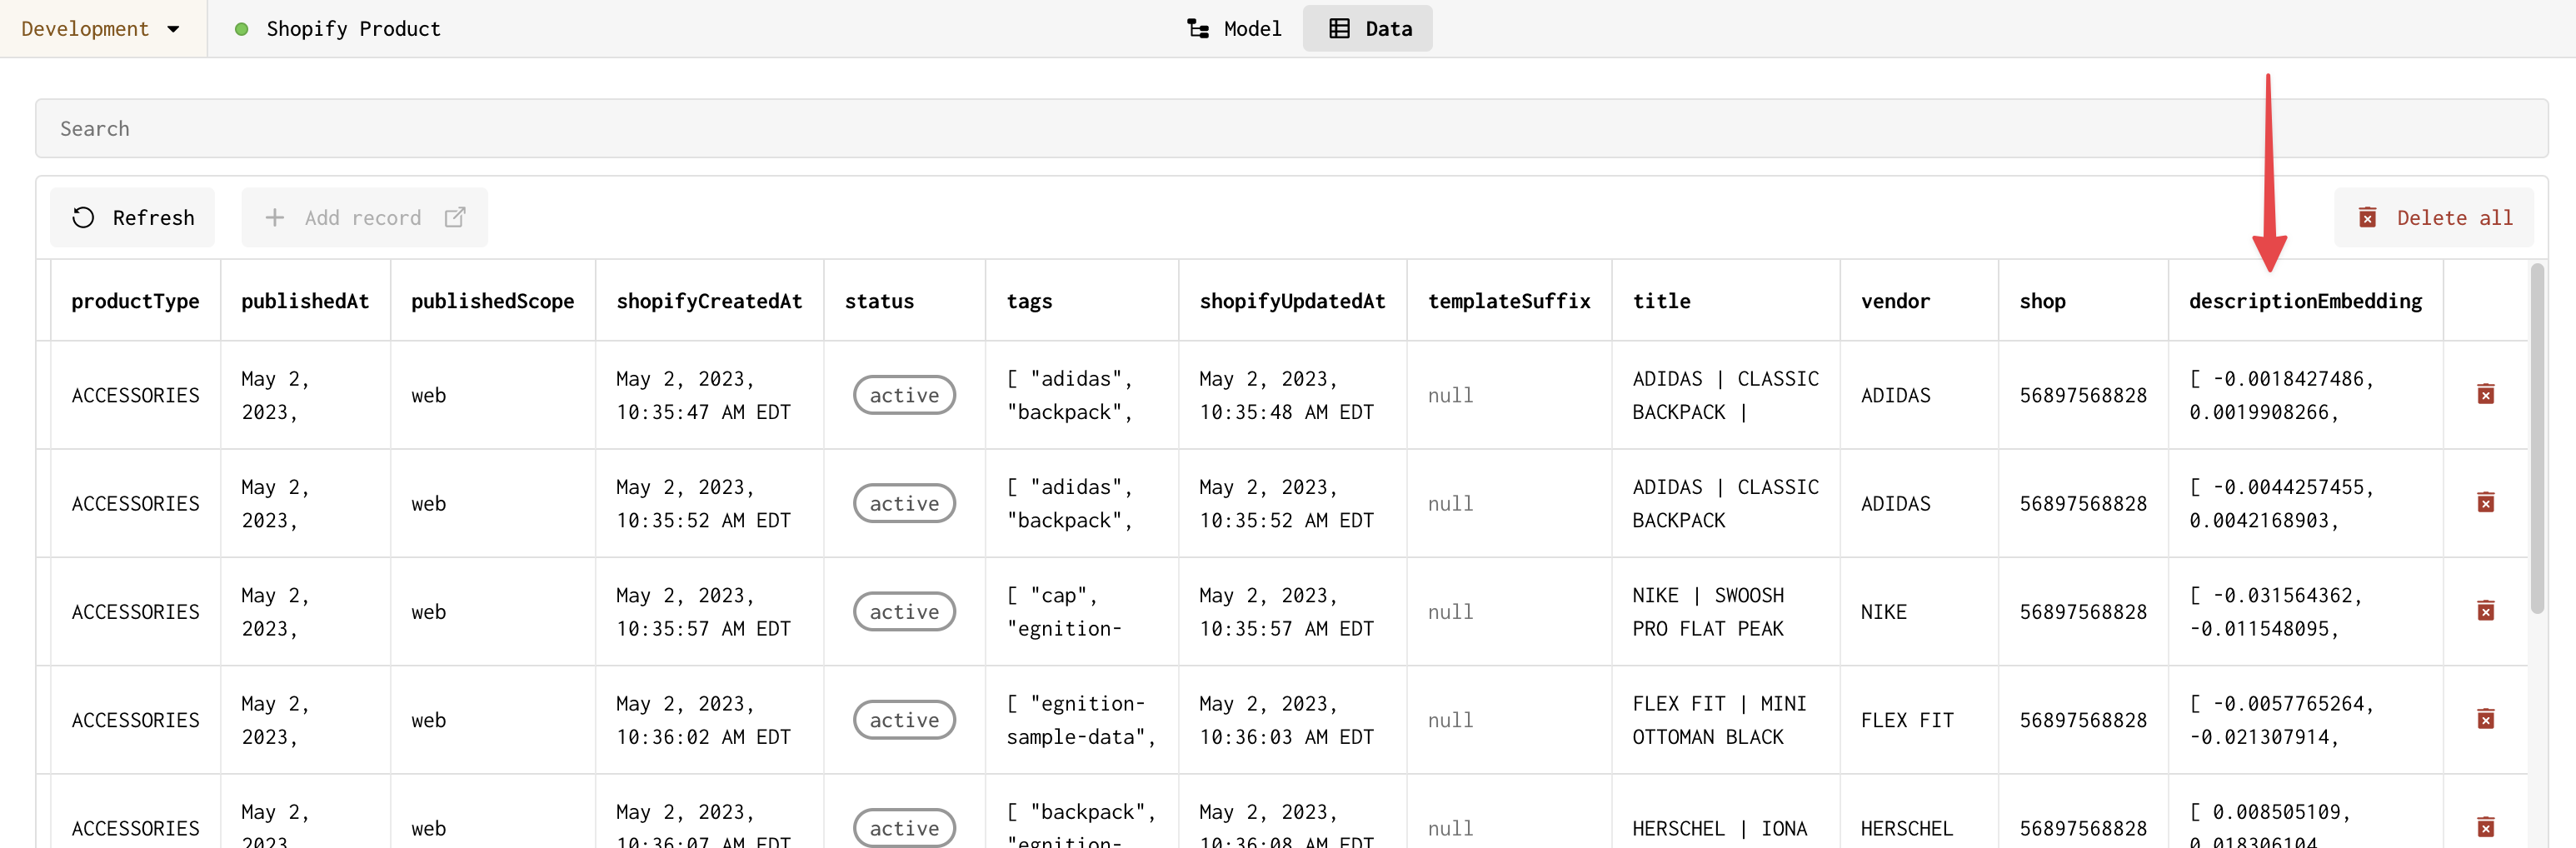
Product and product image data will be synced from Shopify to your Gadget app's database. The code effect you added will run for each product and generate a vector embedding for the product. You can see these vector embeddings by going to the Data page for the shopifyProduct model. The vector embeddings will be stored in the descriptionEmbedding field.
Running into rate limit errors?
If you are running into rate limit errors when generating embeddings while syncing, try using your own OpenAI API key. You can add your own API key to the OpenAI connection by clicking on the Settings tab in the OpenAI connection and selecting the Use my own API key option.
Step 6: Add <inline-code>/chat<inline-code> HTTP route
We will use an HTTP route to handle incoming chat messages from the storefront. The route will take a message from the shopper, use cosine similarity to determine what products to recommend, and stream a response from OpenAI back to the client.
- Hover over the routes folder in the FILES explorer and click on + to create a new file
- Name the file POST-chat.js
Your app now has a new HTTP route that will be triggered when a POST request is made to <inline-code>/chat<inline-code>. You can add code to this file to handle incoming chat messages.
- Paste the following code in <inline-code>routes/POST-chat.js<inline-code>:
This code will:
- create a vector embedding from the shopper's message using the OpenAI connection using <inline-code>connections.openai.embeddings.create()<inline-code>
- use cosine similarity to find the 2 most similar products to the shopper's message using the Gadget API:
use the OpenAI chat API to generate a response
- use the OpenAI chat API to generate a response using the <inline-code>gpt-4-1106-preview<inline-code> model
- stream the response back to the client and save the records to the database using <inline-code>reply.send(openAIResponseStream(chatResponse, { onComplete }))<inline-code>
- <inline-code>onComplete<inline-code> is a callback function that is called after the stream is finished
Set up CORS handling
Before we can call our /chat route from a theme extension, we need to enable CORS handling. To do this we will use the <inline-code>@fastify/cors<inline-code> plugin.
- Open the Gadget command palette using P or Ctrl P
- Enter <inline-code>><inline-code> in the palette to change to command-mode
- Run the following command to install the <inline-code>@fastify/cors<inline-code> plugin:
Once the plugin is installed, you can add it to your app's configuration:
- Add a new file in the routes folder called <inline-code>+scope.js<inline-code>
- Paste the following code into <inline-code>routes/+scope.js<inline-code>:
This will allow requests from ANY domain! For your actual, production app, you probably want to set the <inline-code>origin<inline-code> option to a specific domain - the domain of your store. Read more about CORS in Gadget in our documentation.
Your route is now complete! Now all that is needed is a frontend app that allows shoppers to ask a question and displays the response along with product recommendations.
Step 7: Use Shopify theme app extension to embed chatbot
We make use of an app embed block for our storefront chatbot theme extension. This means that our extension works with any Shopify theme, both vintage and Online Store 2.0 themes.
- Use git to clone the Shopify CLI app
- <inline-code>cd<inline-code> to the cloned directory
- Run <inline-code>yarn install<inline-code> to install dependencies
- Update the direct script tag in <inline-code>extensions/theme-extension/blocks/chatbot.liquid<inline-code> to include your app's script tag URL
The script tag URL can be found in the Installing section of your app's API Reference.Your script tag needs --development added to your app-specific subdomain when working on your Development environment.
- Run <inline-code>yarn dev<inline-code> to start your app and connect to your existing Partners app and development store
You should now be set up and ready to add the chatbot theme app extension to the storefront theme.
- Navigate to your storefront theme editor and click on App embeds in the left sidebar
- Enable your app - the chatbot should appear in your storefront preview
- Click Save in the top right corner of the page
Your chatbot should now be available in your storefront - try it out!

Next steps
You now have a chatbot that can respond to shopper questions with product recommendations! You can continue to build on this app by:
- customizing the embedded React frontend, found in the frontend folder, to give merchants installation instructions
- editing the prompt in <inline-code>routes/POST-chat.js<inline-code> to customize the chatbot's response
- change the look, feel, and merchant customization options for the chatbot by editing the theme extension files
- maintain full chat context by passing <inline-code>messages<inline-code> back and forth between the client and server
- also maintain chat context between browser sessions and/or windows by storing the full chat context in the database
Have questions about the tutorial? Join Gadget's developer Discord to ask Gadget employees and join the Gadget developer community!
Want to learn more about building AI apps in Gadget? Check out our building AI apps documentation.


