Building scalable backends for Swift mobile apps
In the past, only web developers used Gadget's infra and benefited from the smooth developer experience. Swift developers are getting wise to the productivity gains. The Swifties are beginning to join the revolution and do double the work in half the time with the Gadget platform.
In this little walk-through, we'll use Gadget to spin up a database and API in minutes. Then we'll get a Swift app to talk to the Gadget backend using auto-generated code from the Apollo iOS package.
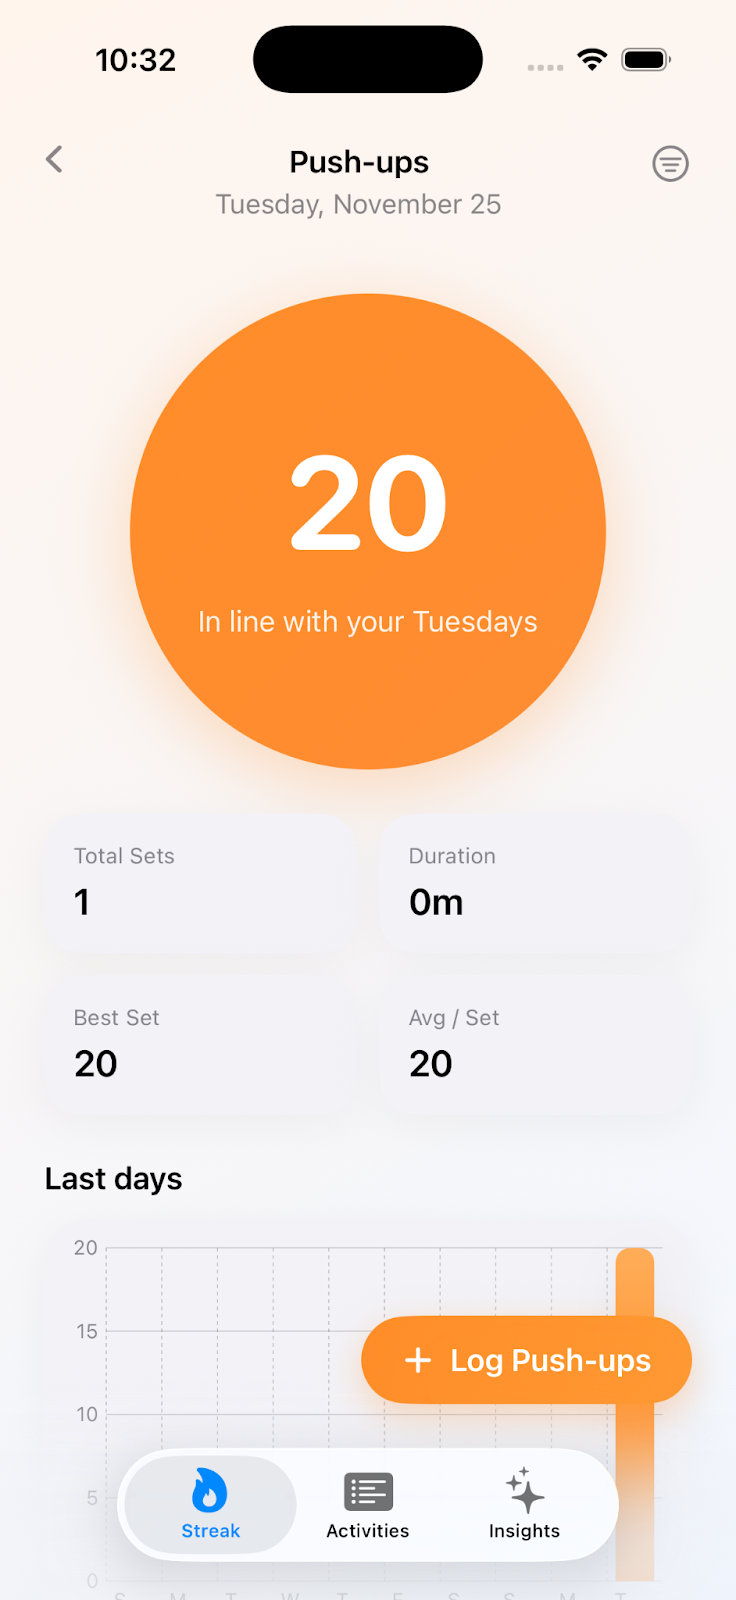
The Swift app we'll be building is a pushup tracking app. Users can log pushups, and see a graph of how many pushups they've done in a week.
Spin up the DB and API
Gadget has a web-based editor like Replit, but you can also use the framework in your local dev environment. Either way, you need to sign up for a Gadget account, then create a new app via the browser.
When prompted, choose Web app and enable auth.

Name your app, then let Gadget do the heavy lifting spinning up the database and API.
The pushup table
Once the Gadget app is set upsetup, we need to add the table that will store the user's pushups. In the left navbar, go to the <inline-code>api/models<inline-code> folder. Notice Gadget already created a user table that securely stores each user's account info.
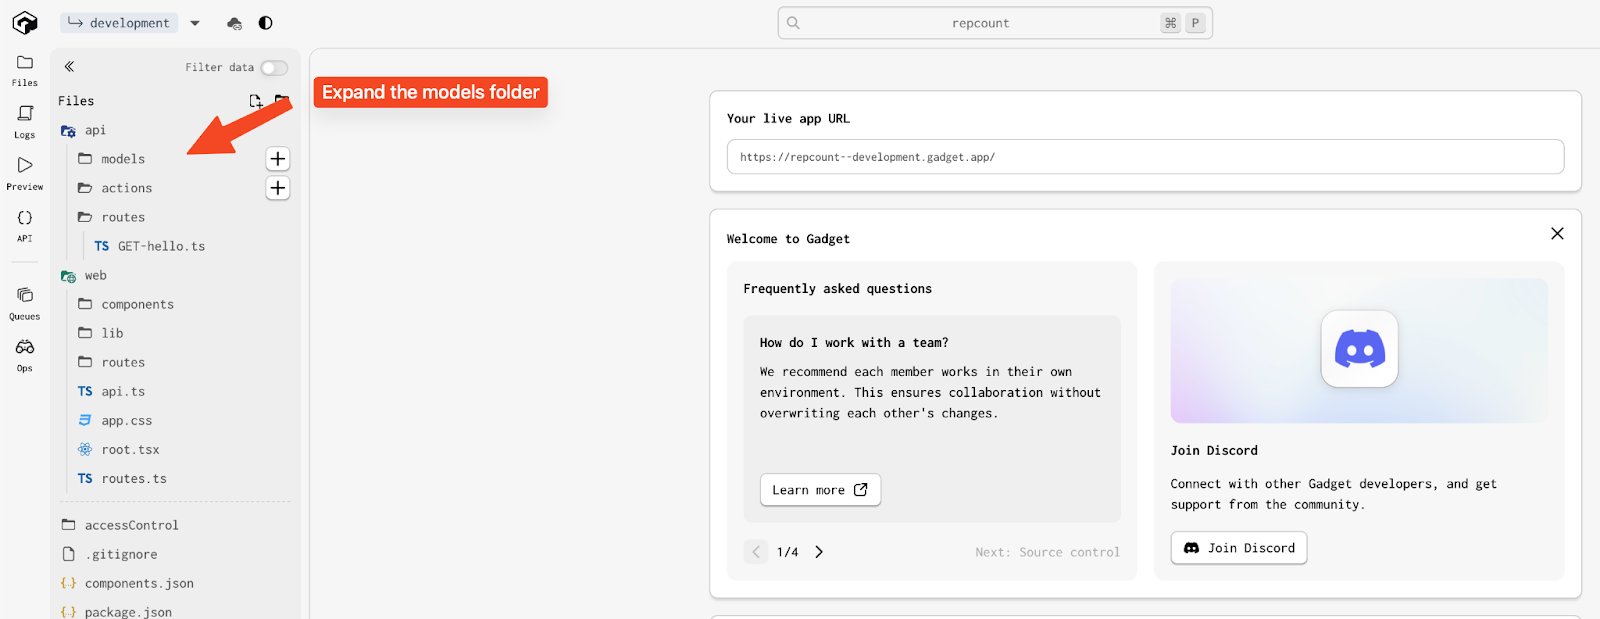
Press the "+" icon beside the models folder to create a new table in your app. Let's name our new table pushup. This will create the schema, database and API endpoints to CRUD the database. That's about an hour of work saved right there. Huzzah!
Now let's add two columns to the database. The first records the number of pushups the user logged. The second is the foreign key to the user table. The foreign key says which pushups belong to which users.
Number of pushups field
Select <inline-code>schema<inline-code>, then press the "+" to add a new column to the database.
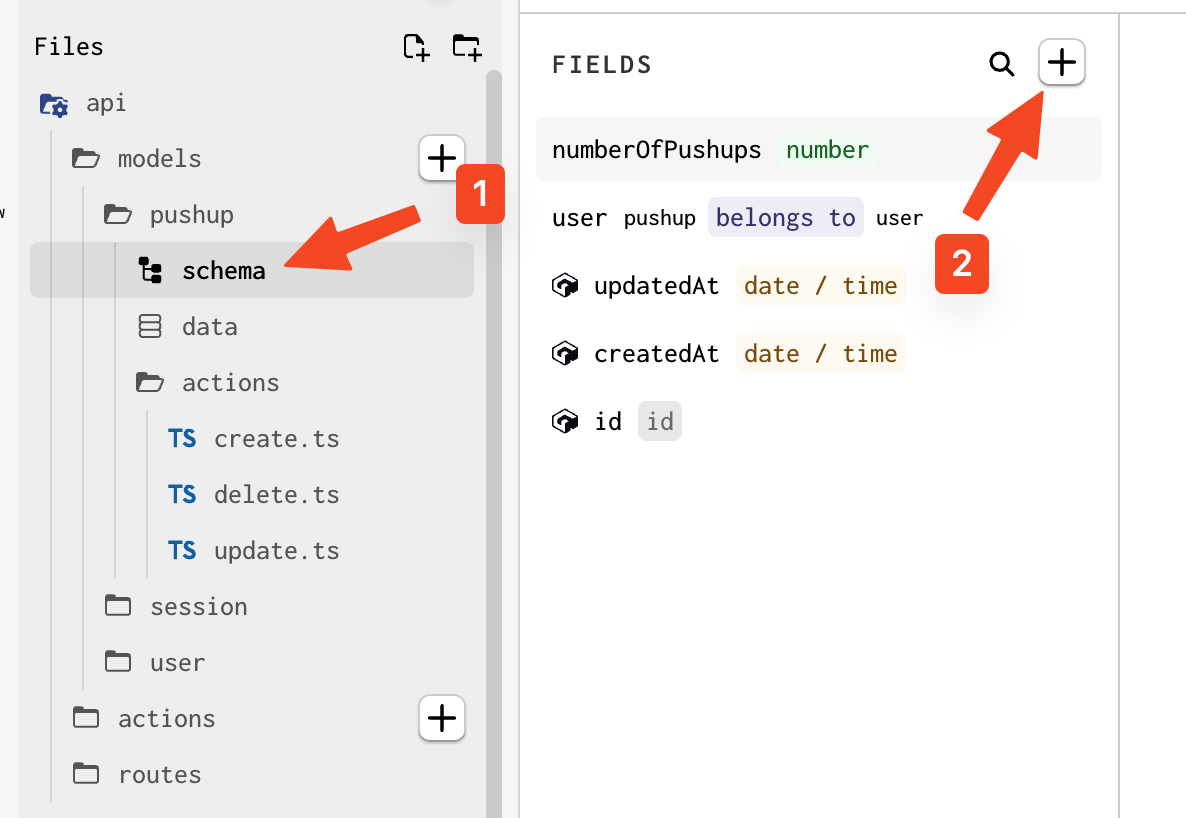
- Name the field <inline-code>numberOfPushups<inline-code>
- Choose Number as the field type
- In the validation section, make the <inline-code>name<inline-code> field required
User foreign key
- Click the + button to add another field
- Choose Belongs to as the field type
- Set the API identifier to <inline-code>user<inline-code>
- In the Related model dropdown, select <inline-code>user<inline-code>
- This creates a many-to-one relationship (many pushups can belong to one user)
Auth
Now let's update permissions so that users can only read the pushup records associated with their account.
Navigate to <inline-code>accessControl/filters/pushup<inline-code>. This is where your Gelly filters should live for the pushup model. Press the + icon to add a new filter.
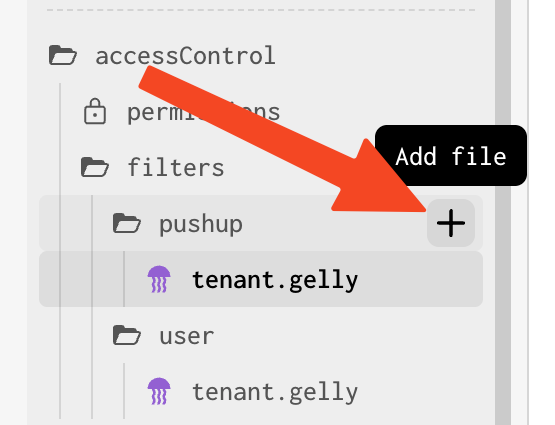
Name the filter something like <inline-code>tenancy.gelly<inline-code>. We want the filter to make sure the user ID associated with the request equals the user ID associated with the pushup. Here’s the gelly code that does that:
Copy & paste that into your new gelly filter.
Now we need to add this filter to the read action. Gadget has a handy GUI for that. You can find it by navigating to <inline-code>accessControl/permissions<inline-code>.
Hover on the pushup/read row, and add a filter:
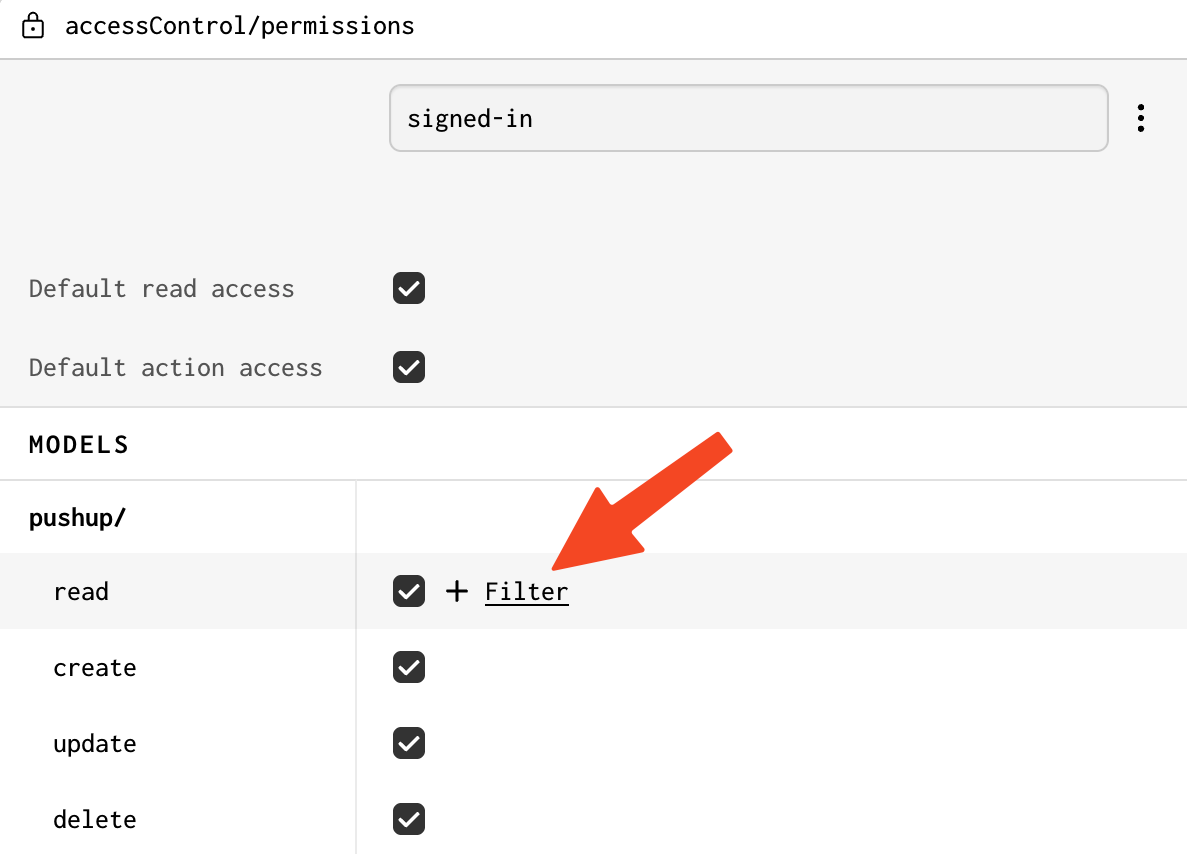
Select the name of the filter you just created.
Now the filter is associated with the read action, users can only view pushup records they created. We have thwarted the throng of nosy hackers once again — what a thrill.
Create the Swift app
Believe it or not, we're done with the backend! Now let's create a simple Swift app that allows users to sign in, then manage their pushups.
The Swift code is available on GitHub. Let's set up and run the app:
Open Xcode, and select Clone Git Repository:
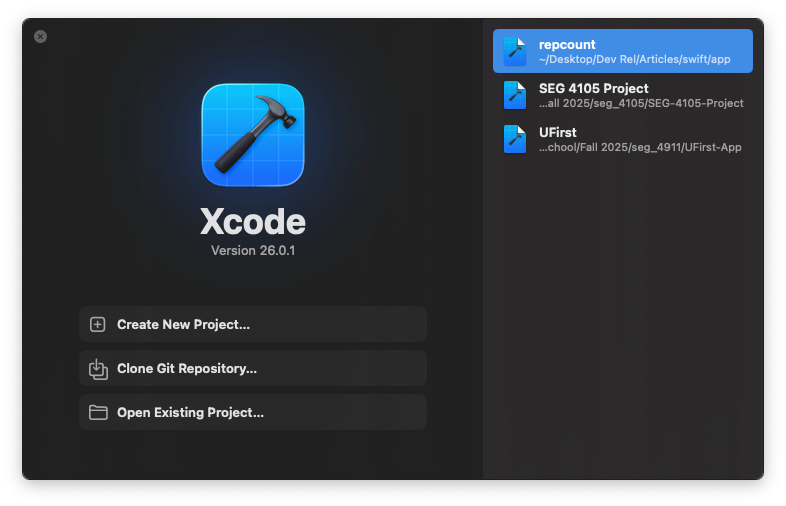
Paste https://github.com/gabeb03/repcount into the search box and press Clone.
In the Menu Bar, select Product > Scheme > Edit Scheme. Select the run section, then add this environment variable:

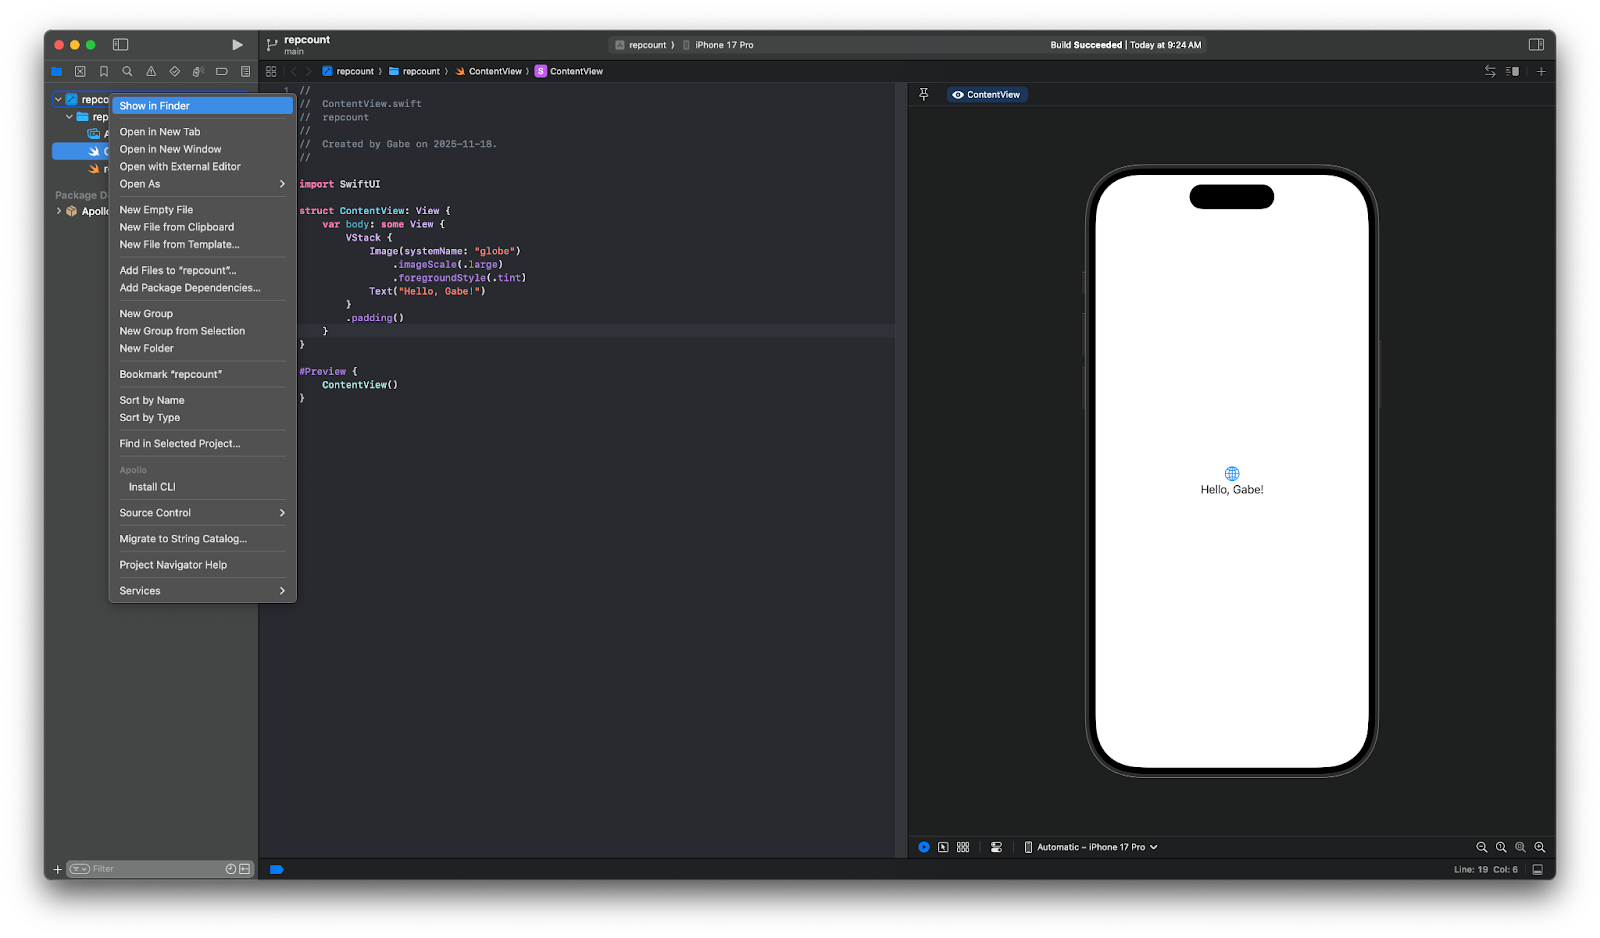
Now you can press the run button, and play around with the app. When you create new pushups, you should see them come up in the Gadget database. Go to <inline-code>api/models/pushup/data<inline-code> to see the data that has been added to the <inline-code>pushup<inline-code> table.
Shazam!! You have a beautiful app that saves pushups to a scalable, secure backend.
Swift codebase deep dive
This section is for the folks who want to know exactly how I got our pushup app to talk to the Gadget API.
Let's dive into the key parts of the codebase. By the end of this section, you should be able to drop Gadget into any native Swift app. Buckle up: we're going to cover a lot here.
The auto-generated GraphQL API
Our goal in life is to write Swift code that will make API requests to Gadget. We want to use the API to create and read pushup entries from the database.
Usually, we'd have to write all the code to do that by hand. Fortunately, Gadget knows how lazy we are, and has written all that code for us.
Gadget automatically spins up a GraphQL API that allows us to read/write to the database.
Now all we have to do is write the Swift code to make calls to the GraphQL API.
There are two ways to make calls to the Gadget API: write all the GraphQL API queries by hand, or generate those queries based on the Gadget's GraphQL schema. The second option is way easier. Let's go with that one.
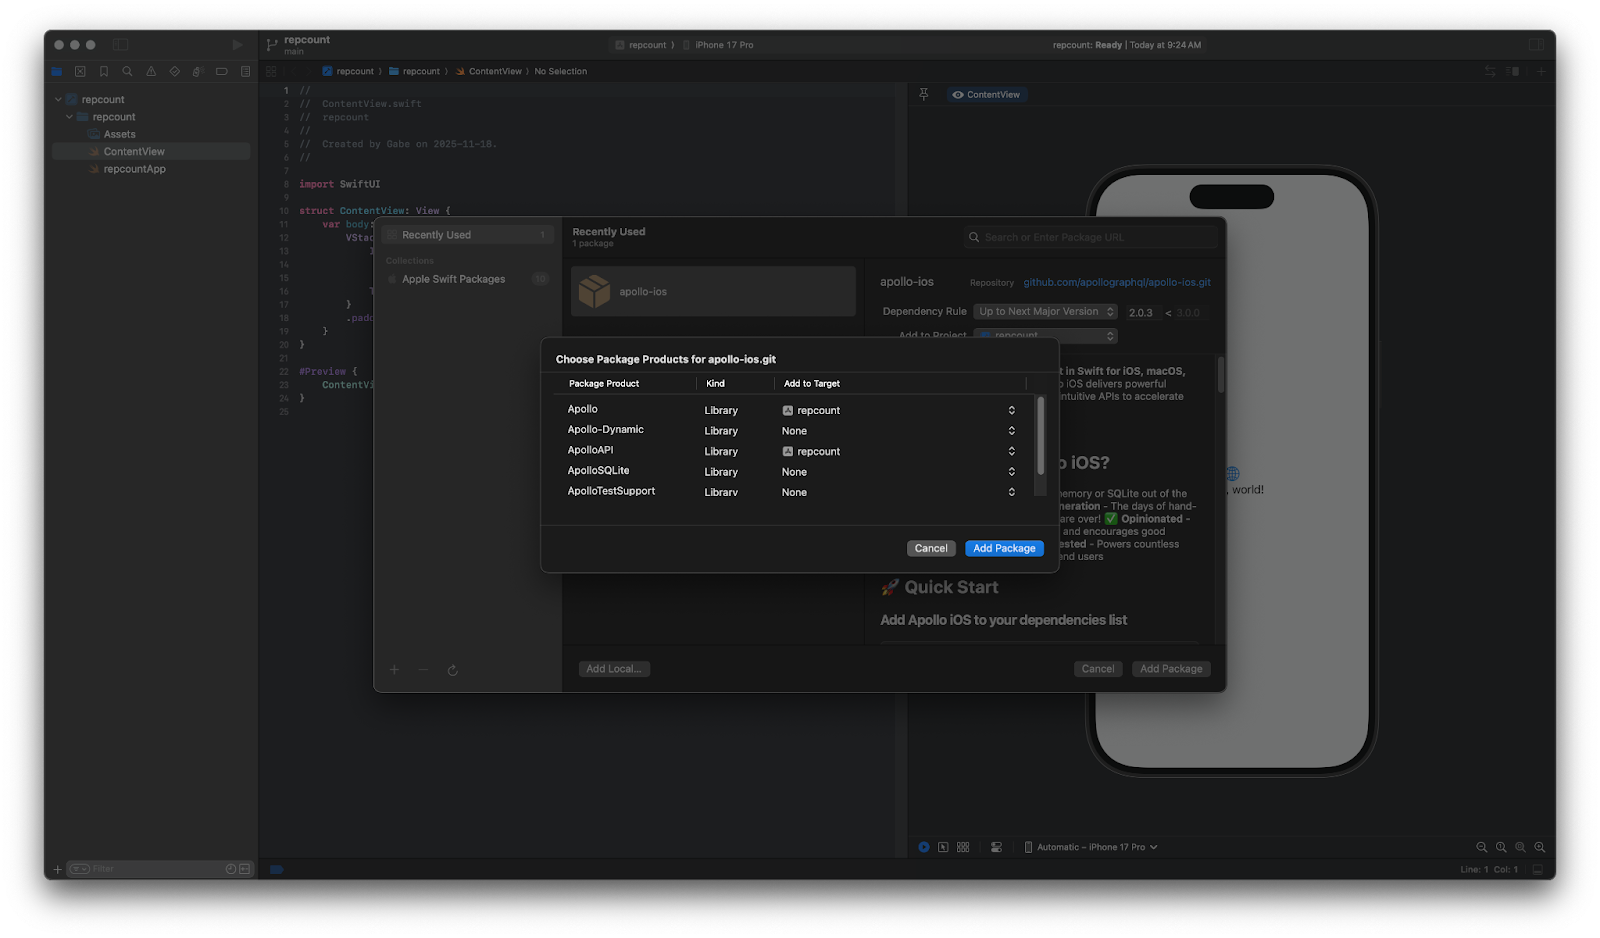
Install Apollo
The Apollo library makes it super easy to generate the Swift code to hit the Gadget API. Go to File > Add Package Dependencies, then paste <inline-code>https://github.com/apollographql/apollo-ios.git<inline-code> into the search box.
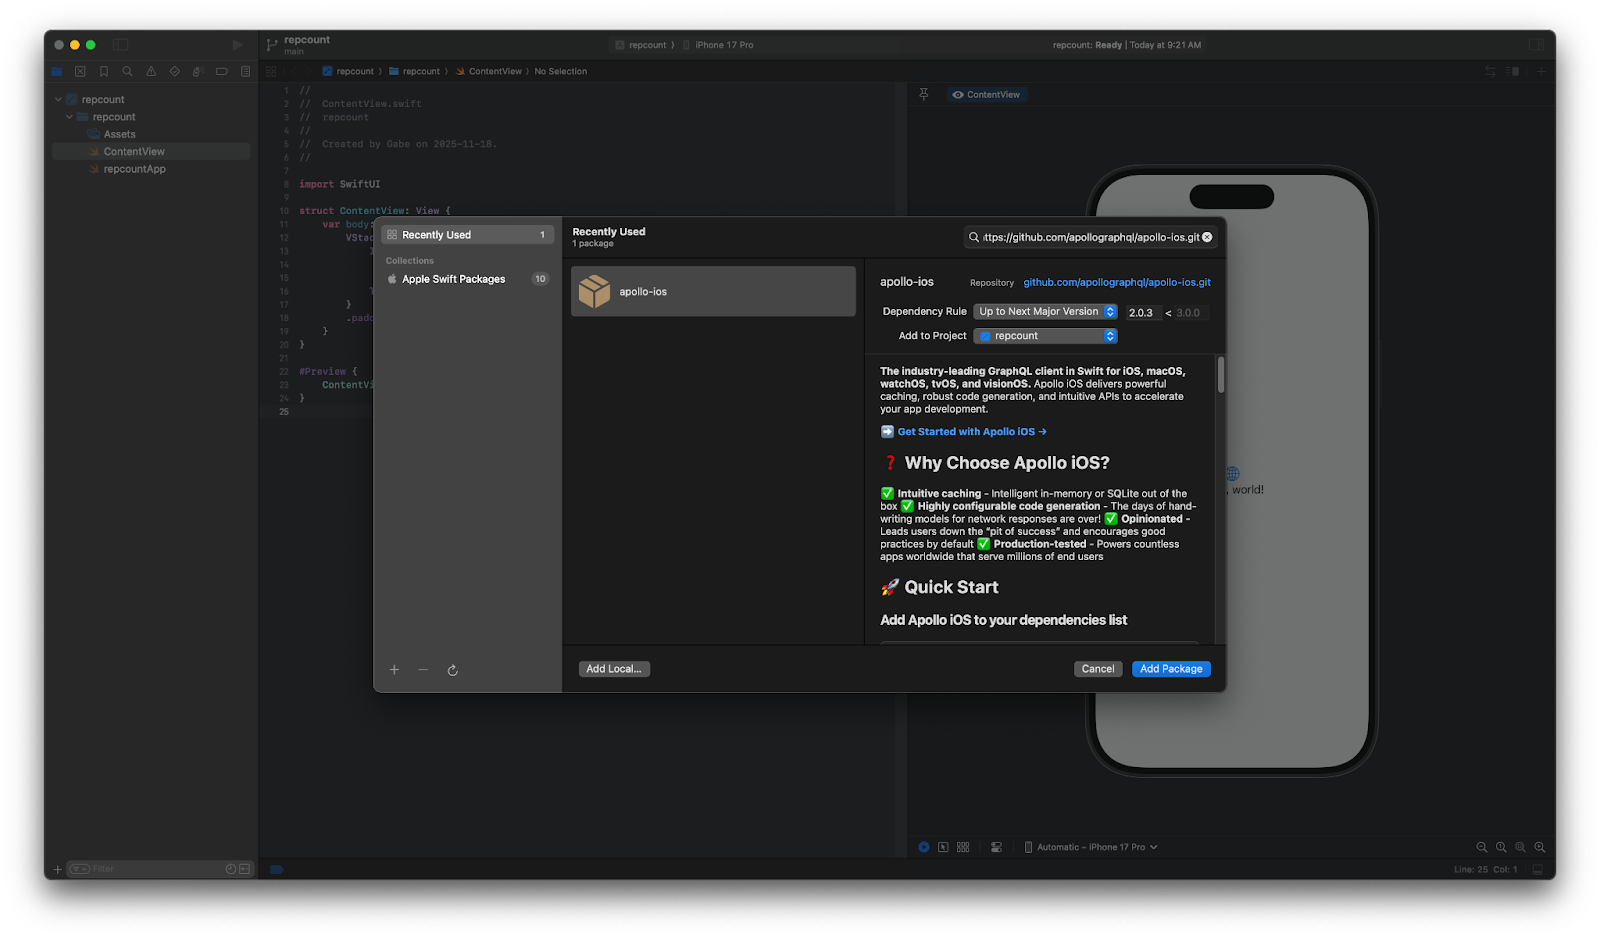
Add the package, then add <inline-code>Apollo<inline-code> and <inline-code>ApolloAPI<inline-code> to the target
Finally, we need to install the Apollo CLI. Right click on the project name, then select "Install CLI"
Get schema
Apollo needs the GraphQL API schema to be able to generate code. We can fetch it using npx:
Copy the schema into your project. I put my schema in <inline-code>./graphql/schema/graphqls<inline-code>
Set up codegen config
Next, we need to tell Apollo how to generate the Swift files. All the settings are specified in a file called <inline-code>apollo-codegen-config.json<inline-code>. There's the JSON file that worked for me. You'll need to tweak it for your project.
Here comes the annoying part: you need to write the GraphQL mutations you want to convert to Swift by hand. Make a folder with all the GraphQL mutations. My mutations are in <inline-code>/graphql<inline-code>. It doesn't matter where you put the queries. Apollo will look everywhere in your project and turn <inline-code><any file name>.graphql<inline-code> into Swift code.
All the GraphQL mutations I wrote for the pushup app are here. Take a peek at Gadget's GraphQL docs if you're unfamiliar with Gadget's auto-generated GraphQL API
Generate Swift code
Now all your GraphQL queries are written out, you can use Apollo to turn those queries into Swift code.
Go to the terminal, and run the following from the root folder of your Swift project:
The Swift files should magically appear in the folder you specified in <inline-code>apollo-codegen-config.json<inline-code>.
Deal with Xcode being dumb
You are probably going to see a bunch of errors in the generated code that contain "cannot satisfy conformance requirement for a 'Sendable'"
You can fix that by double-clicking on the project name:
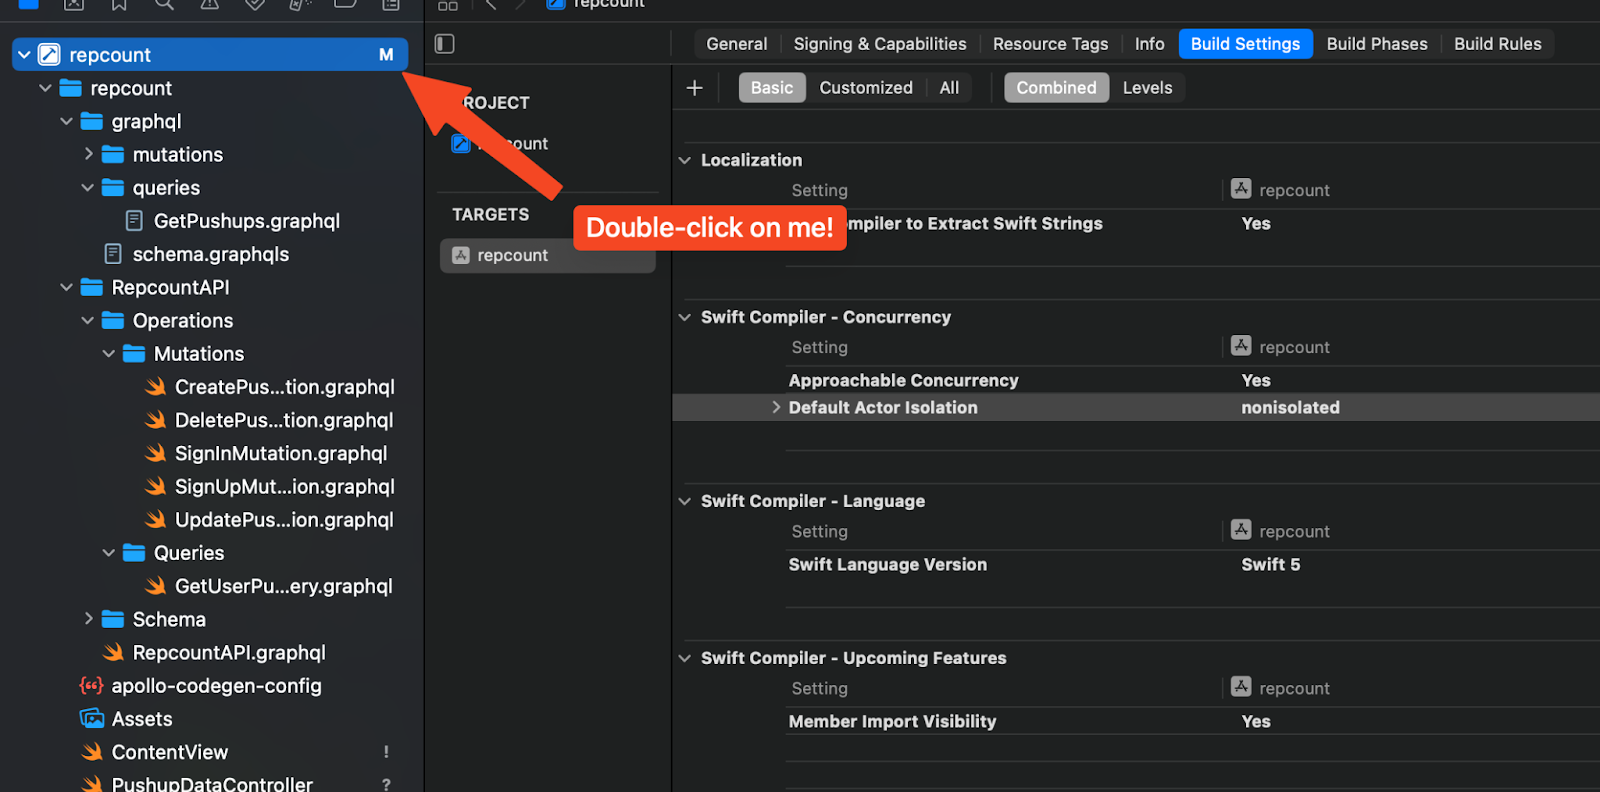
Go to Build Settings, then Swift Compiler - Concurrency. Set Default Actor Isolation to nonisolated. You should be able to build your project, and call the Gadget API from any Swift file!
As far as I can tell, Swift Concurrency is to blame for this quirk. Older Swift code was written assuming that it would all run on the main thread. In this brave, concurrent world, that may not be the case. Old, non-current Swift code was breaking, and developers were angry. Apple patched this problem by treating non-annotated code as if it were intentionally main-thread-bound. You make code main-thread-bound by adding the <inline-code>@MainActor<inline-code> annotation. The “Default Actor Isolation = MainActor” means “treat every unannotated file as if it has the <inline-code>@MainActor<inline-code> annotation”. The data models Apollo generates are meant to be passed between threads, so when they are given the <inline-code>@MainActor<inline-code> annotation, the compiler gets very angry.
Setting “Default Actor Isolation = nonisolated” doesn’t add the MainActor annotation to every file, and the compiler gets happy again.
Session token authentication
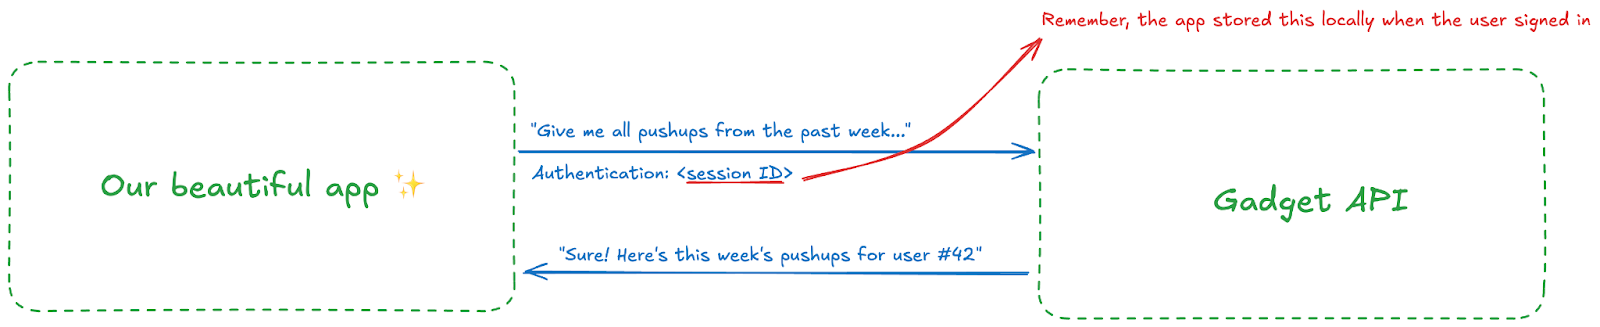
Thanks to Apollo, we can talk to the Gadget API, but all requests we make from the Swift app will be unauthenticated. Unauthenticated users can't even read pushup records, so we need to set up session authentication so the Gadget API knows the user making these API requests has signed in. Here’s a little diagram showing how we’ll set up auth:

When our beautiful app wants to make an authenticated request, it includes the session ID that was stored locally in the Authentication header of the request:
All the code I’m going to show you is stolen from the Gadget auth docs. Check 'em out if you get stuck.
When the user signs in, we need to store the session token in the Keychain. The session token is what authenticates requests, so it needs to be kept in a secure spot. The Keychain is the perfect place.
Here's a quick tour of the services you need to get session token authentication working:
- APINetwork.swift. The APINetwork spins up a GraphQL client that can make authenticated calls.
- ApolloClient+Async.swift. This extends the Apollo client in APINetwork.swift so that it handles responses asynchronously.
- AuthService.swift. This file exposes the sign in, sign out methods. The UI uses these methods to allow the user to authenticate.
- AuthSessionManager.swift. AuthService.swift uses the methods in this file to store the session token in the Keychain.
- AuthInterceptor.swift. I'm too lazy to fetch the session token from the Keychain every time and include it in every request I send to Gadget. I wrote this interceptor to add the session token to the Authentication header for every request.
I wish there was a cleaner way to do authentication, but this verbose solution is what we are stuck with at the moment. Thankfully all the files above are general enough to work in any Swift project, not just my pushup app. Feel free to copy and paste.
Call the API from the Swift app
FINALLY, we can start reading and writing to the database. Here's how I did it in my pushup app:
Party time
That's pretty much it! Once you have the GraphQL and authentication setup, you can start working on making the app beautiful and functional.
I'll leave all that fun stuff to you. Bon voyage!