How to: Build a language translator app powered by OpenAI
TL;DR: Build an AI-powered translator app using Gadget’s built-in OpenAI connection to quickly localize any web copy.
With the public release of OpenAI’s ChatGPT, developers are suddenly able to apply simple solutions to traditionally complex problems. Accurate, quick, and affordable language translation has been a problem for a long time. Whether you’re an ecommerce merchant looking to maximize the number of potential buyers, or you just have to deal with customer support for a global client base, tons of businesses run into the issue. Thankfully, OpenAI has made it easy to build your own language translation chatbot using a single API call. With Gadget, you can develop and deploy a prototype to production in a matter of minutes.
Follow along with these steps to build your very own language translator.
Step 1: Create a new AI app
Start by going to gadget.new to create a new Gadget app.
Gadget is a hosted development platform that allows you to build apps on the same infrastructure you use to host your production services. Every Gadget app comes with a built-in OpenAI connection and $50 of OpenAI credits, so you can immediately start building your AI apps.
For this guide, select the AI app project, enter your domain, and click Get started to create a new Gadget app. Once the development environment is set up, you can test the OpenAI connection right away. If you open your development app by clicking on the URL in the top right corner (hint: it has –development in the domain) you can log in using Gadget-supplied Google OAuth credentials to try out the simple chat widget.
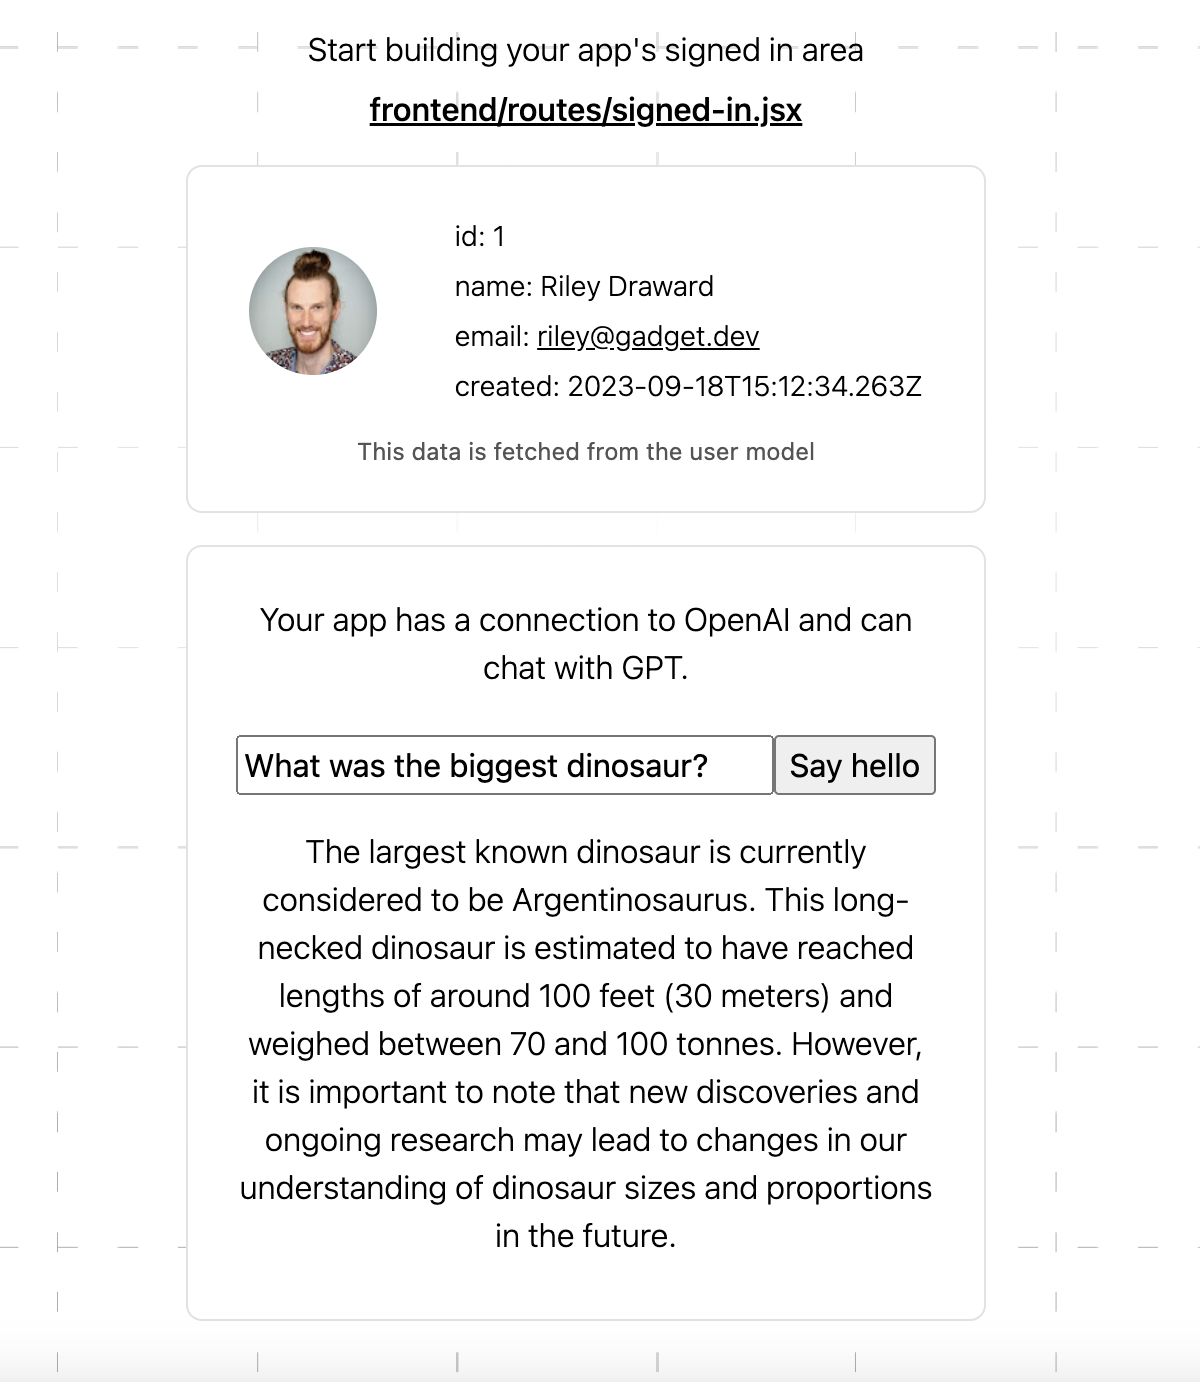
This widget calls a <inline-code>/chat<inline-code> HTTP route which uses the OpenAI connection to make a request to OpenAI’s completion API. A response will be streamed back to you through the route.
You can modify this existing frontend page and HTTP route to act as a simple language translator instead by adding a translation data model.
Step 2: Add a translation data model
Start by adding a custom data model to your app. This isn’t strictly necessary for this build, but it does give a nice history of translations that could be used as a chat history. Models in Gadget are similar to tables in a database. You can add fields, which are similar columns, to define what kind of data is stored by your model.
1. Name your model <inline-code>translation<inline-code>
2. Add an <inline-code>input<inline-code> field to store text entered by users that will be translated
• Make sure it is a <inline-code>string<inline-code> type
• Add a <inline-code>Required<inline-code> validation
3. Add an <inline-code>output<inline-code> field to store the translated text
• Make sure it is a <inline-code>string<inline-code> type
• Add a <inline-code>Required<inline-code> validation
4. Add a <inline-code>language<inline-code> field to store the output language that OpenAI translated the original text into
• Make sure this is also a <inline-code>string<inline-code> type
• Add a <inline-code>Required<inline-code> validation
• If desired, add a default language, for example, French
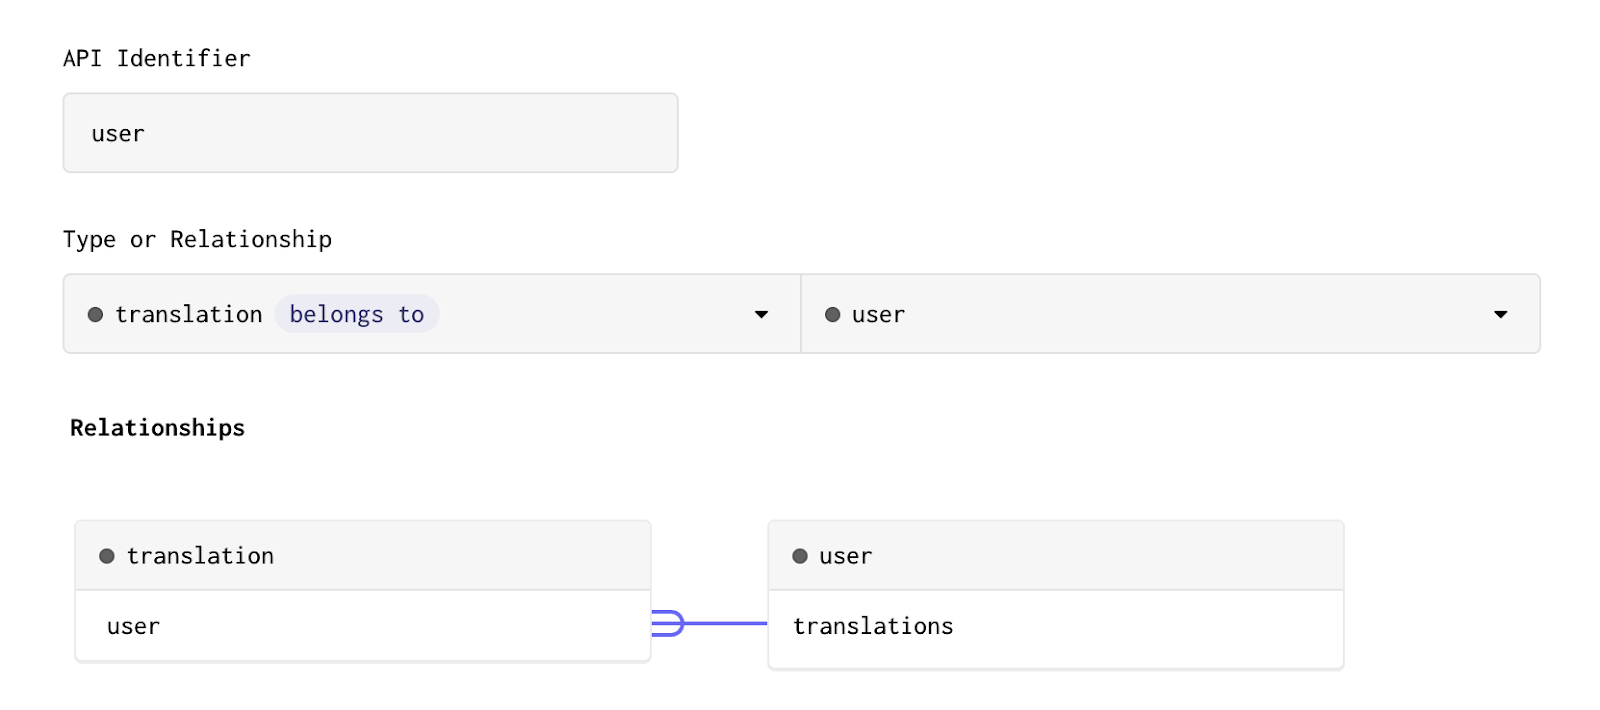
5. Add a <inline-code>user<inline-code> field to relate translations to the signed-in user who made the request
• Make this a belongsTo relationship, so that <inline-code>user<inline-code> hasMany <inline-code>translations<inline-code>
• Name the field added to the <inline-code>user<inline-code> model to capture the inverse of the relationship <inline-code>translations<inline-code>
Now that you have your custom data model, you can modify the existing <inline-code>/chat<inline-code> route to send a translation prompt to OpenAI and stream the response back to the caller. Data models in Gadget also come with an auto-generated API. You will use the translation model’s <inline-code>create<inline-code> action to save translations in the modified HTTP route below.
Step 3: Customize the /chat HTTP route
Your AI app project comes with an OpenAI connection that has already been set up for you using a Gadget-supplied OpenAI API key. You can see where this connection is being called in the <inline-code>routes/POST-chat.js<inline-code> file.
This is a sample HTTP route that shows how you can use the OpenAI connection and stream a response back to your client. With some modifications to the prompt and input params, you can make this <inline-code>/chat<inline-code> route a hub for your custom translations.
Paste the following code into <inline-code>routes/POST-chat.js<inline-code>, replacing the existing template:
This code will send a prompt for translation to OpenAI using the OpenAI connection and the response will be streamed back using Gadget’s openAIResponseStream helper. An <inline-code>onComplete<inline-code> callback function will be called once the stream is finished, and a new translation record will be created in the database. This is making use of the translation model’s auto-generated <inline-code>create<inline-code> action.
The new translation record is linked to the current user by accessing the user’s id through the current <inline-code>session<inline-code>. This is a preferred way of linking records to users, as sending the user ID via a parameter is easy to spoof.
The OpenAI connection uses Gadget’s OpenAI API keys, and new teams get $50 of OpenAI credit to use when starting development. See the OpenAI API reference for more details on the completions API being used.
This should be all that is needed for an HTTP route, the final step is building a React frontend.
Step 4: Build your frontend and call /chat
The final step is building a frontend that allows for language translation. Gadget apps come with a React frontend powered by Vite, as well as a built-in authentication system that can be used out of the box. You can modify the default <inline-code>signed-in<inline-code> frontend route to better support language translations.
Note: The signed-in route is defined in <inline-code>frontend/App.jsx<inline-code>, and is wrapped with one of Gadget’s auth helpers so that only users who have authenticated can access the route.
Paste the following code into <inline-code>frontend/routes/signed-in.jsx<inline-code>:
And then paste the following into <inline-code>frontend/App.css<inline-code>:
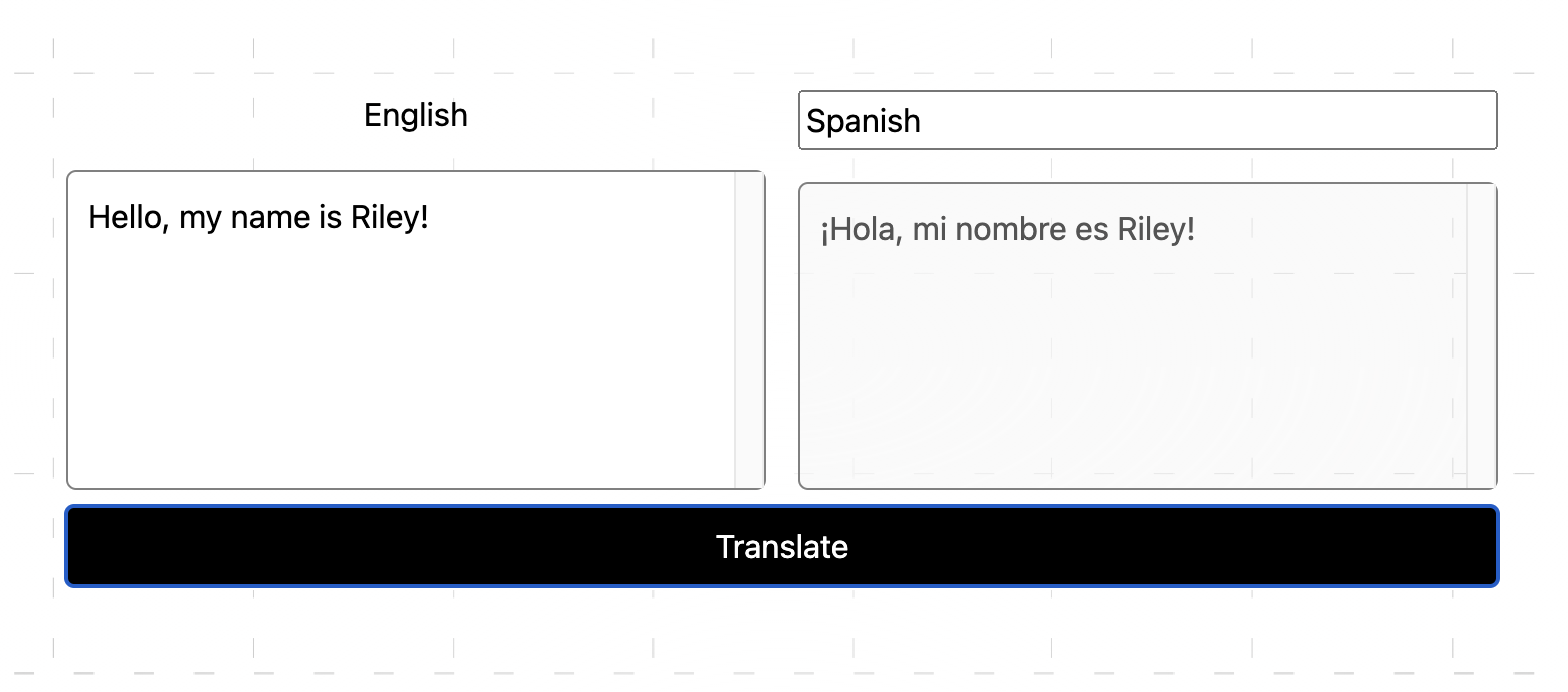
If you go back to your development environment you should see a page that allows you to enter some text, enter a language, and then a Translate button that will fire off a call to the <inline-code>/chat<inline-code> route.
Gadget has React helpers that help you call your backend actions and HTTP routes. In this app, the <inline-code>useFetch<inline-code> hook is used to call the <inline-code>/chat<inline-code> route. You can make a request to an HTTP route in a Reactful way, and handle the returned response using the <inline-code>data<inline-code> param. There are also returned values for <inline-code>fetching<inline-code>, a boolean that will be true when the request is underway, and an <inline-code>error<inline-code>, which will return any error messages. The other returned value from the hook is a function, called <inline-code>translate<inline-code> here, which allows you to actually make the call to the route. The <inline-code>translate<inline-code> function is then called in a callback function fired on form submission.
The body of the request is a JSON string of the inputted language and input text, and a stream: “string” property is also set so the hook can handle the stream returned from the route.
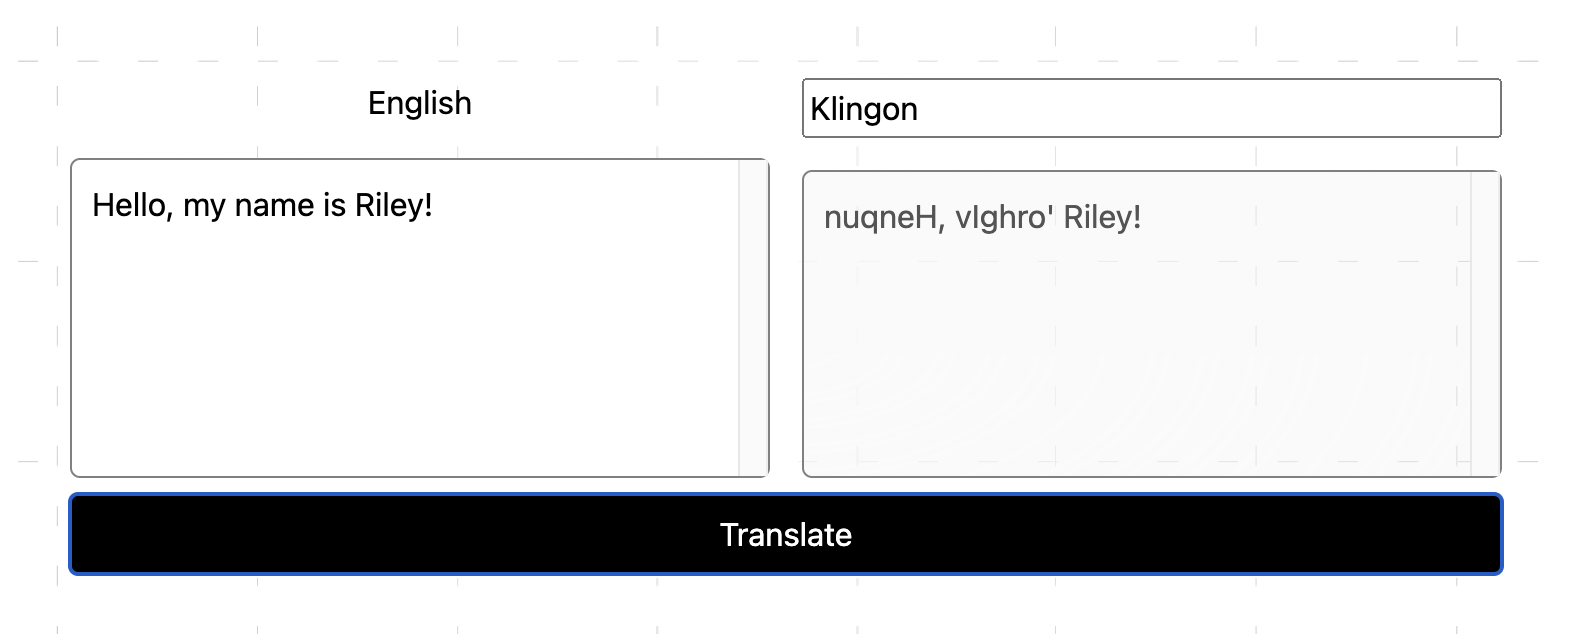
Now you can test out your translator app. Enter some text and a target language, and click <inline-code>Translate<inline-code>. The <inline-code>/chat<inline-code> route should stream a translated response back to the frontend. You can also verify that your translation record was saved. Click on the Translation data model in Gadget and then the Data page, you should see records for your translations.
This is a simple frontend design, but you could integrate the useFetch hook and HTTP route into a variety of other apps, such as a customer support chatbot.
Step 5: Deploying to production
You are finished building your app, congrats! You can deploy to production right away for testing by clicking on the <inline-code>Deploy<inline-code> button in the bottom right of the Gadget editor, and confirming that you want to deploy. Your app will be optimized for production, the bundle will be minified and built, and in no time at all you can test out your production environment at your app domain!
There are a couple of things you need to do before you release your production app to users:
- Add your own OpenAI API key to the OpenAI connection
- Go to Connections -> click the edit icon next to GADGET_KEYS in the OpenAI connection
- Enter your API key
- Set up your own Google OAuth credentials
Neither of these are absolutely necessary, but note that using Gadget managed API keys or OAuth credentials will mean that anyone can sign in to your app and use your OpenAI credits! You can still push to production if you are just testing, but make sure you don’t give many users access to your app until you take these steps!
Questions
Have questions about building with Gadget, or Gadget’s OpenAI connection? Feel free to reach out on our developer Discord or read through our docs.


