How to: use Gadget's OpenAI connection to call the DALL-E 2 API

In this tutorial you will build an app that creates and displays custom Gadgémon (Gadget Monsters). Custom sprites for your Gadgémon will be generated using OpenAI's DALL-E API and Gadget's built-in OpenAI connection.
What you'll learn
After you have finished this tutorial, you will have accomplished the following:
- Built a custom data model
- Constructed an action using the OpenAI connection (and interacted with the CRUD API)
- Managed your app's permissions
- Setup your React frontend
- Deployed your application
Want to skip to the end? Fork the completed app to try it out and browse the code.

Step 1: Create a new Gadget app
Every Gadget app includes a hosted Postgres database, a serverless Node backend, and a Vite + React frontend. You will use all of these to build an app.
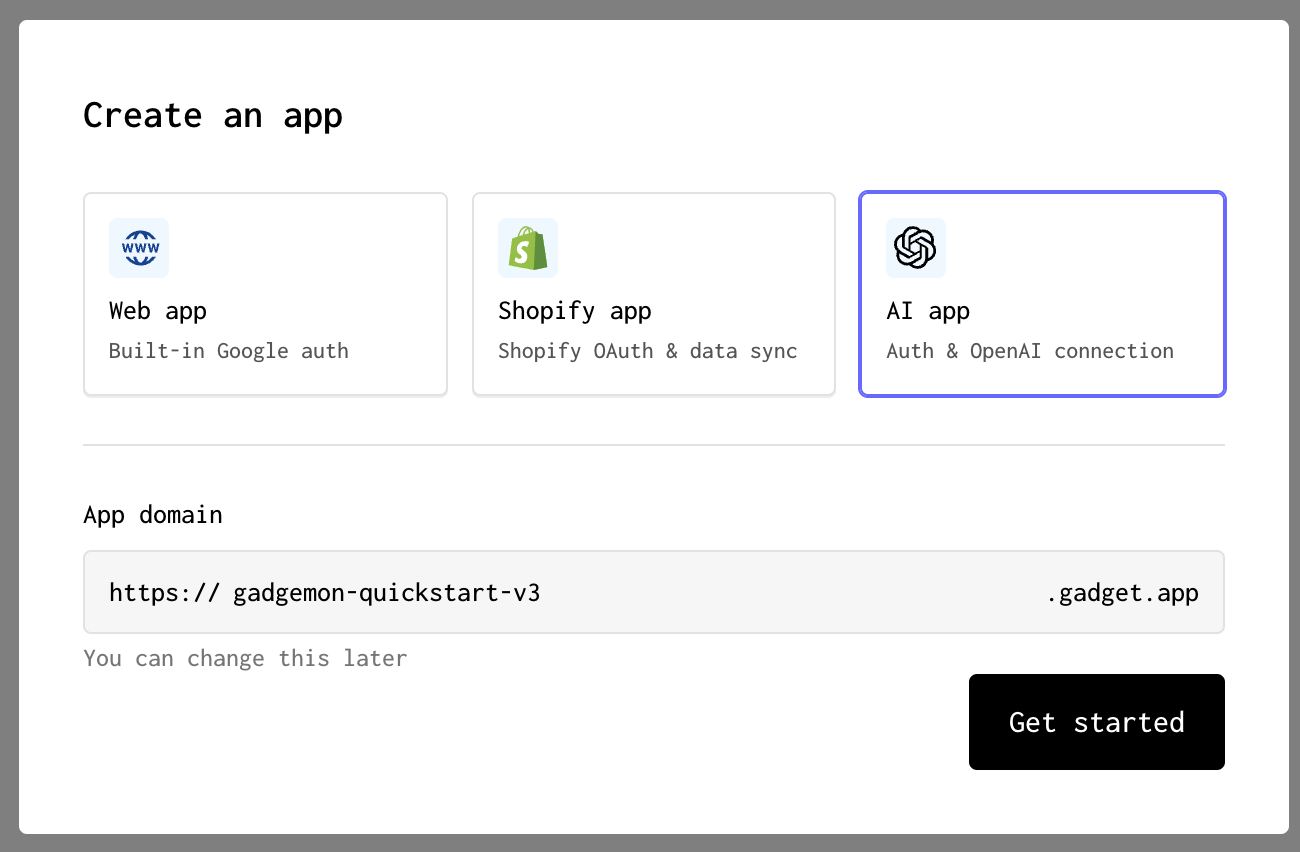
- Start by creating a new Gadget app at https://gadget.new
- Select the AI app template and enter your app's domain name
- Click Get started
Step 2: Build your model
Models in Gadget are similar to tables in a database. They are the building blocks of your app. Models have one or more fields. You can think of fields as columns in a database table. You can create as many models and fields as you need to build your app.
You are going to create a model to store your Gadgémon data, which includes fields to store name, type, what the Gadgémon looks similar to, and an image.
- Click the + button in the Data Models section of the toolbar to create a new model
- Rename your model's API identifier to <inline-code>gadgemon<inline-code>
When you create a new model, you get some default fields for your model's records:
- <inline-code>id<inline-code>: stores the unique ids for records, or rows, in your model
- <inline-code>createdAt<inline-code> and <inline-code>updatedAt<inline-code>: timestamps that store the time when a record was created and last updated
You can also add custom fields to your models:
- Click the + button in the Fields section of the model page to create a new field
- Rename your field's API identifier <inline-code>name<inline-code>
This string field will be used to store your Gadgémon's name. Now you can add additional fields to your model:
- Add another new string field with an API identifier of <inline-code>similar<inline-code>
- Add a new field with an API identifier of <inline-code>type<inline-code>
- Change your <inline-code>type<inline-code> field's Type or Relationship to enum
- Use the + Add Option button to add 3 options to your enum: <inline-code>grass<inline-code>, <inline-code>fire<inline-code>, and <inline-code>water<inline-code>
- Add a new field with an API identifier of <inline-code>sprite<inline-code>
- Change your <inline-code>sprite<inline-code> field's Type or Relationship to file
These fields will be used to store "type" info as well as a sprite image file that will be generated for your Gadgémon.
Your model should now look like this:

That's it for building your Gadgémon model! Changes to your Gadget apps are automatically saved as you build, so you can move on to the next step.
Step 3: Add custom code to an action
Now that you have added fields to your Gadgémon model, you need to be able to create new records. Records in Gadget are just rows in a database table.
As you build models in Gadget, a CRUD (create, read, update, delete) API is automatically generated. You can see these actions and the code that powers them in the Actions section of the model page.
You will want to run some custom code when you create a new Gadgémon that makes a request to OpenAI's images API to generate a sprite.
OpenAI credentials
The Gadget AI app template comes with an OpenAI connection set up with Gadget-managed credentials. This means you can test out the OpenAI API in your app without having to create an account or manage your own API keys. For more information, see the OpenAI connection docs.
- Click on the create action in the Actions section of the gadgemon model page
A JavaScript file, <inline-code>gadgemon/create.js<inline-code> is already created for you. Now you just need to add some custom code.
- Paste the following code into <inline-code>gadgemon/create.js<inline-code> (replace the entire file):
This code block has two built-in functions:
- the <inline-code>run<inline-code> function is the first thing that executes when the create action is called. It takes the params from the action call and applies them to the record that is being created, then saves that record to the database.
- the <inline-code>onSuccess<inline-code> function is called after the run function and is good to use for long-running or secondary effects, like image generation using OpenAI.
The custom code added to onSuccess does three things:
- it uses the OpenAI connection to make a request and returns a new image for your Gadgémon
- it writes a log message to the Gadget Logs
- it saves the image file to the newly created Gadgémon record
The <inline-code>api<inline-code> from the function's parameters is used to update this record with a generated sprite image. The api object gives you full access to your Gadget app's API.
<inline-code>copyURL<inline-code> is a special command used to store files in your Gadget database from a URL. See the storing files documentation to learn more about storing files in Gadget.
Test your action with the API Playground
Gadget comes with a built-in API Playground where you can test out your backend API. You can use the API Playground to test out your Gadgémon models' create action.
- On the Gadgémon model's page, click the create action, then the Run Action button - the API Playground will open with the create mutation pre-loaded
- Enter some values for your Gadgémon's <inline-code>name<inline-code>, <inline-code>similar<inline-code>, and <inline-code>type<inline-code> fields in the Variables section of the Playground
- Click the run button to run the create action
This will create a new record in your model, and send off a request to generate a new sprite image. You should see a success message in the playground, and can hover over the sprite url field to preview your Gadgémon! You can also view your record on the model's Data page.
- Click on the <inline-code>gadgemon<inline-code> model in the sidebar
- Click on the Data tab

You can see that your record was stored in the database and that an image was generated. You can view the generated image by copying the url value from the sprite field and pasting it into your browser.
To view the log message you wrote in your action, you can view the Gadget Logs:
- Click on Logs in the sidebar
- Turn the My events toggle on by clicking the switch - you may also need to adjust the time range to see your log message
You should see the log message that was written when you ran your action.

Now that you know that you can create new Gadgémon records, you can move on to building a frontend so you can create and view your Gadgémon with a UI.
Step 4: Access control
Before you write frontend code, you need to make sure users can make requests to your API from the frontend.
By default, unauthenticated users are not granted access to your app's API. For this app, you won't worry about authentication, but you will need to grant access to the Gadgemon model's read and create actions for <inline-code>unauthenticated<inline-code> users so you can create and view your Gadgemon in the frontend.
- Click on Settings in the sidebar
- Click on Roles and Permissions
- Check the gadgemon model's read and create actions for the <inline-code>unauthenticated<inline-code> role
Now requests made to your backend will succeed. Move on to the next step: building your React frontend.
Step 5: Setup your frontend
In Gadget, your Vite + React frontend is found inside the frontend folder. New Gadget apps have a starter template that you will edit to build your app frontend:
- a Vite project is initialized, including the <inline-code>vite.config.js<inline-code> and <inline-code>index.html<inline-code> files in the root folder of your app
- a default React project is set up in the frontend folder, including <inline-code>main.jsx<inline-code>, <inline-code>App.jsx<inline-code>, and <inline-code>App.css<inline-code>, and two routes in the <inline-code>frontend/routes<inline-code> folder
- an API client is already set up in <inline-code>frontend/api.js<inline-code>, and is imported into <inline-code>App.jsx<inline-code>
First, install a component library to style your frontend.
Install Material UI (MUI)
You may have noticed the <inline-code>package.json<inline-code> in the file explorer. Gadget runs on Node.js, so you can use <inline-code>yarn<inline-code> to install Node.js packages to your app. You will use Material UI (MUI) to style your frontend.
- Open the Gadget command palette with P or Ctrl P
- Type > to enable terminal mode
- Run the following command:
Run in the Gadget command palette
This will install MUI and its dependencies to your app. Currently, only yarn is supported for package management in your Gadget apps. Once the install is complete, you will be able to see these packages in your <inline-code>package.json<inline-code> file.
Your React frontend will have two main sections: a form used to create new Gadgémon and a list of the Gadgémon that have already been created. Start by adding a section for displaying your already-created Gadgémon.
Display your Gadgémon
To display the Gadgémon that was already created, you need to fetch the data from your backend API. You can use the <inline-code>useFindMany<inline-code> hook, provided by the <inline-code>@gadgetinc/react<inline-code> package to fetch all of the Gadgémon records from your backend API. This hook takes in the API client, which you can import from the <inline-code>api.js<inline-code> file in the frontend folder.
- Edit the <inline-code>frontend/App.jsx<inline-code> file to add the following code:
The key line to pay attention to is:
The <inline-code>useFindMany<inline-code> hook will read data from your <inline-code>gadgemon<inline-code> model, and return an object that includes:
- the returned data, aliased as <inline-code>myGadgemon<inline-code>
- fetching, a boolean that is true while the request is running and aliased as <inline-code>fetchingGadgemon<inline-code>
- error, which will contain any errors that occur while fetching the data
You can use the objects returned from the hook to display the returned data, a loading message, or an error message to users. In the return block of the provided code snippet, you can see how you are using <inline-code>myGadgemon<inline-code> to display your monsters and <inline-code>fetchingGadgemon<inline-code> to handle a loading spinner.
- Replace the contents of <inline-code>frontend/App.css<inline-code> with the following:
Now you can see your Gadgémon in the frontend. Just open up your development environment URL in your browser:
- Click on your app domain name at the top of the left sidebar
- Hover over Go to app
- Click on Development to open your app in a new tab
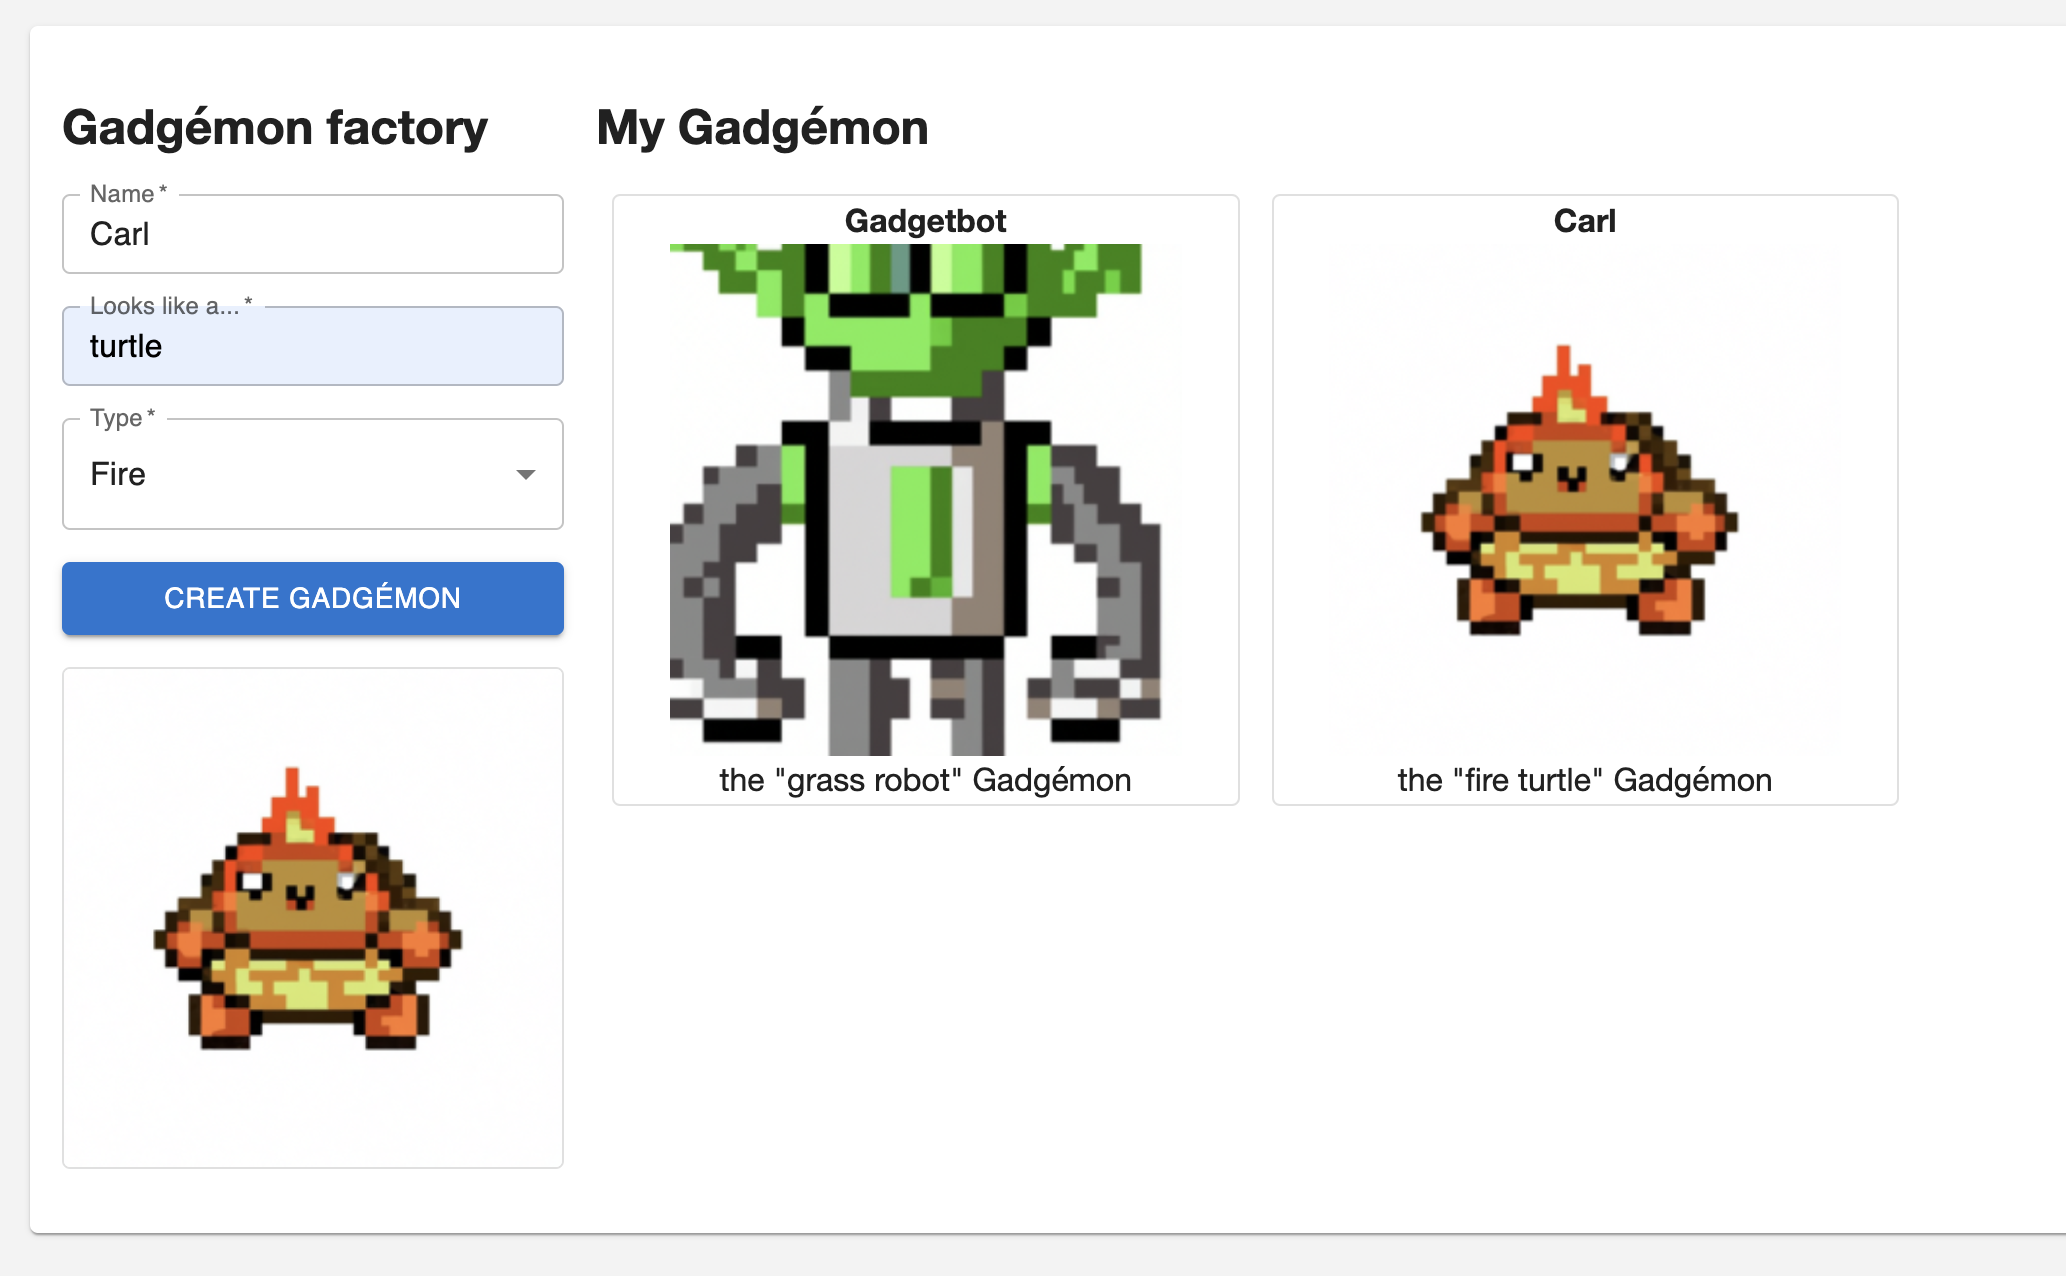
And you should see your Gadgémon displayed on the page!

Create new Gadgémon
Now add a form to create a new Gadgémon. You can use the <inline-code>useAction<inline-code> hook, provided by the <inline-code>@gadgetinc/react<inline-code> package to create a new Gadgémon record in your backend API. This hook accepts your Gadget API's <inline-code>gadgemon.create<inline-code> action as an argument.
Here is the complete code for <inline-code>frontend/App.jsx<inline-code> file. Step-by-step instructions will follow:
You are now done building your full-stack app. You can test it out in your development environment.
Test your app
Head back to your development URL and you should see your form! Gadget frontends include hot module reloading so the frontend will update as you write code. Try creating a new Gadgémon.
Step 6: Deploy your app
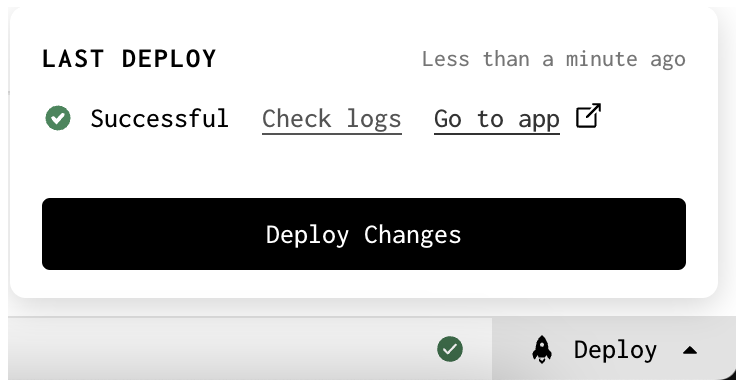
Deploying to production is a two-click process:
- Click the Deploy button in the bottom right of the Gadget UI
- Then click the Deploy Changes button
Your app will be built and optimized for production, and available at your production URL. To view your app in production:
- Click on your app domain in the top left of the Gadget UI
- Hover over Go to app
- Click Production
Your production app will open, and you can create your first Gadgémon in production!
Congrats! You have built your first fullstack Gadget application and have learned how to:
- build data models
- add custom code to model actions
- change API permissions
- call your app's API (actions) from the frontend
Next steps
Want to expand your app? Here are some ideas:
- allow users to delete Gadgémon
- use OpenAI to generate a description for your Gadgémon
- send two Gadgemon into battle (using OpenAI) and see who wins


