How to: listen to a 3rd party webhook in Gadget

Gadget comes with a Shopify connection that includes a robust subscription to Shopify webhooks and helps developers manage the incoming webhook data. But what if you want to listen to a webhook from a different service? This guide will show you how to listen to webhooks coming from GitHub in your Gadget application.
Requirements
Before you begin this guide, make sure you have the following:
→ A GitHub account, or an account with a service that allows you to subscribe to webhooks
→ Some familiarity with Gadget. If you are new to Gadget, start with the automated product tagger tutorial
Prefer to watch a video? You can watch how to build this step-by-step by in the video below.
You can fork this Gadget project and try it out yourself. After forking, you will still need to subscribe to a webhook from GitHub

Create a Gadget App
Your first step will be to create a new Gadget application at gadget.new. Select any of the available app templates.
Create a new HTTP route
To subscribe to webhooks in Gadget, you need to create a new HTTP route. This route will be the URL that you give to the service that will send you webhooks. To create a new route that can be used for a webhook subscription:
- Add a new file to the routes folder in your Gadget application's FILES explorer
- Name the file <inline-code>POST-my-route.js<inline-code>

This creates a new POST route that will be accessible at <inline-code>https://<app-name>--development.gadget.app/my-route<inline-code> in your app's Development environment or <inline-code>https://<app-name>.gadget.app/my-route<inline-code> for the Production environment. You can change the name of the route by changing the file name. This route can be used as a target URL for a service that sends webhooks.
To test for incoming webhooks, you can use the following code snippet to make sure that the subscription is working. This code will log the incoming webhook payload to your app's logs and reply with a 204 response.
Gadget routes are built on top of Fastify, which is used to power the request and reply params. These params allow you to access the incoming webhook data and reply with a 204 response if required. For more information on the anatomy of an HTTP route in Gadget, see our documentation.
The api parameter allows you to interact with your Gadget app's API, and the logger will write to your app's logs. This means that you can process the webhook payload and write data to your app's database within the route file.
Subscribe to a webhook from GitHub
Now you can hook up this new route to a webhook subscription. For this example, we'll use GitHub's star events webhook. To subscribe to this webhook:
- Log into your GitHub account and navigate to one of your repositories or create a new, empty repo
- Click on the Settings tab
- Click on Webhooks in the left sidebar
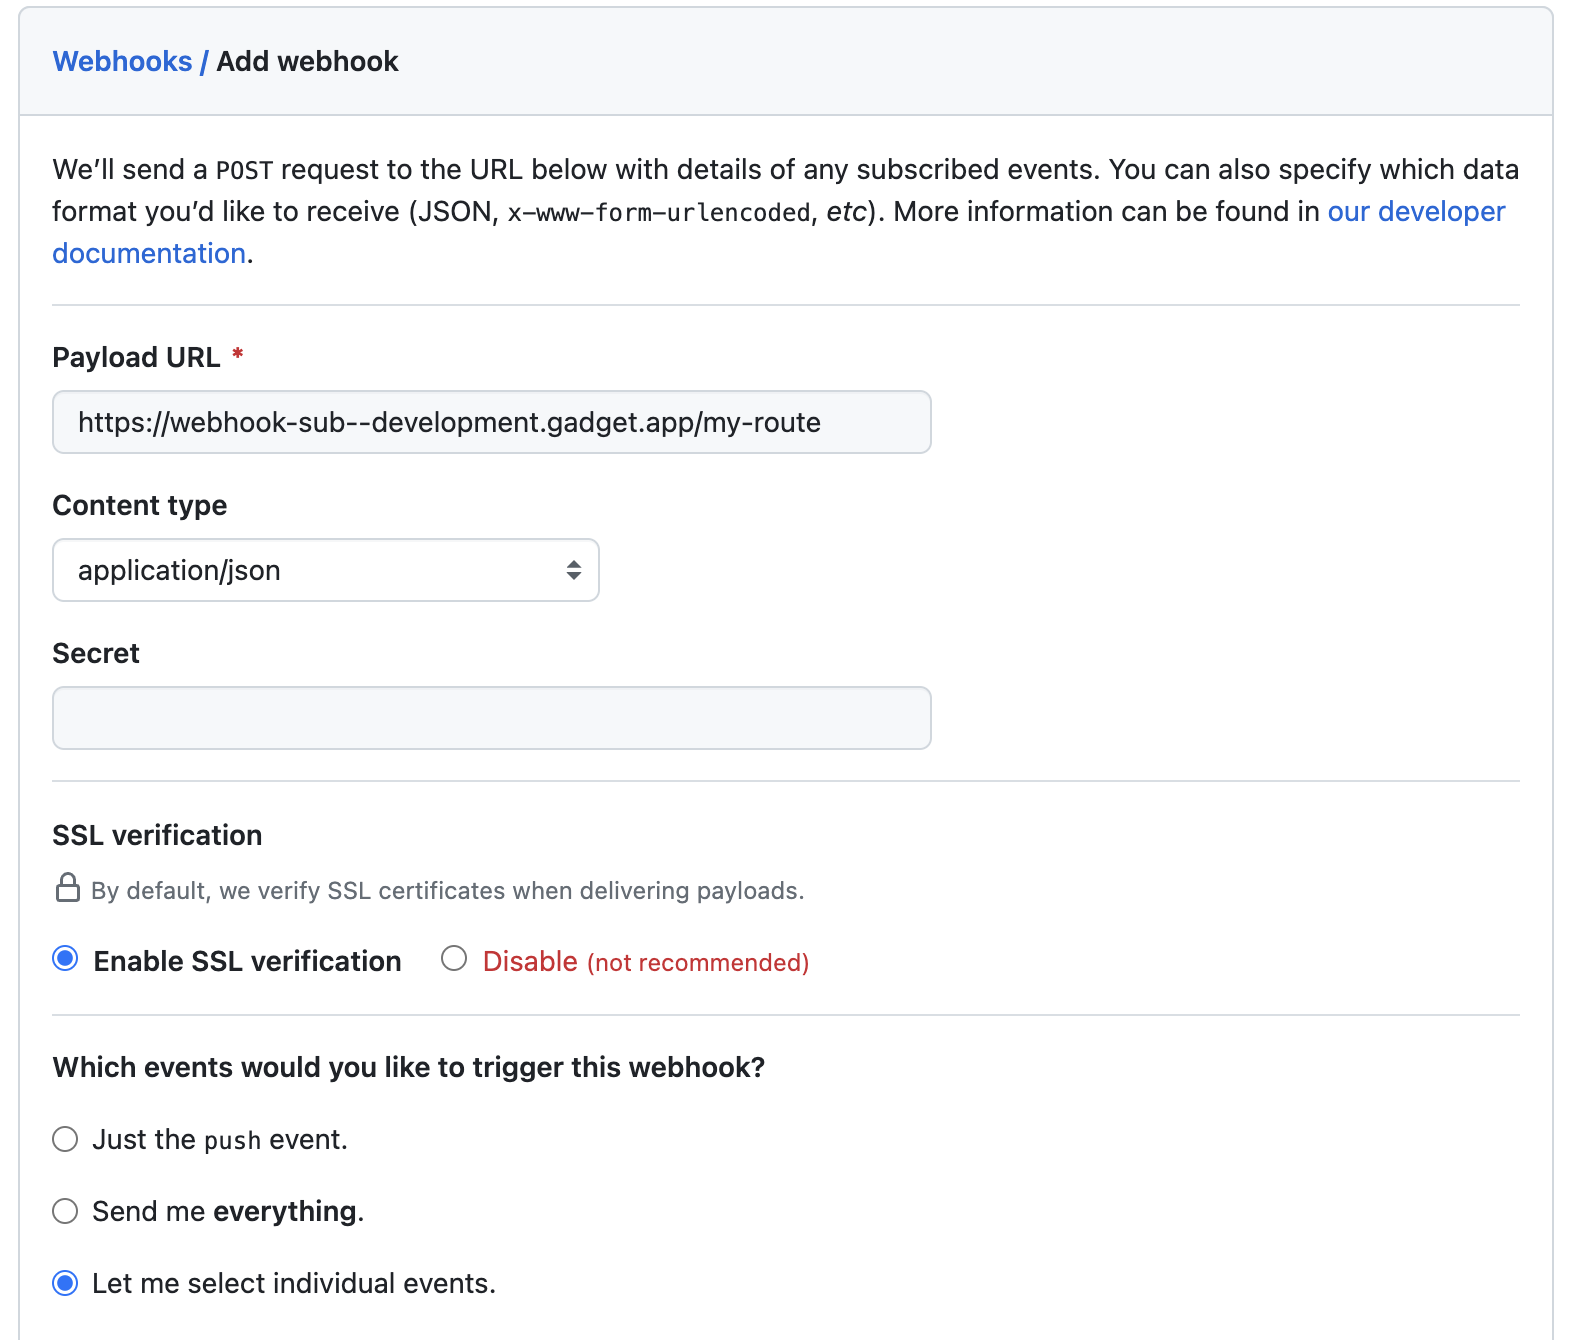
- Click on Add webhook
- In the Payload URL field, enter the URL for your new Gadget route
- In the Content type field, select application/json
- In the Which events would you like to trigger this webhook? section, select Let me select individual events. and then select Stars from the list of events. Uncheck the default Pushes event.
- Click Add webhook to save your webhook subscription
That's all that is required, GitHub will send a webhook to your Gadget route! You can test this by starring and unstarring your repository and then checking your app's logs. Next up, you'll parse the webhook payload and save some data to your app's database.
Save webhook data to Gadget
You can parse the webhook payload and write data to your app's database within the route file. The provided api parameter could be used to save records in your Gadget app's database. First, you need a model that can store some info about the GitHub stars. To create a new model:
- Add a new data model in Gadget with the API Identifier githubStars
- Add a <inline-code>string<inline-code> field with the API Identifier <inline-code>user<inline-code>
- Add a <inline-code>string<inline-code> field with the API Identifier <inline-code>repo<inline-code>
- Add a <inline-code>string<inline-code> field with the API Identifier <inline-code>action<inline-code>
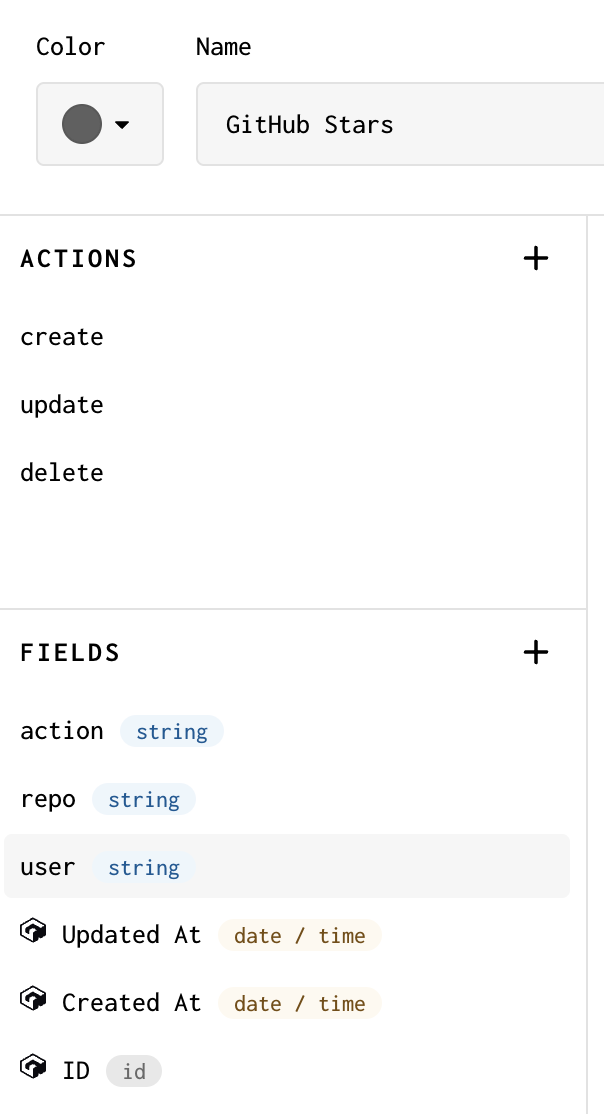
This will let you capture some information on who is adding or removing stars from what repo.
Finally, update your route file:
You can test out this new route by starring and unstarring your repository. You should see new records in your Gadget app's database!

Make sure that you used your Development environment route when building and testing, and create a new webhook subscription or edit the existing subscription for your Production environment when you are ready to go live.
Questions
If you have any questions about subscribing to webhooks, reach out on Gadget's developer Discord.


