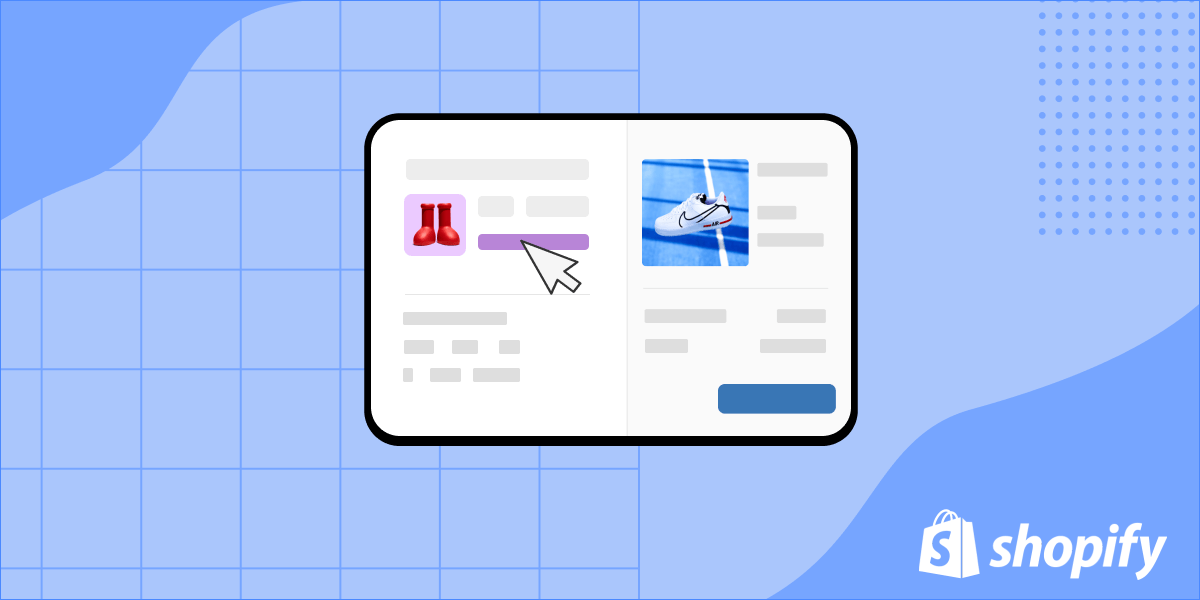
Build a pre-purchase Shopify checkout UI extension
Topics covered: Shopify connections, React frontends
Time to build: ~20 minutes
Checkout UI extensions are an important part of the Shopify developer ecosystem. Since Shopify announced the deprecation of checkout.liquid, it has become more important than ever for developers to be able to swiftly migrate existing Plus-merchant checkout functionality over to checkout UI extensions.
In this tutorial, you will build a simple pre-purchase upsell extension that allows merchants to select a product in an embedded admin app that will then be offered to shoppers during checkout. Gadget will take care of your embedded app frontend, backend, and database, and the Shopify CLI will be used to manage the checkout UI extension.
Requirements
To get the most out of this tutorial, you will need:
- A Shopify Partners account
- A development store with the checkout extensibility developer preview enabled
You can fork this Gadget project to quickly preview this app. There are two things you need to do after forking:
- Set up a Shopify Partners Connection after forking
- After setting up your connection, you also need to build, test, and deploy your checkout UI extension

Create a Gadget app and connect to Shopify
Our first step will be to set up a Gadget project and connect our backend to a Shopify store via the Shopify connection. Create a new Gadget application at gadget.new and start with the Shopify app.
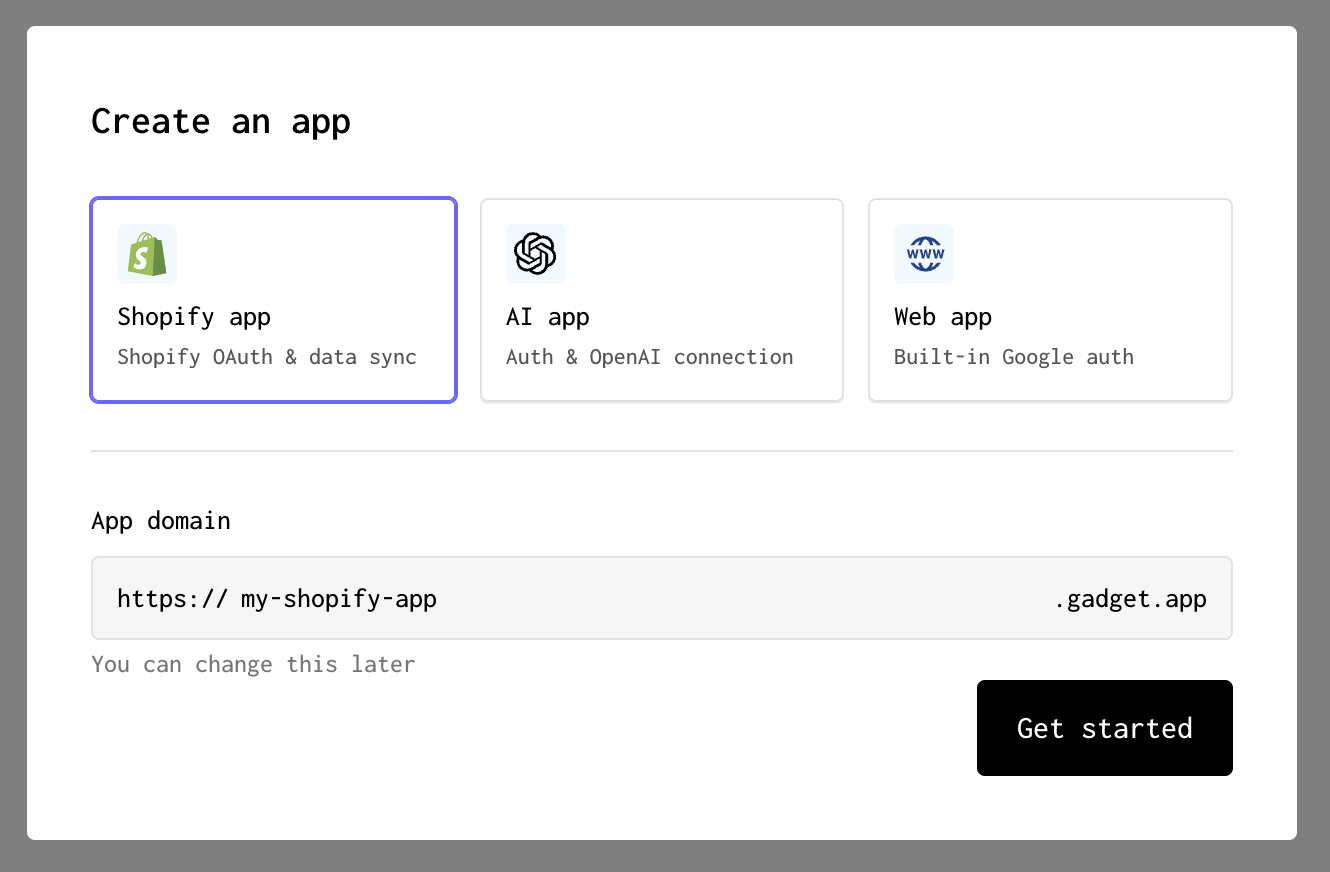
Because we are adding an embedded frontend, we are going to build an app using the Partners connection.
Connect to Shopify through the Partners dashboard
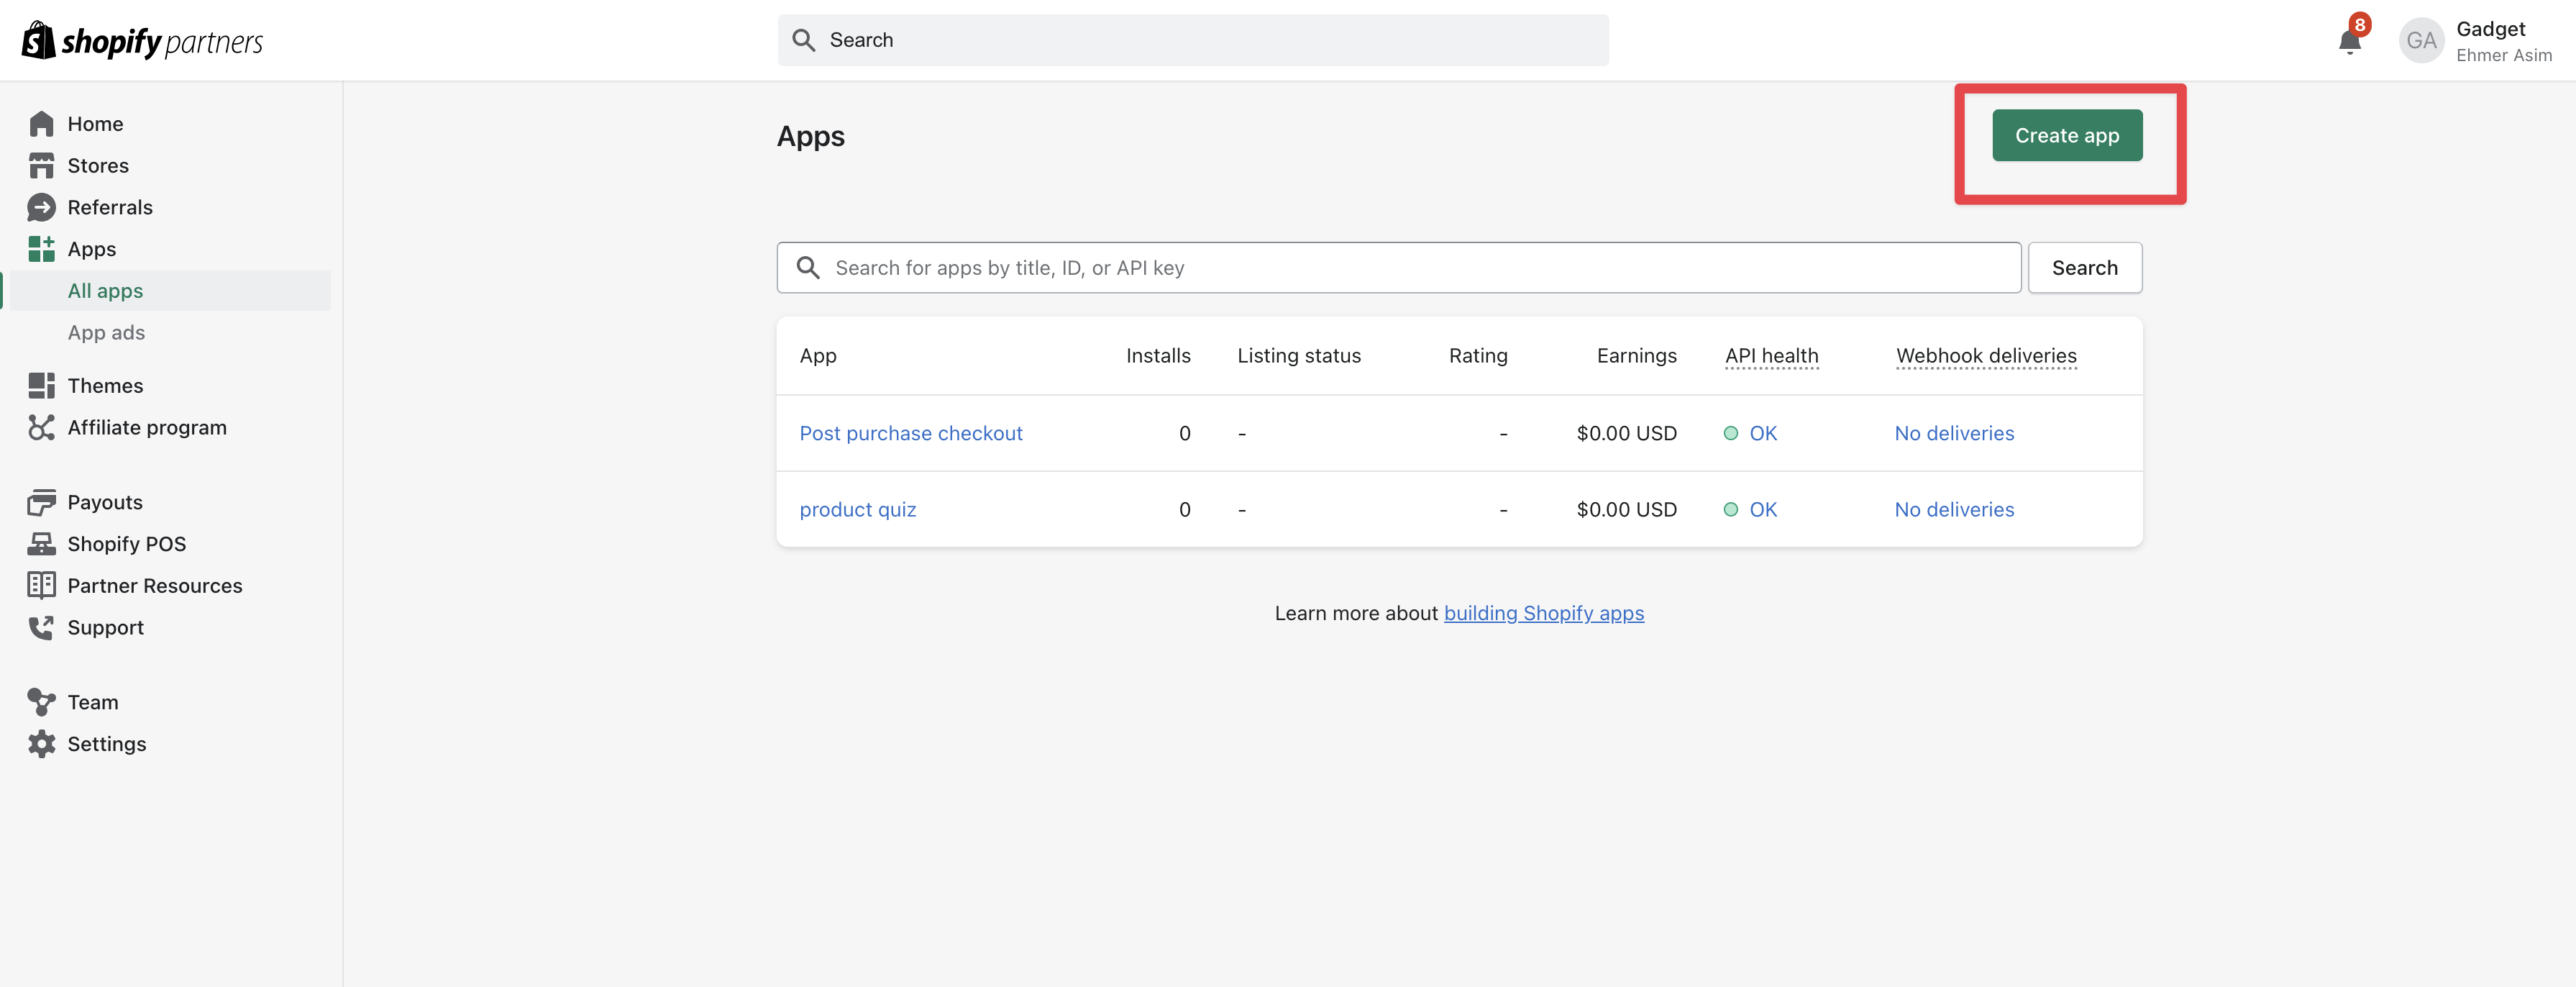
Both the Shopify store Admin and the Shopify Partner Dashboard have an Apps section. Ensure that you are on the Shopify Partner Dashboard before continuing.
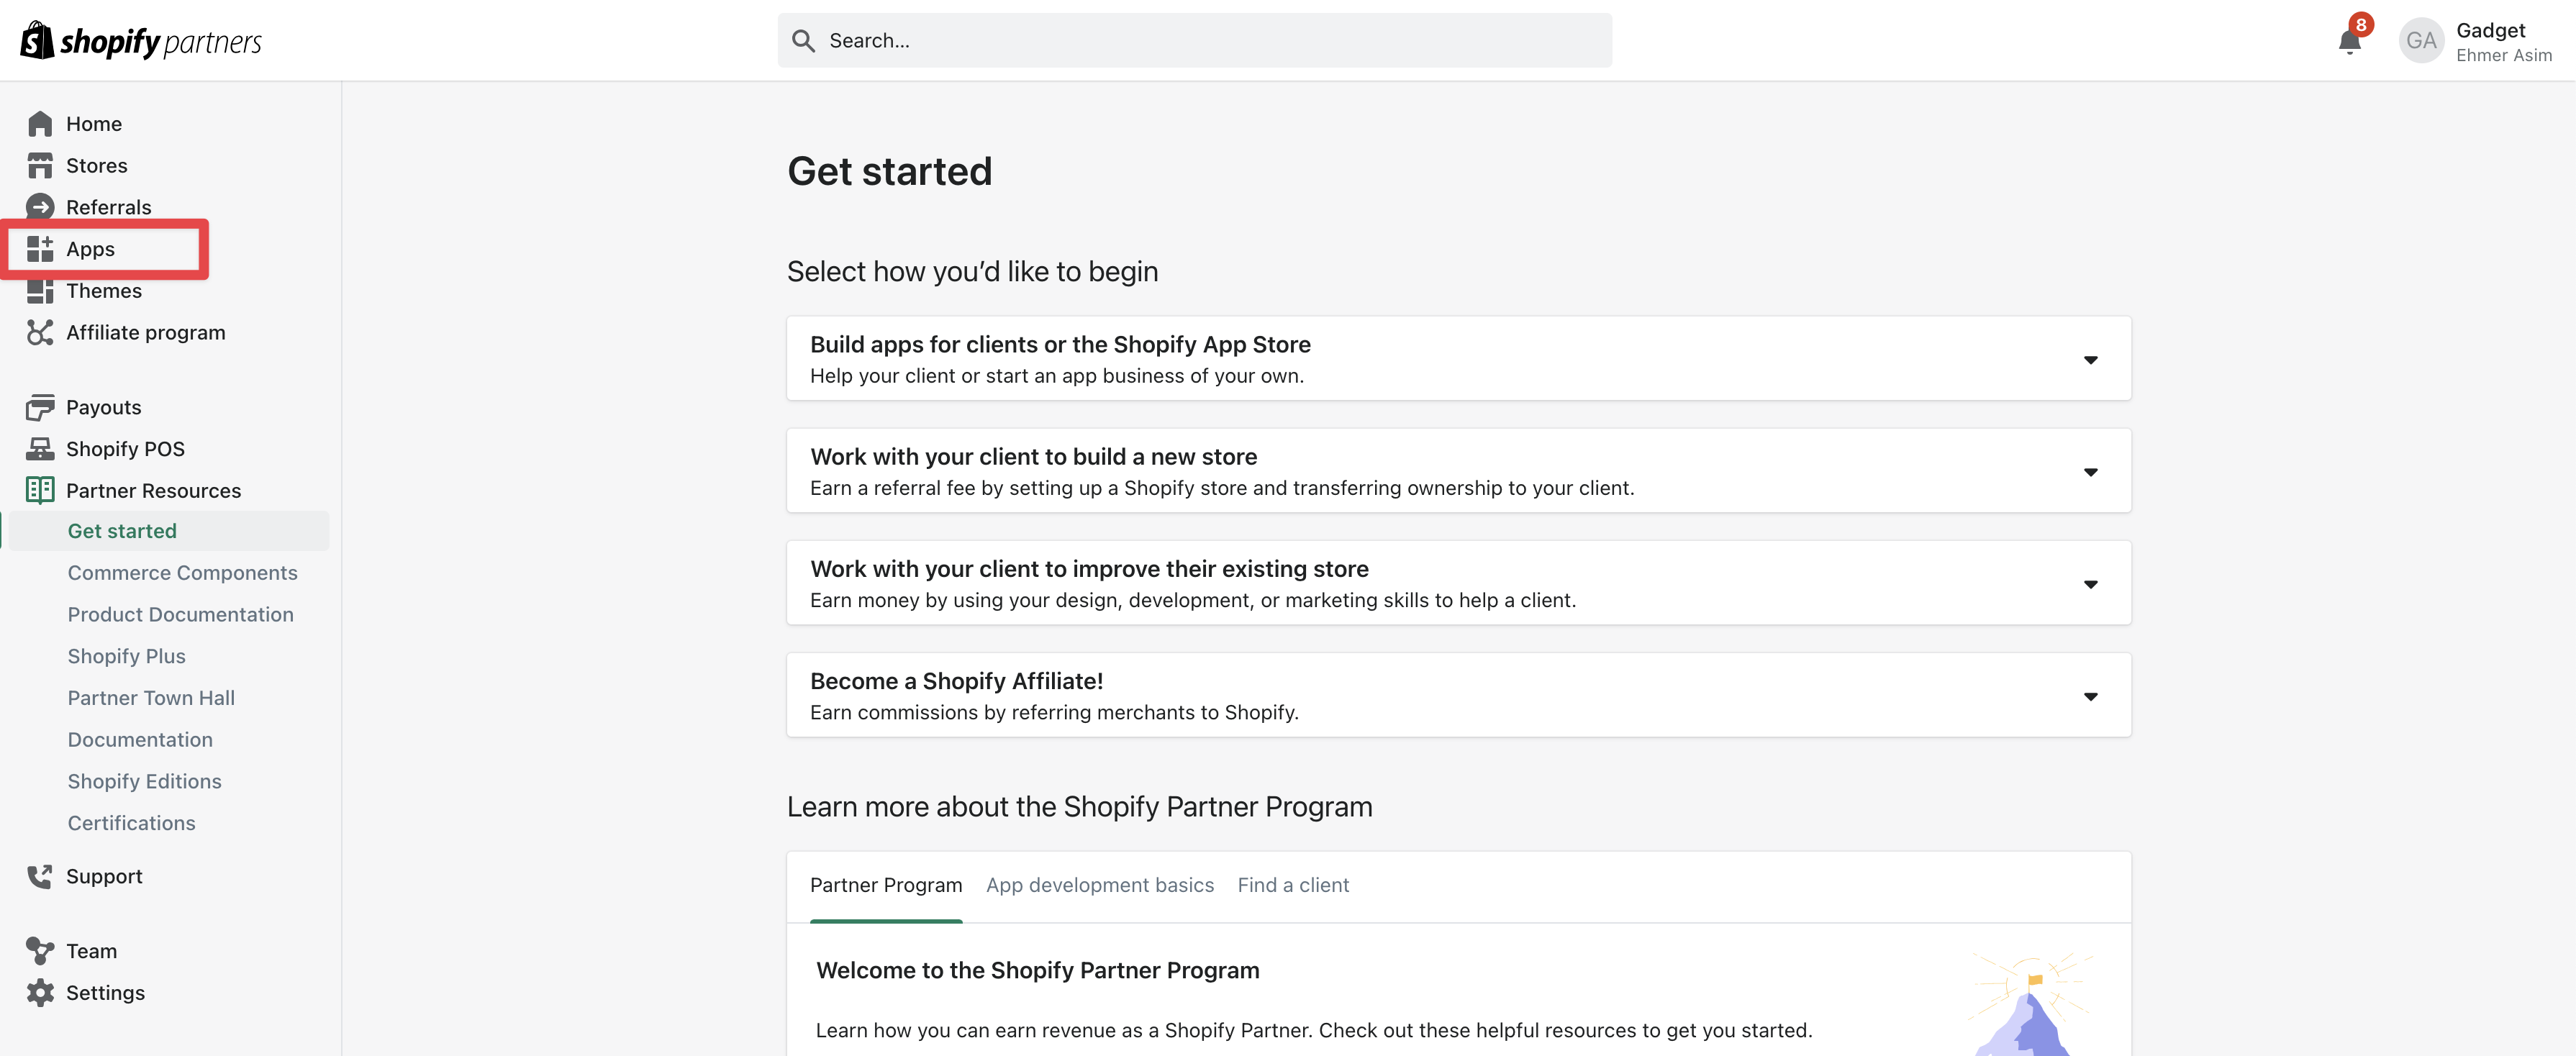
- Click the Create App button
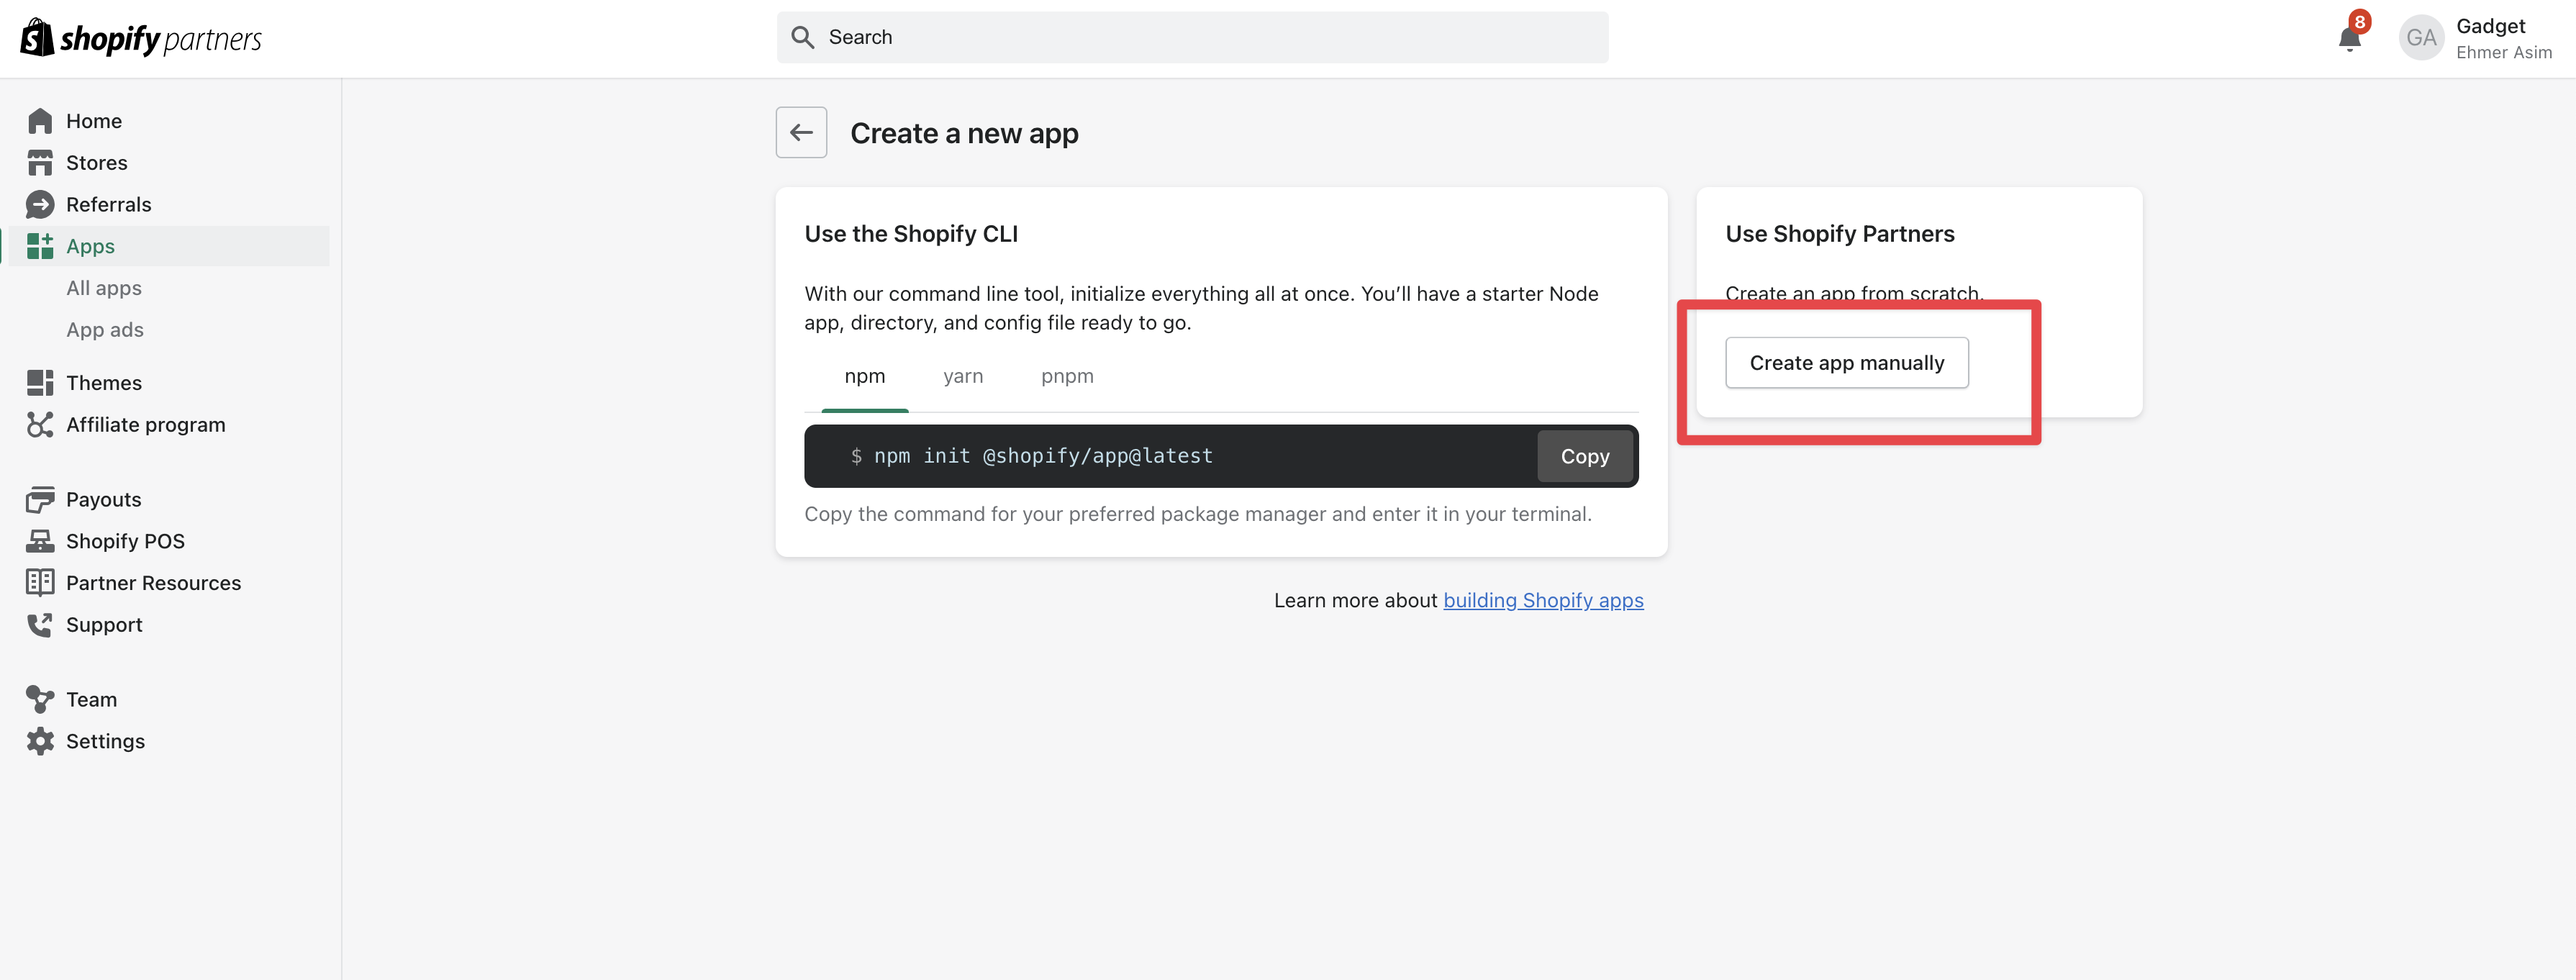
- Click the Create app manually button and enter a name for your Shopify app
- Go to the Connections page in your Gadget app and click on Shopify
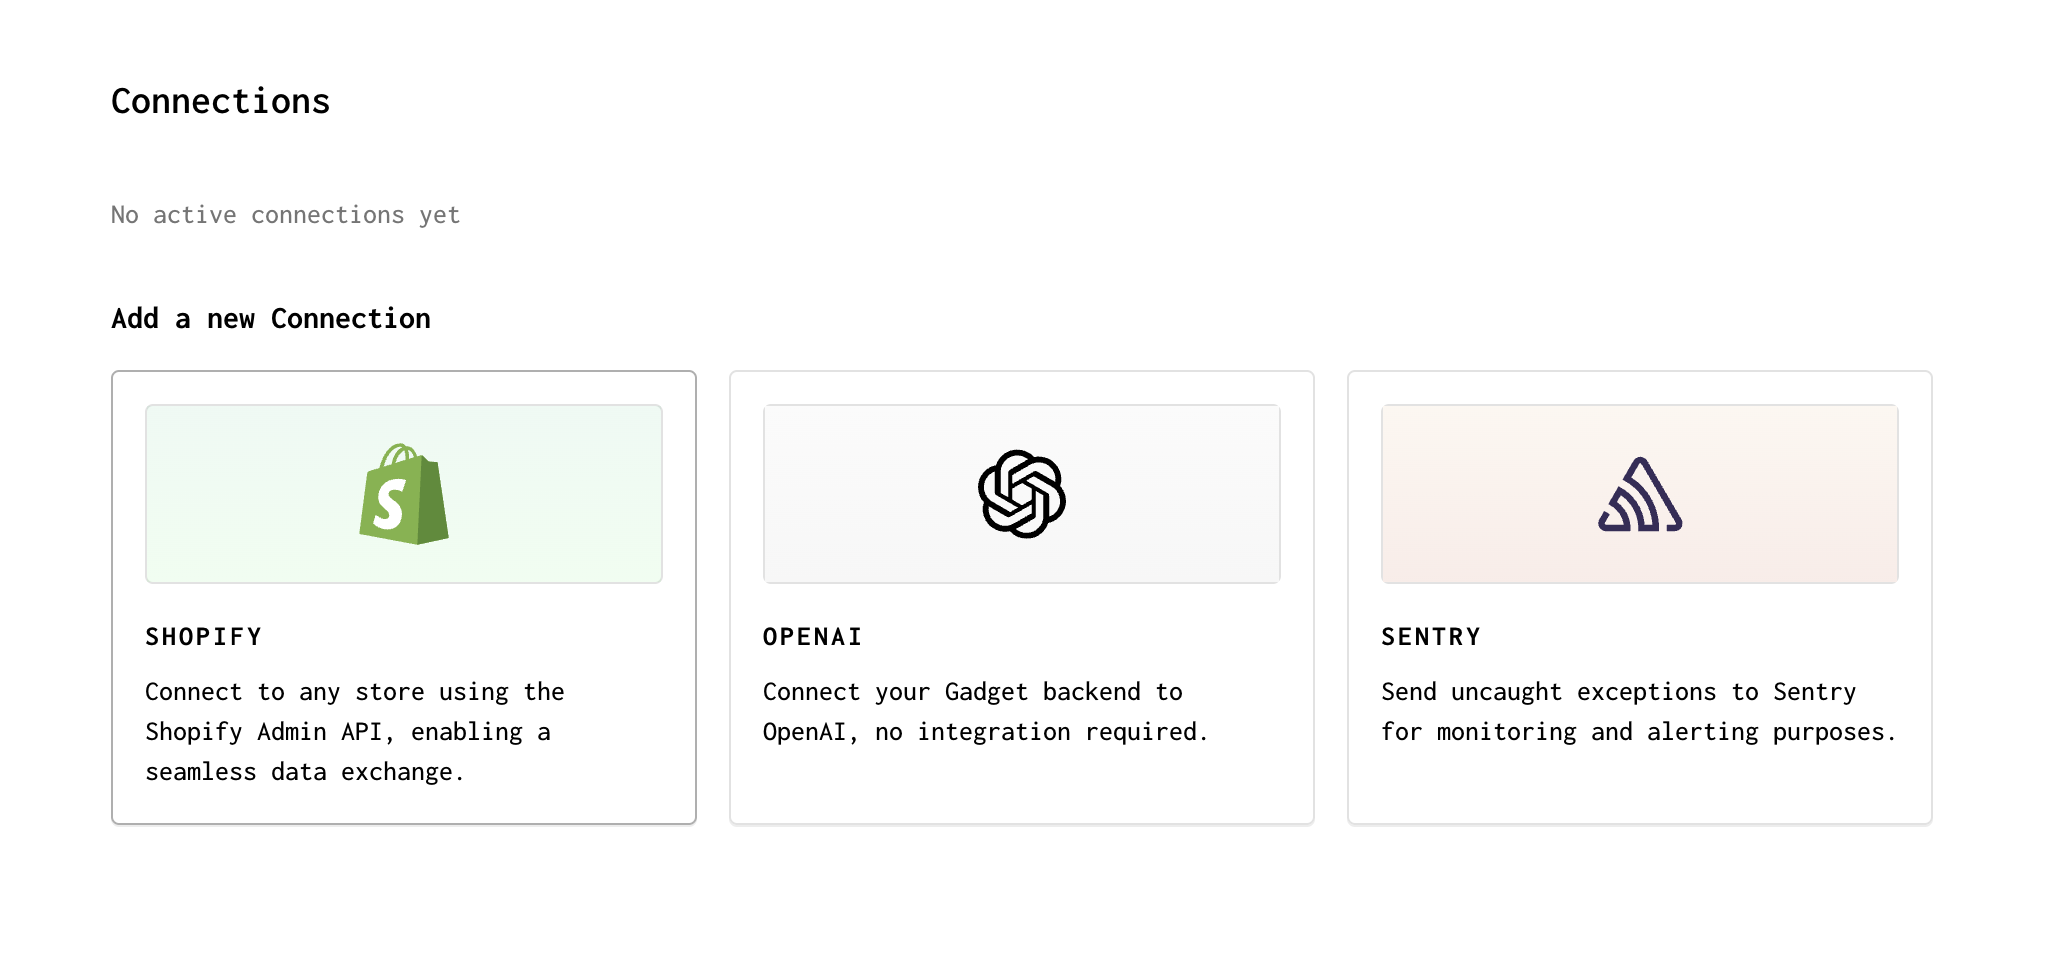
- Copy the Client ID and Client secret from your newly created Shopify app and paste the values into the Gadget Connections page
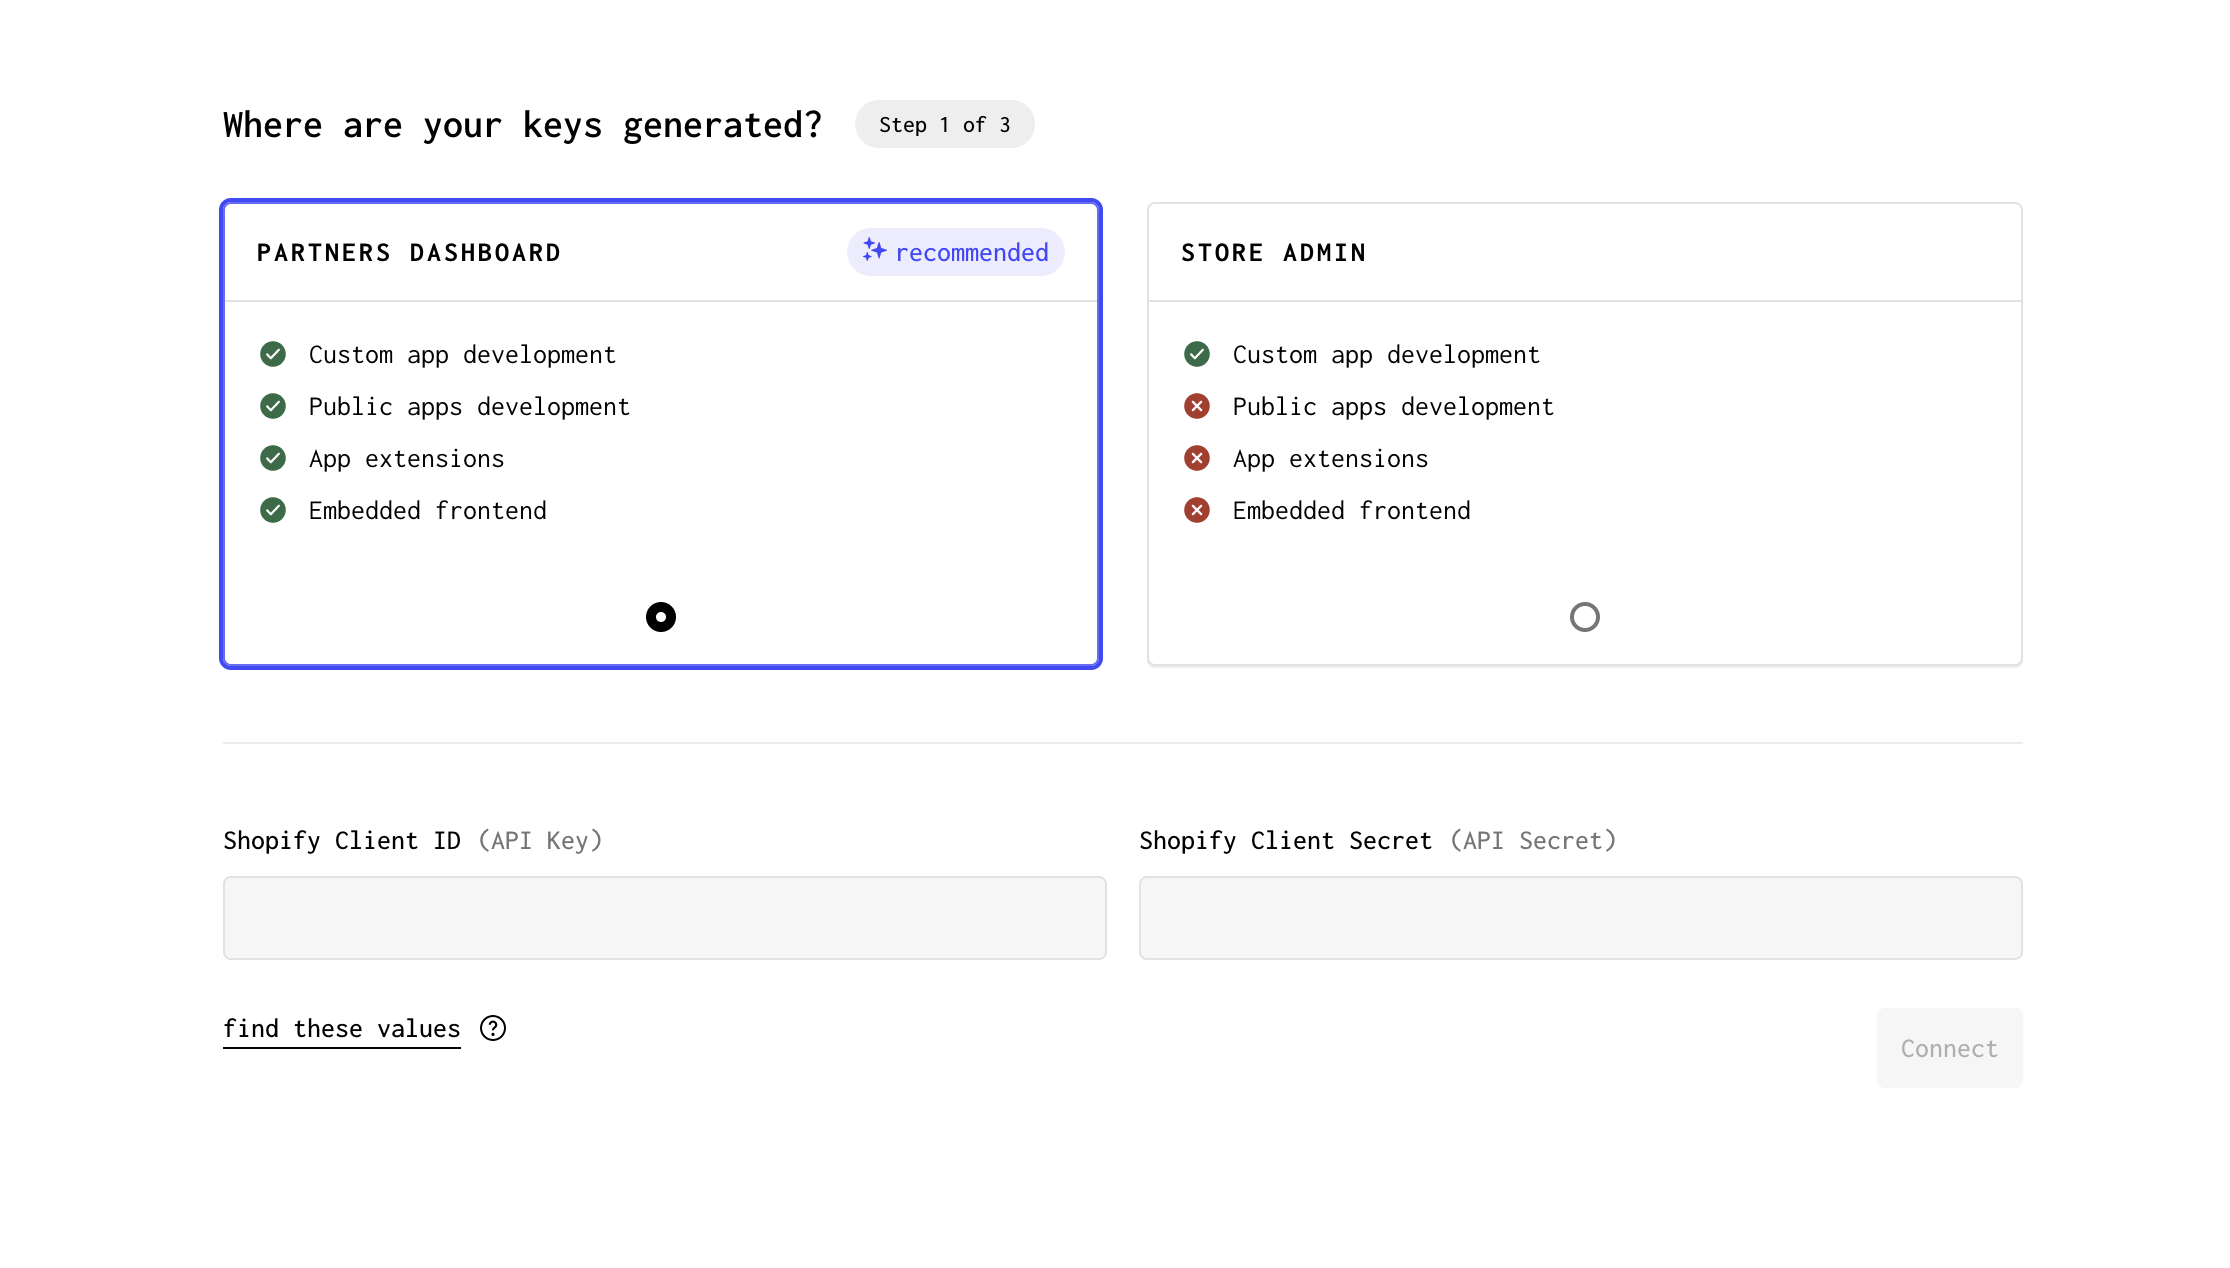
- Click Connect on the Gadget Connections page to move to scope and model selection
Now we get to select what Shopify scopes we give our application access to, while also picking what Shopify data models we want to import into our Gadget app.
- Enable the read scope for the Shopify Products API, and select the underlying Product model that we want to import into Gadget
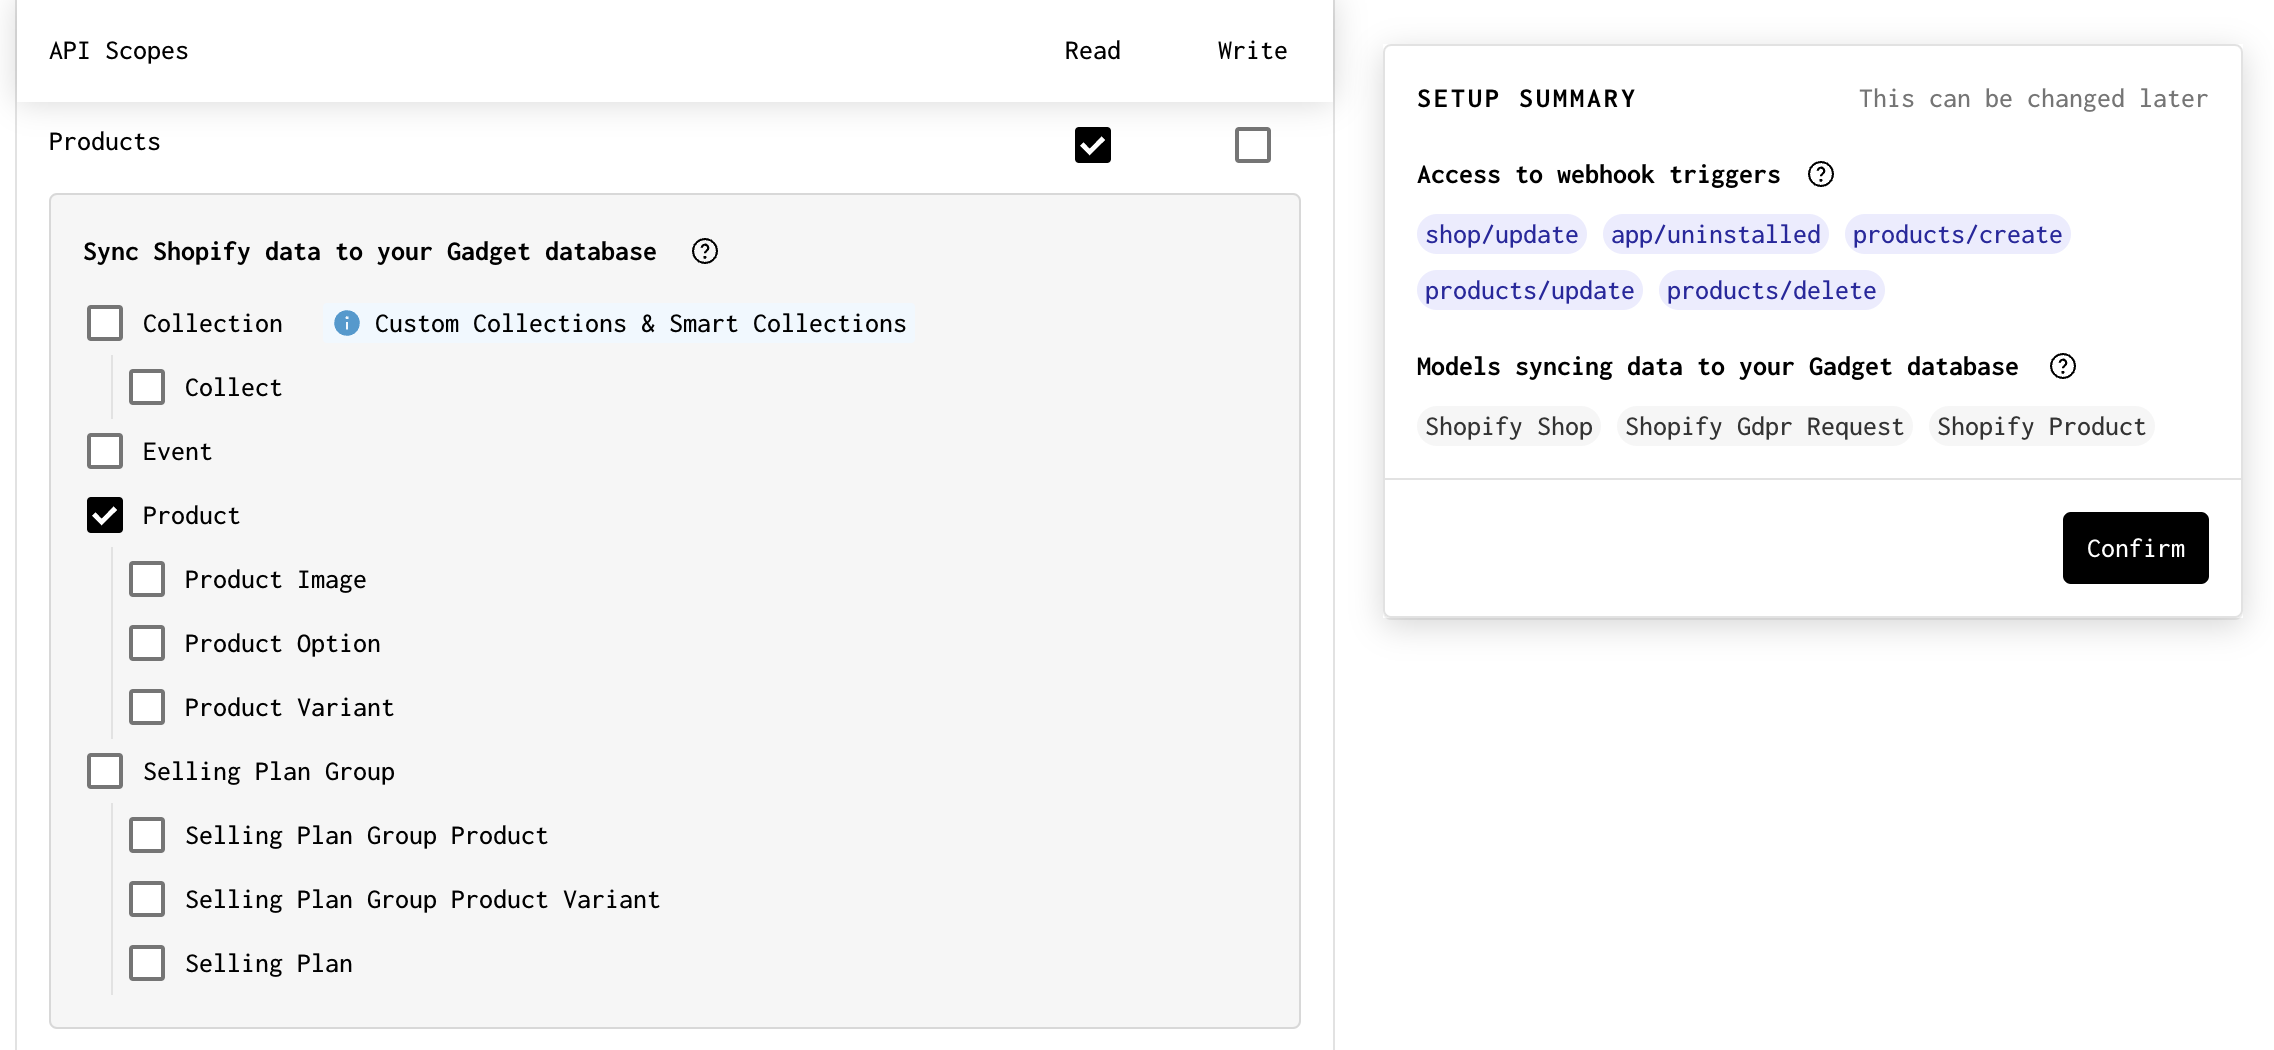
- Click Confirm
Now we want to connect our Gadget app to our custom app in the Partners dashboard.
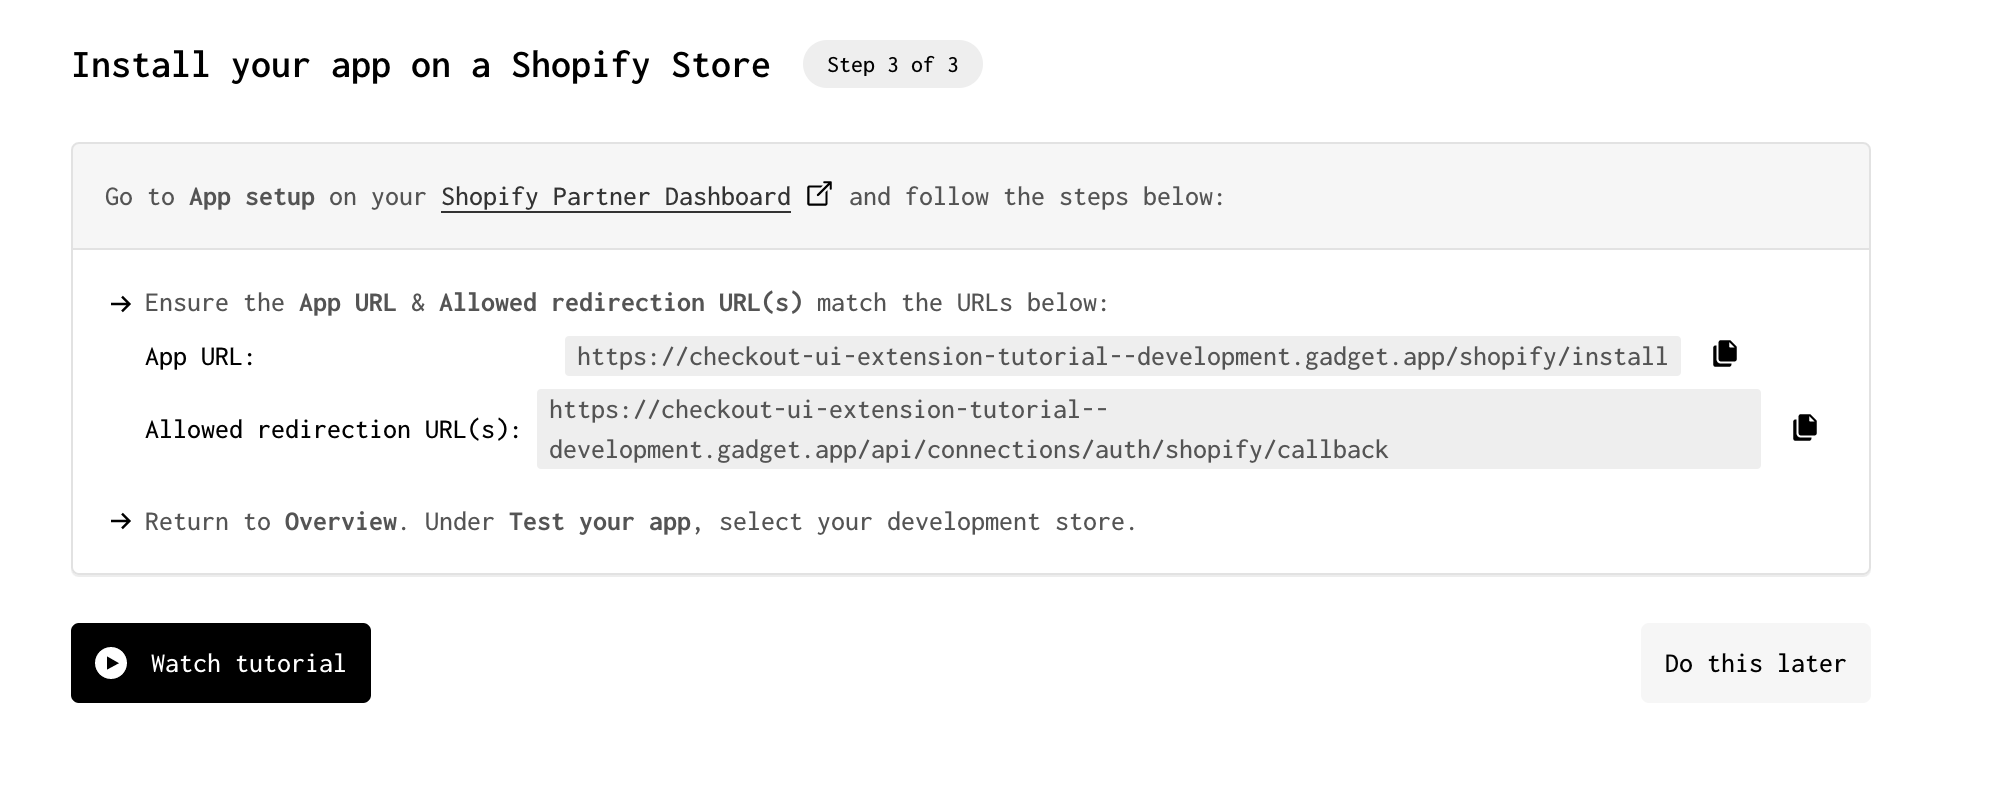
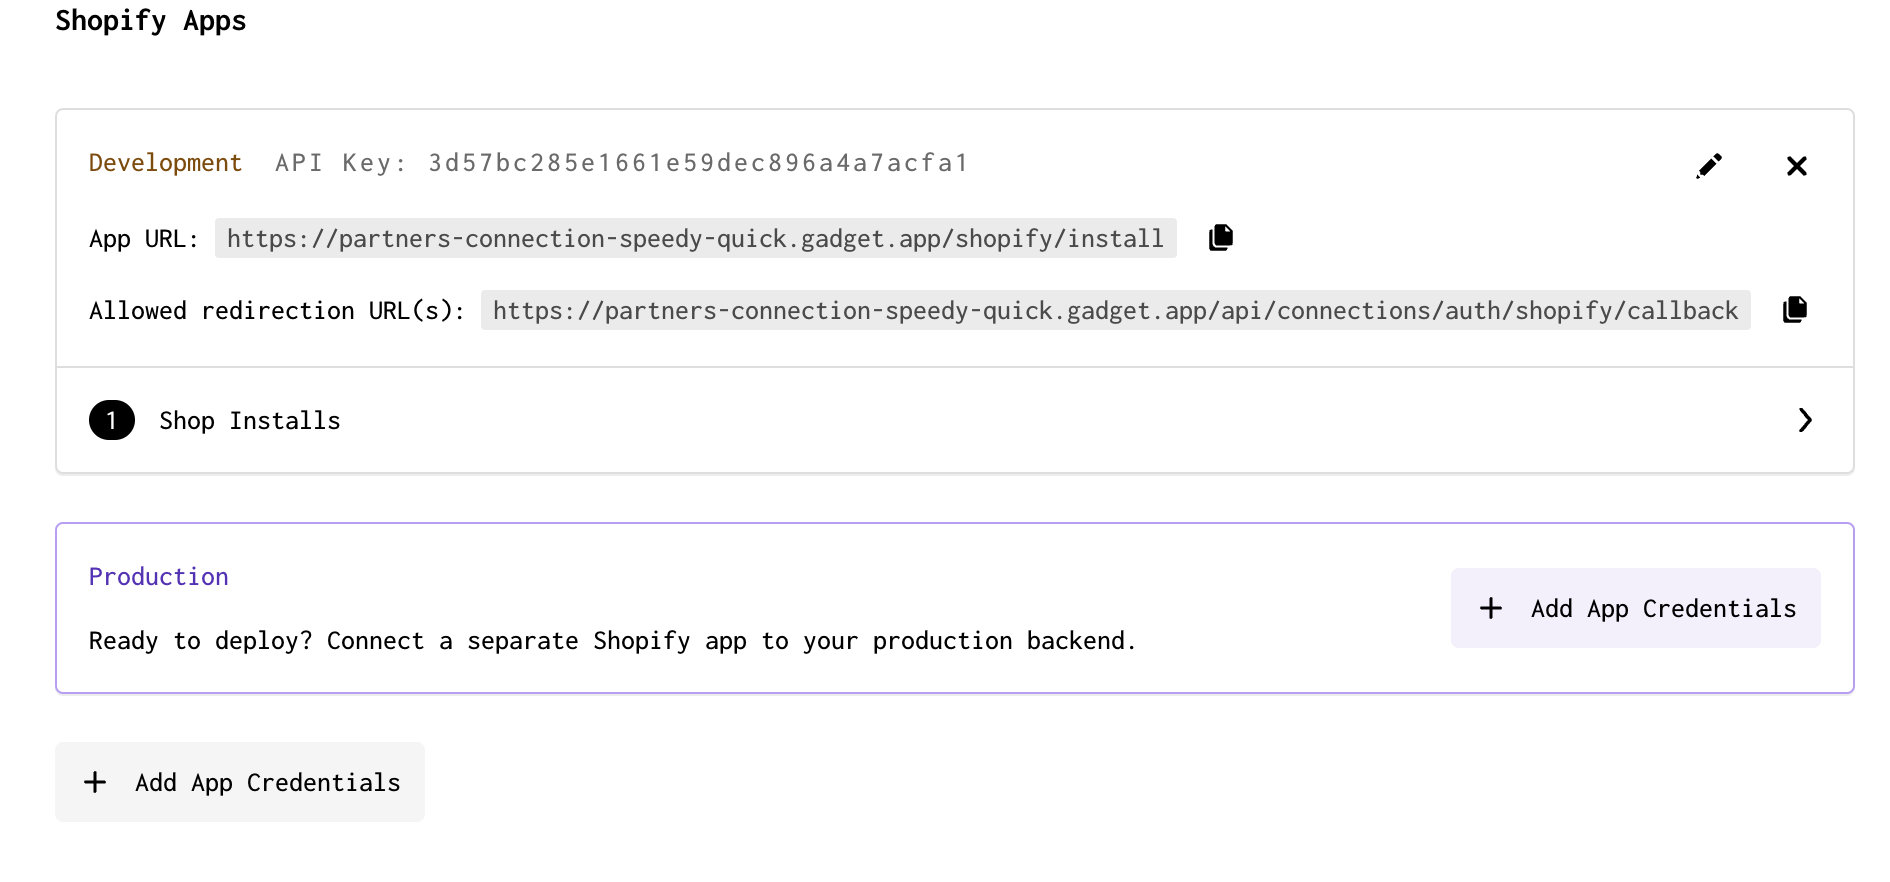
- In your Shopify app in the Partners dashboard, click on App setup in the side nav bar so you can edit the App URL and Allowed redirection URL(s) fields
- Copy the App URL and Allowed redirection URL from the Gadget Connections page and paste them into your custom Shopify App
Now we need to install our Shopify app on a store, and sync data.
- Go back to the Shopify Partners dashboard
- Click on Apps to go to the Apps page again
- Click on your custom app
- Click on Select store
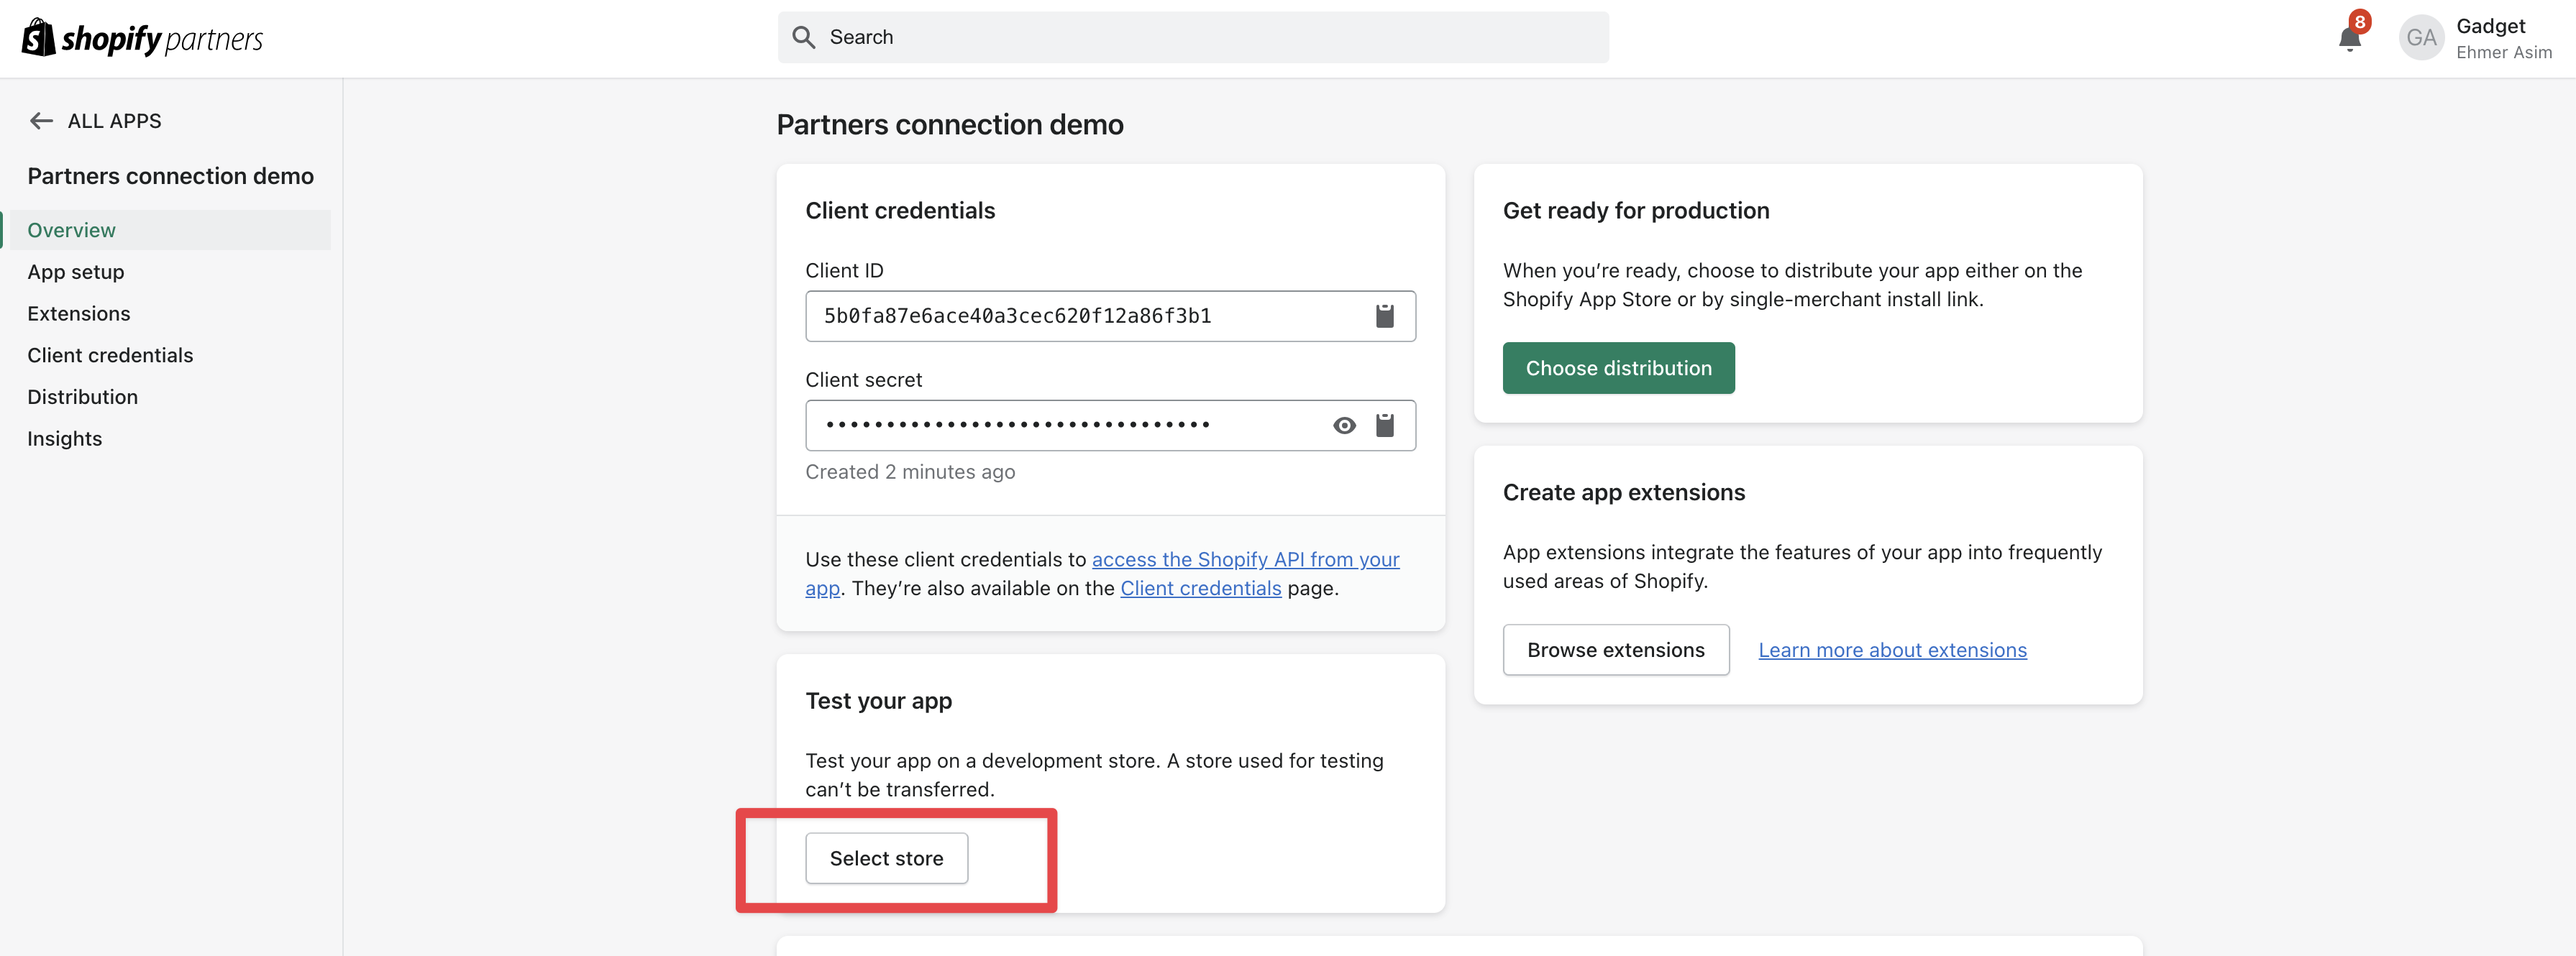
- Click on the store we want to use to develop our app
- You may be prompted about Store transfer being disabled. This is okay, click Install anyway
- Click Install app to install your Gadget app on your Shopify store
Having an issue installing?
If you are getting a permissions denied error when installing your app, try logging in to the Shopify store Admin!

You will be redirected to an embedded admin app that has been generated for you. The code for this app template can be found in <inline-code>frontend/ShopPage.jsx<inline-code>.
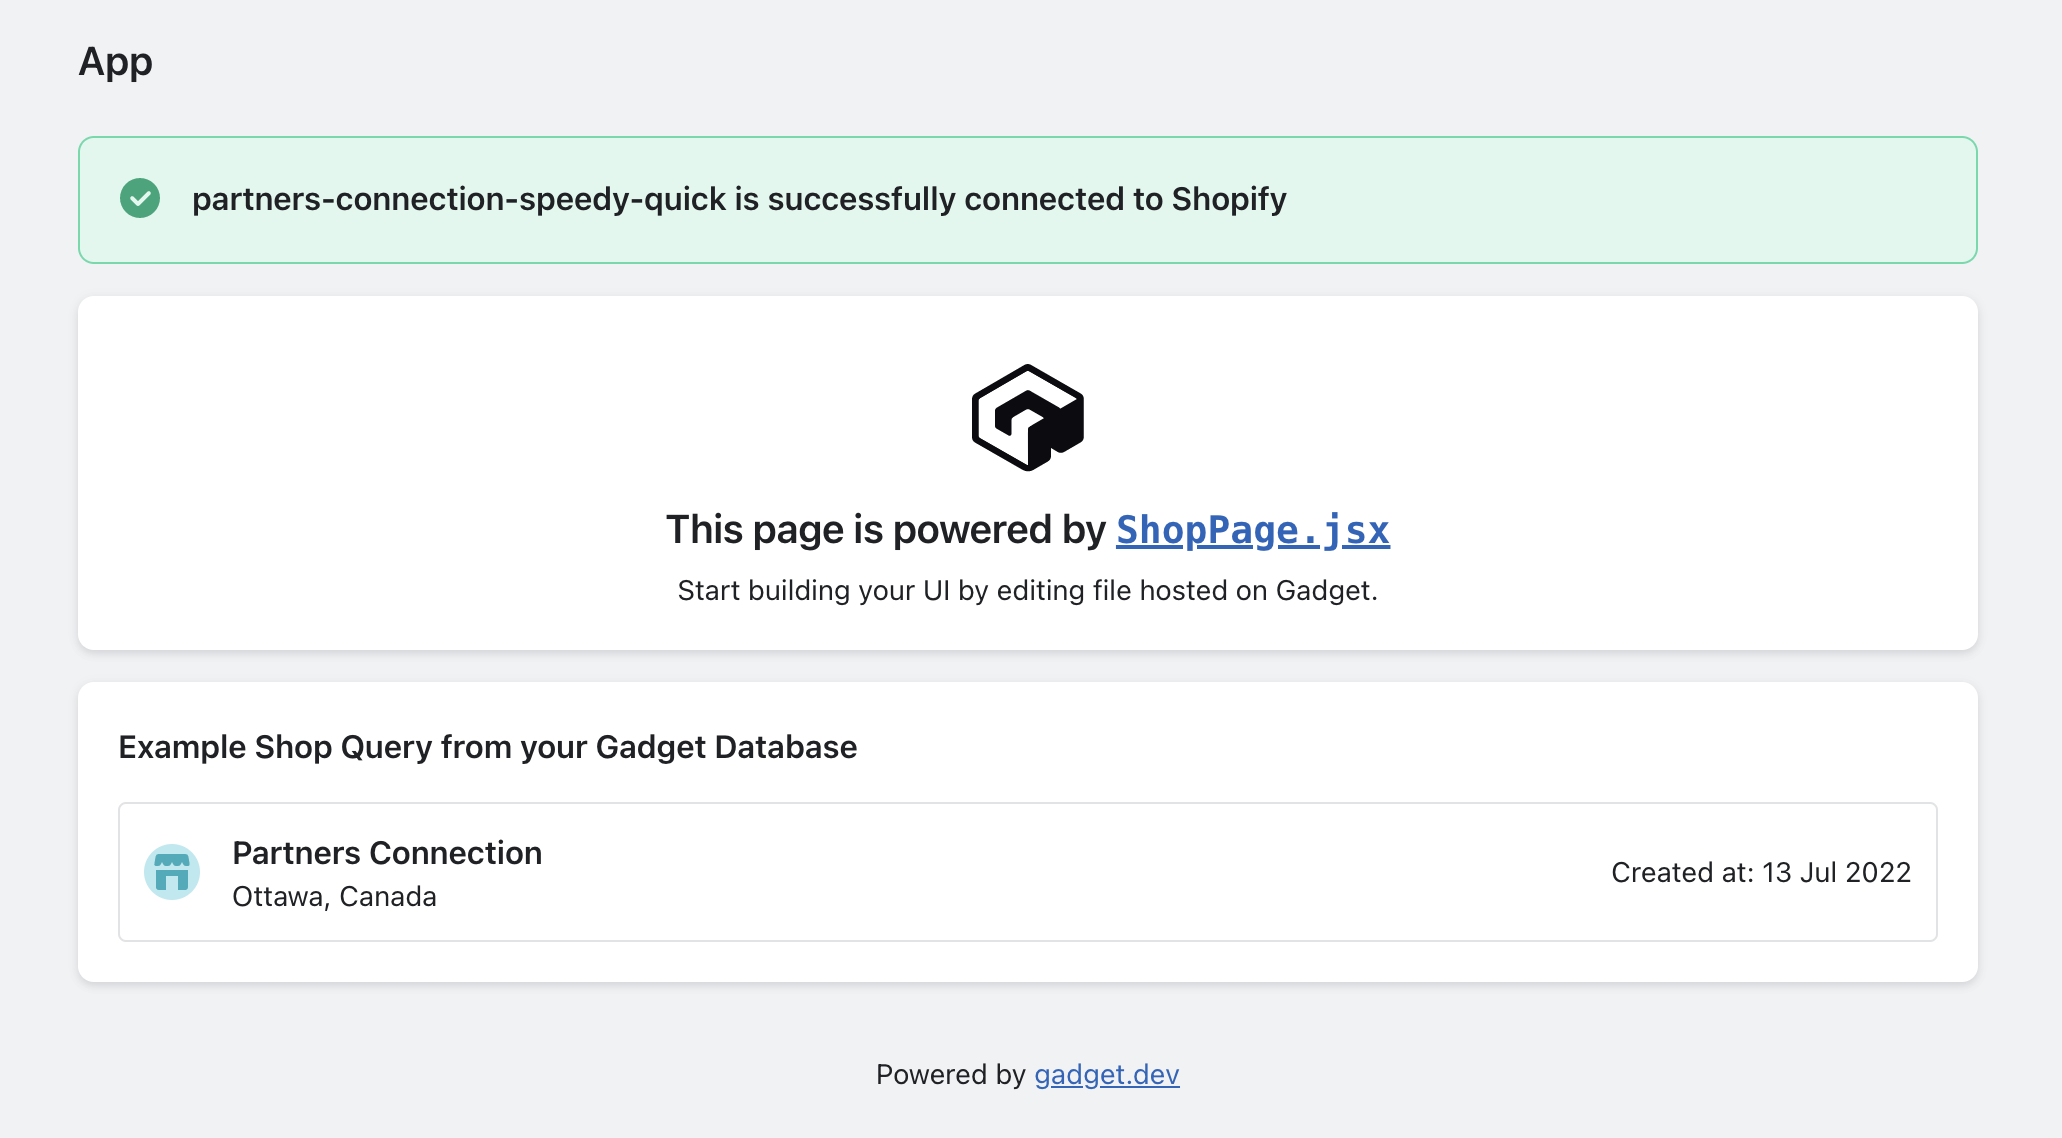
Set up is complete! We are now ready to build our Gadget application.
If we have created at least one product in our store we can test out the connection:
- Go back to our Gadget Connections page and click on the Shop Installs button for the added app in the Shopify Apps section
- Click the Sync button for the installed store
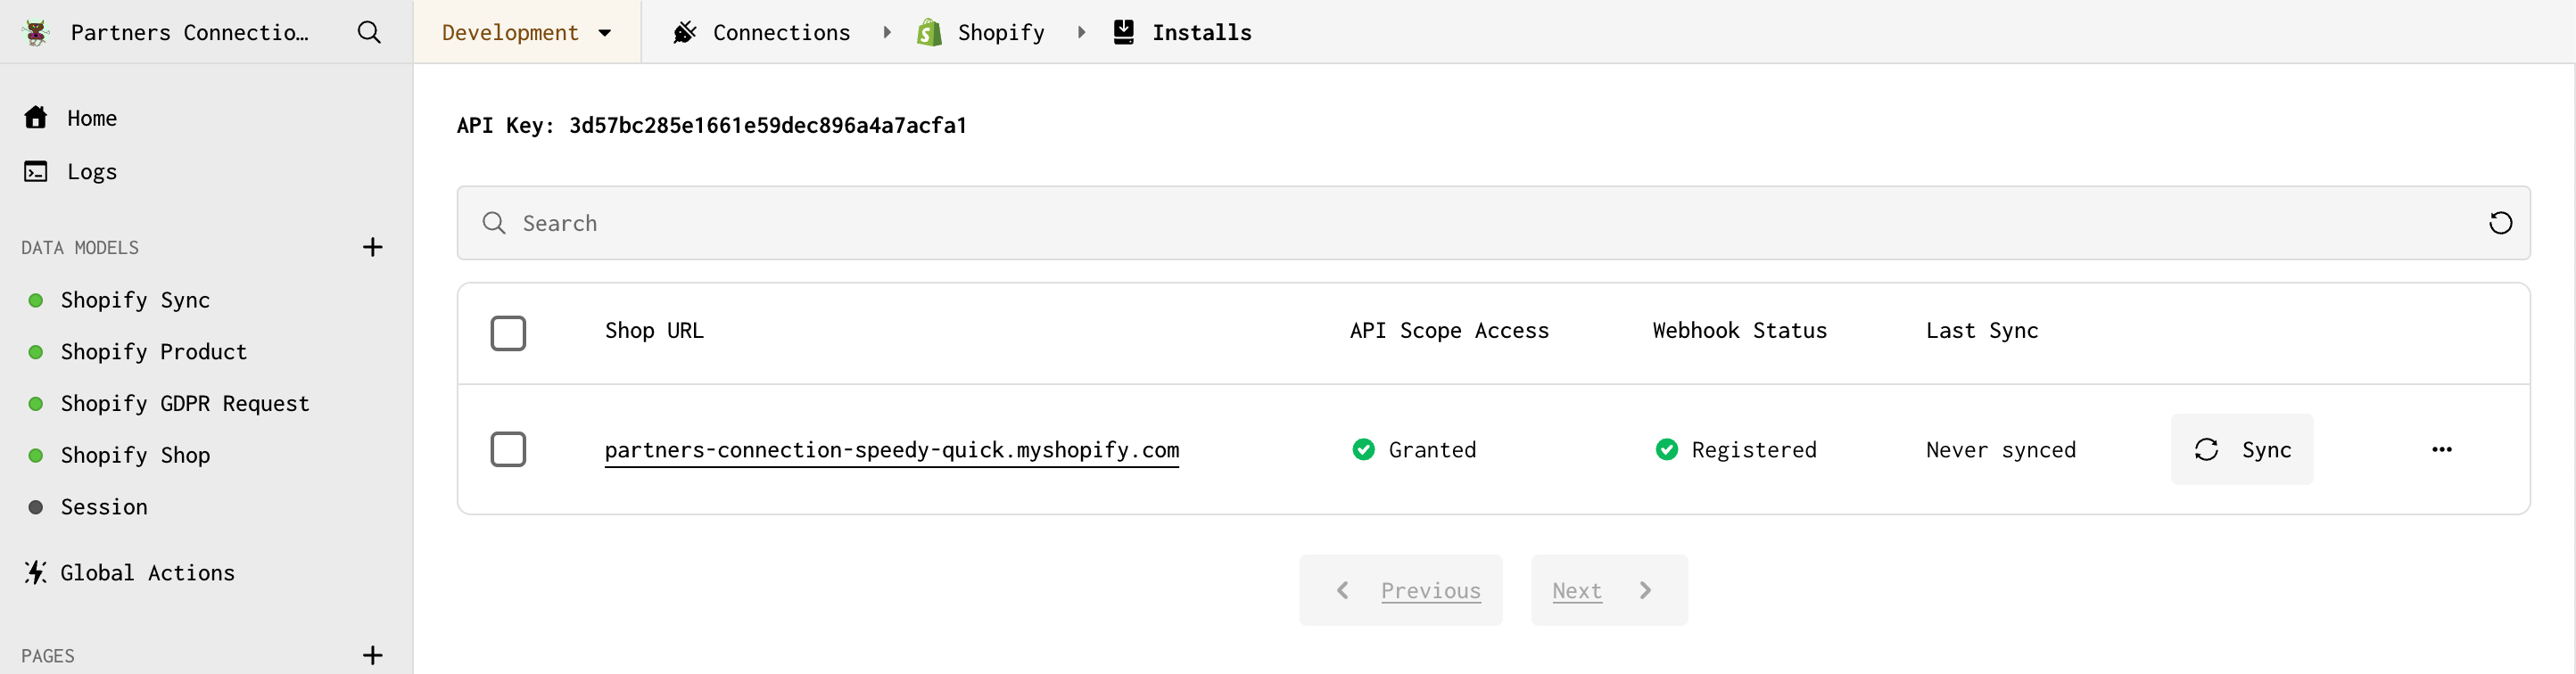
- We should see that the Sync action was a success
That's it! We have successfully set up a store and custom app in Shopify, connected our Gadget app to this store, and synced our store data with our Gadget app.
Note: For public Shopify apps, you can add a code effect to sync data on Shop install. For more information, check out our docs.
After your data sync is successful, you can view synced data in the Shopify Product Data page in Gadget. To view this page:
- Click on the <inline-code>shopifyProduct<inline-code> model in the Gadget nav
- Click Data to view the Shopify product data that has been synced to your Gadget app
Now that your app is connected to Shopify, the next step will be to start building your app frontend that will be embedded in the store admin.
Build an embedded frontend
This is all the code you need to add a product picker to an embedded app. Shopify Polaris is used to draw components and Gadget's React tooling is used to manage reading from your Gadget app's backend API. An explanation of the Gadget tooling used is found below the snippet.
- Copy and paste this snippet into <inline-code>frontend/ShopPage.jsx<inline-code>:
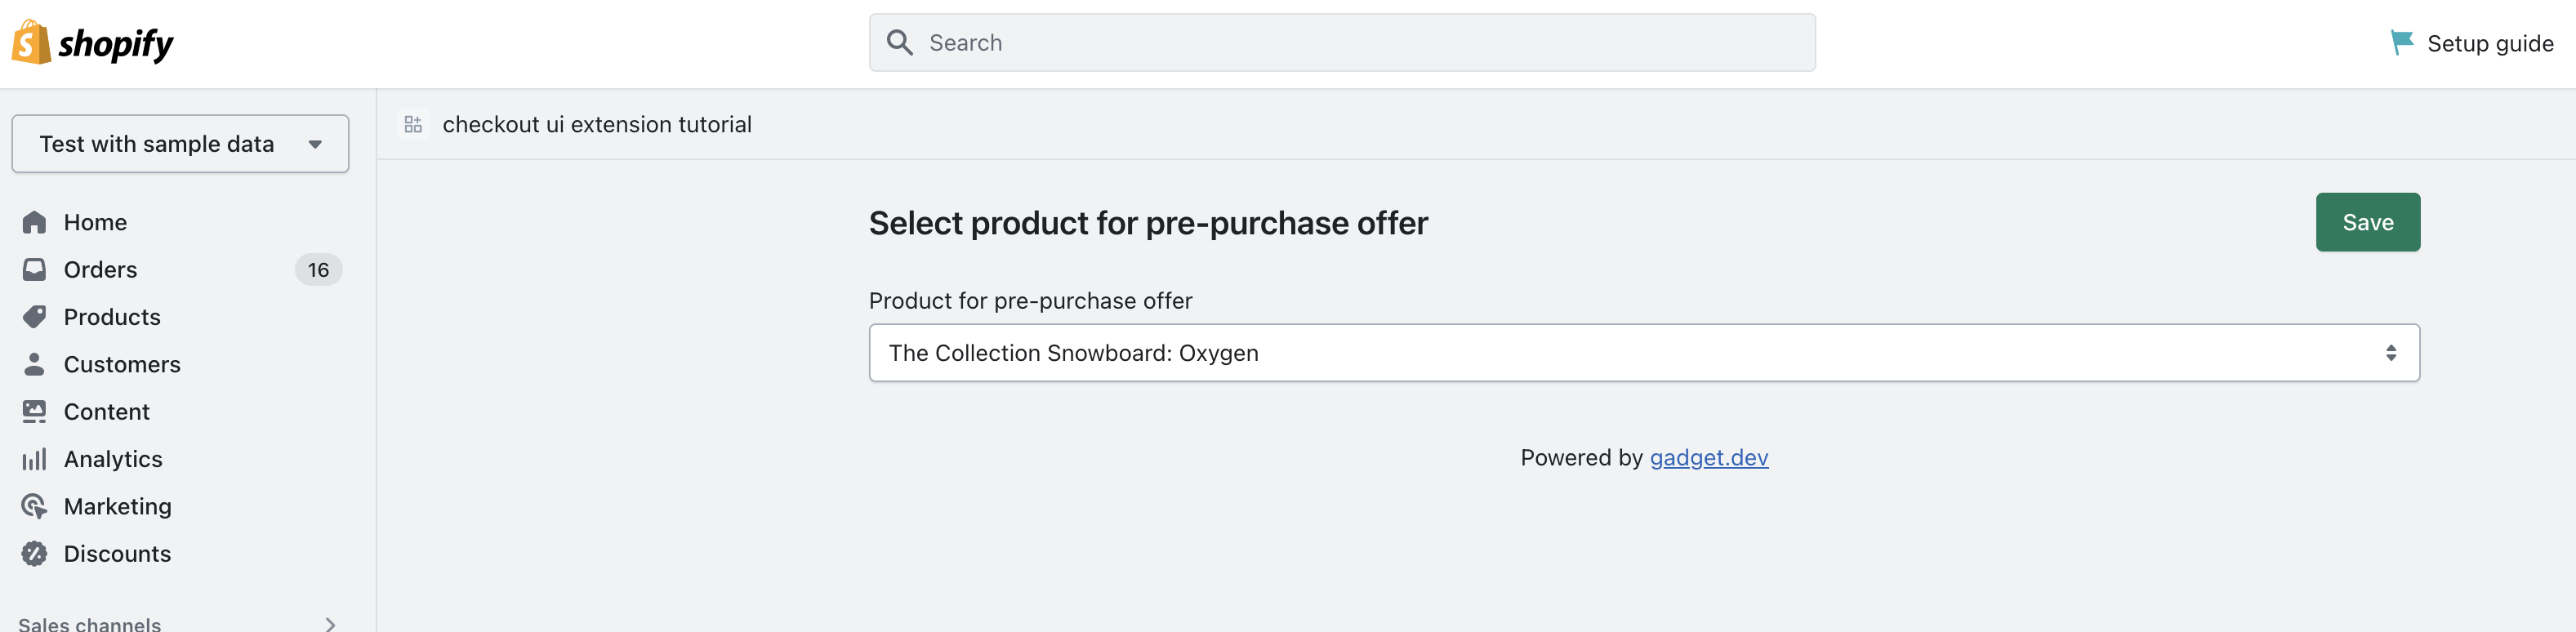
Most of this code is just Polaris and React - the Select component is used to display a dropdown that merchants can use to select what product is offered to shoppers during checkout.
Your Gadget app's API client is already set up in <inline-code>frontend/api.js<inline-code> and handles auth and session token management for you. This client is imported into <inline-code>ShopPage.jsx<inline-code> and used alongside the <inline-code>useFindFirst<inline-code> and <inline-code>useFindMany<inline-code> React hooks to read product data from your app's API. Both <inline-code>useFindFirst<inline-code> and <inline-code>useFindMany<inline-code> are imported from the <inline-code>@gadgetinc/react<inline-code> package. These are hooks provided by Gadget and allow for a reactive way of interacting with your Gadget app's API.
useFindMany to read product data
The <inline-code>useFindMany<inline-code> hook is used to read Shopify product data that has been synced to Gadget:
The returned properties are then used to handle the request's response reactively. The data property will contain product data returned from this request. Note that pagination is not implemented here, so 50 Shopify Product records will be returned by default, up to a maximum of 250 without pagination. The fetching property is a boolean that can be used to display a loading state while data is being retrieved. And finally, error contains any error information that can be handled or displayed to the user.
useFindFirst to read shop data
To retrieve the current shop id, a useFindFirst hook is used. Because shop tenancy is automatically handled for Shopify models when you connect your Gadget app to Shopify, you will only read a single shop's data from inside an embedded admin. This default filter can be modified in <inline-code>tenancy/shopifyShop.gelly<inline-code>, but it isn't recommended!
Because the ID field on the Shopify Shop model is the only required field, a <inline-code>select<inline-code> query is added to the hook so only the ID field is returned.
Your embedded frontend app is almost complete. It is missing one crucial piece: writing the selected product back to Gadget.
Save product reference metafield
There is one thing missing from your embedded frontend app - you need to be able to save the selected product somewhere so that it can be fed into the checkout UI extension. The best way to do this is to store the product ID inside a metafield. To save this metafield, you will create a new action on the <inline-code>shopifyShop<inline-code> model and write some custom code to save the product ID to a metafield in Shopify. You will also add a new field to the <inline-code>shopifyShop<inline-code> so the metafield data is synced to Gadget.
Add save action and custom code
- Click on the <inline-code>shopifyShop<inline-code> data model
- Click + in the ACTIONS section of the model page and name the new action <inline-code>savePrePurchaseProduct<inline-code>
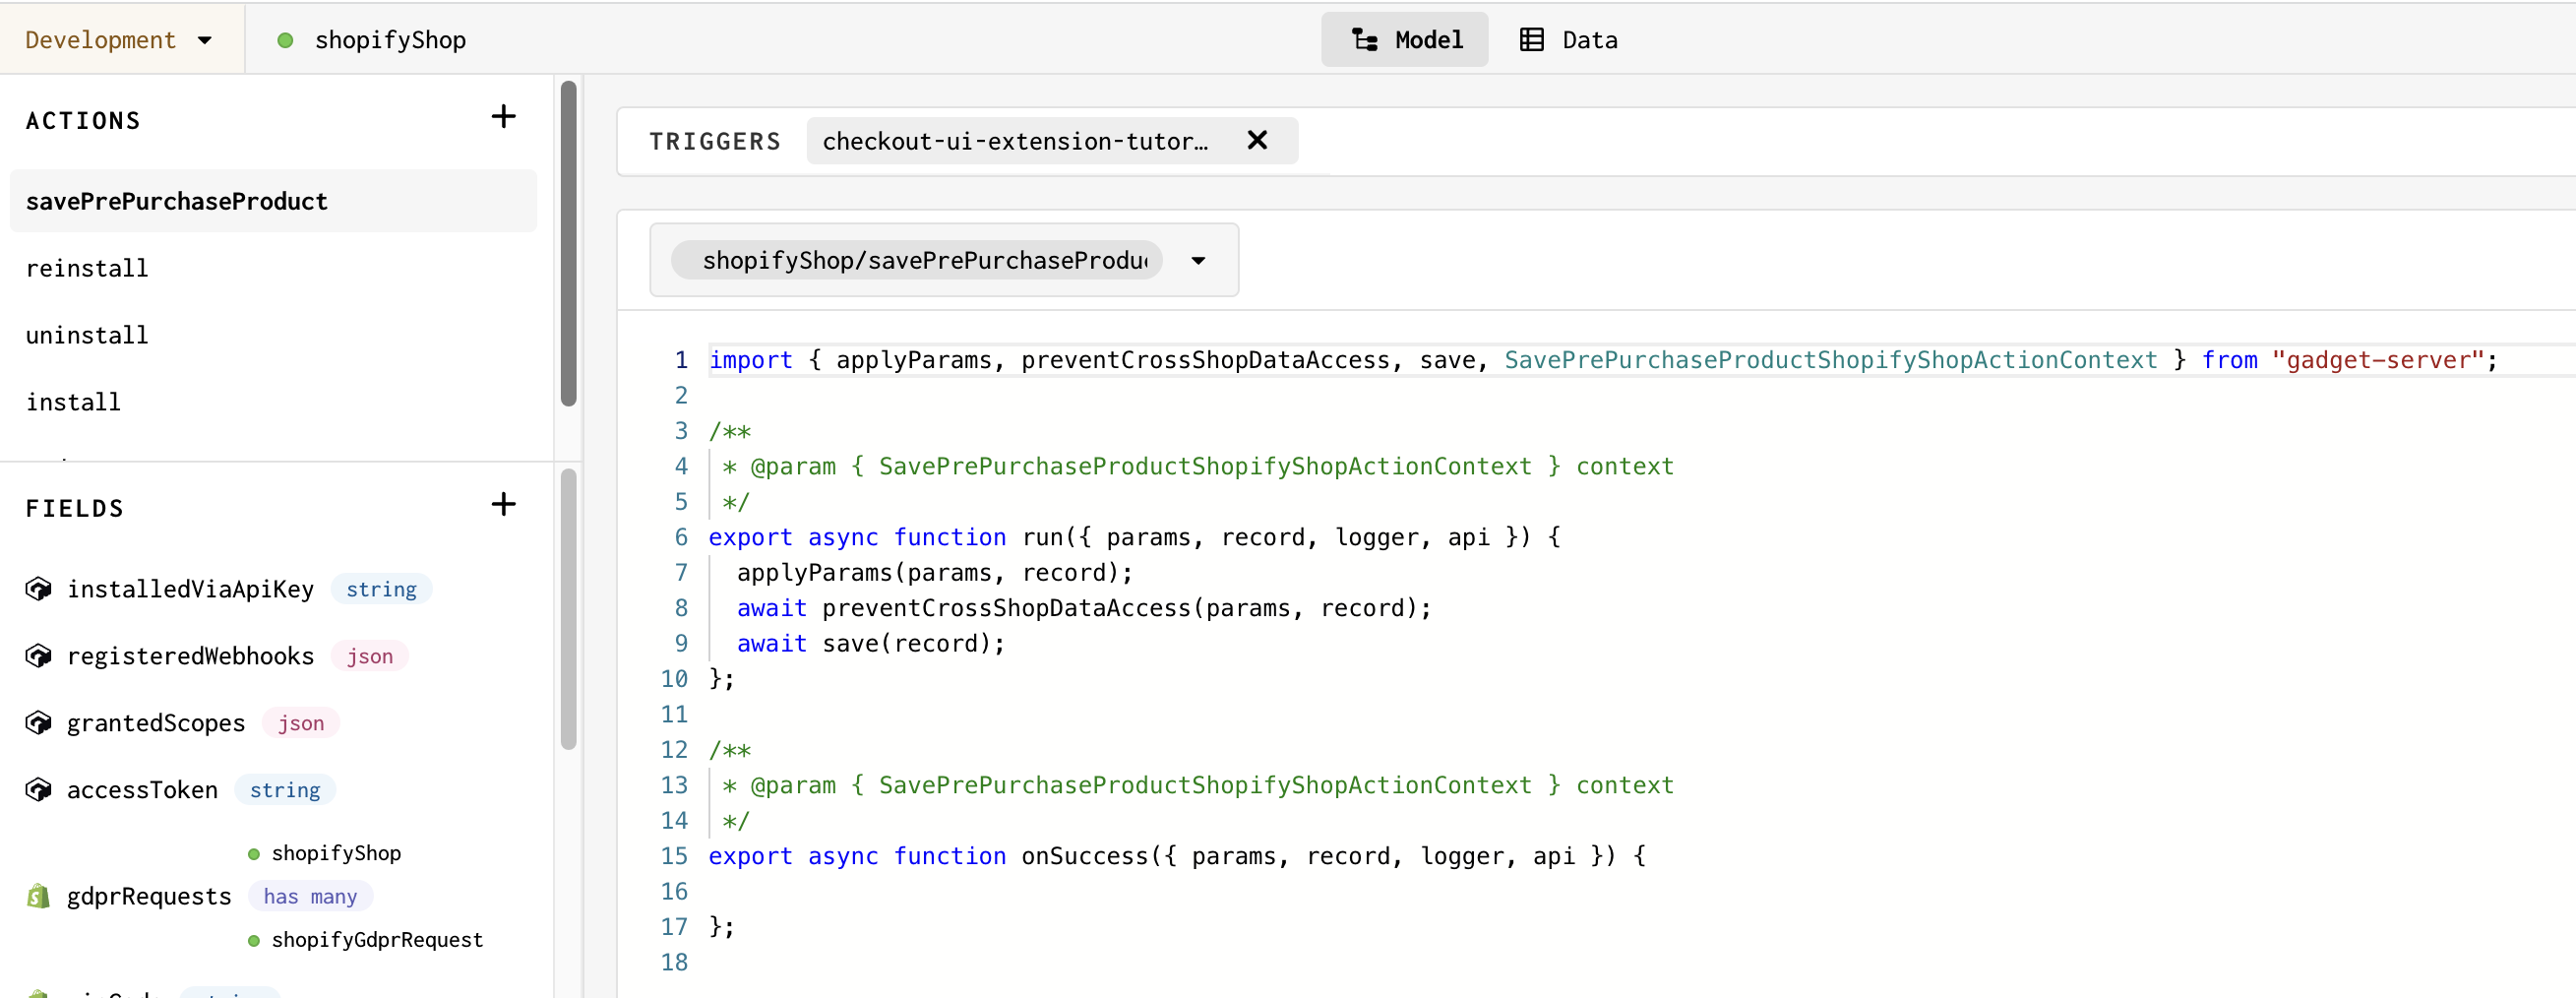
- Paste the following code snippet into <inline-code>savePrePurchaseProduct.js<inline-code> to update the <inline-code>onSuccess<inline-code> function of the action:
This code file is writing a metafield to Shopify using Shopify's metafieldsSet GraphQL API. The <inline-code>ownerId<inline-code> is set to the current Shopify shop, so each shop that installs your app can have a unique <inline-code>pre-purchase-product<inline-code> metafield.
Input parameters, which are available in the params arg in code effects, are defined with the <inline-code>module.exports.params<inline-code> declaration at the bottom of the file. Here, you are declaring a new string parameter called <inline-code>productId<inline-code>. This param is then used here: <inline-code>const { productId } = params;<inline-code>.
Add metafield to Shopify Shop model
This metafield can also be added to your Shopify Shop model. In this app, the synced metafield is only used for testing, but it could also be used to display the currently selected product in the admin app if you want to add that on your own.
- Click on the <inline-code>shopifyShop<inline-code> data model
- Click + in the FIELDS section of the model page and give the field the identifier <inline-code>prePurchaseProduct<inline-code>
- Check the Store data from Shopify Metafield option
- Enter the metafield's namespace: <inline-code>gadget-tutorial<inline-code>
- Click the Register Namespace button
- Enter your metafield's key <inline-code>pre-purchase-product<inline-code>
- Select the Product Reference metafield type
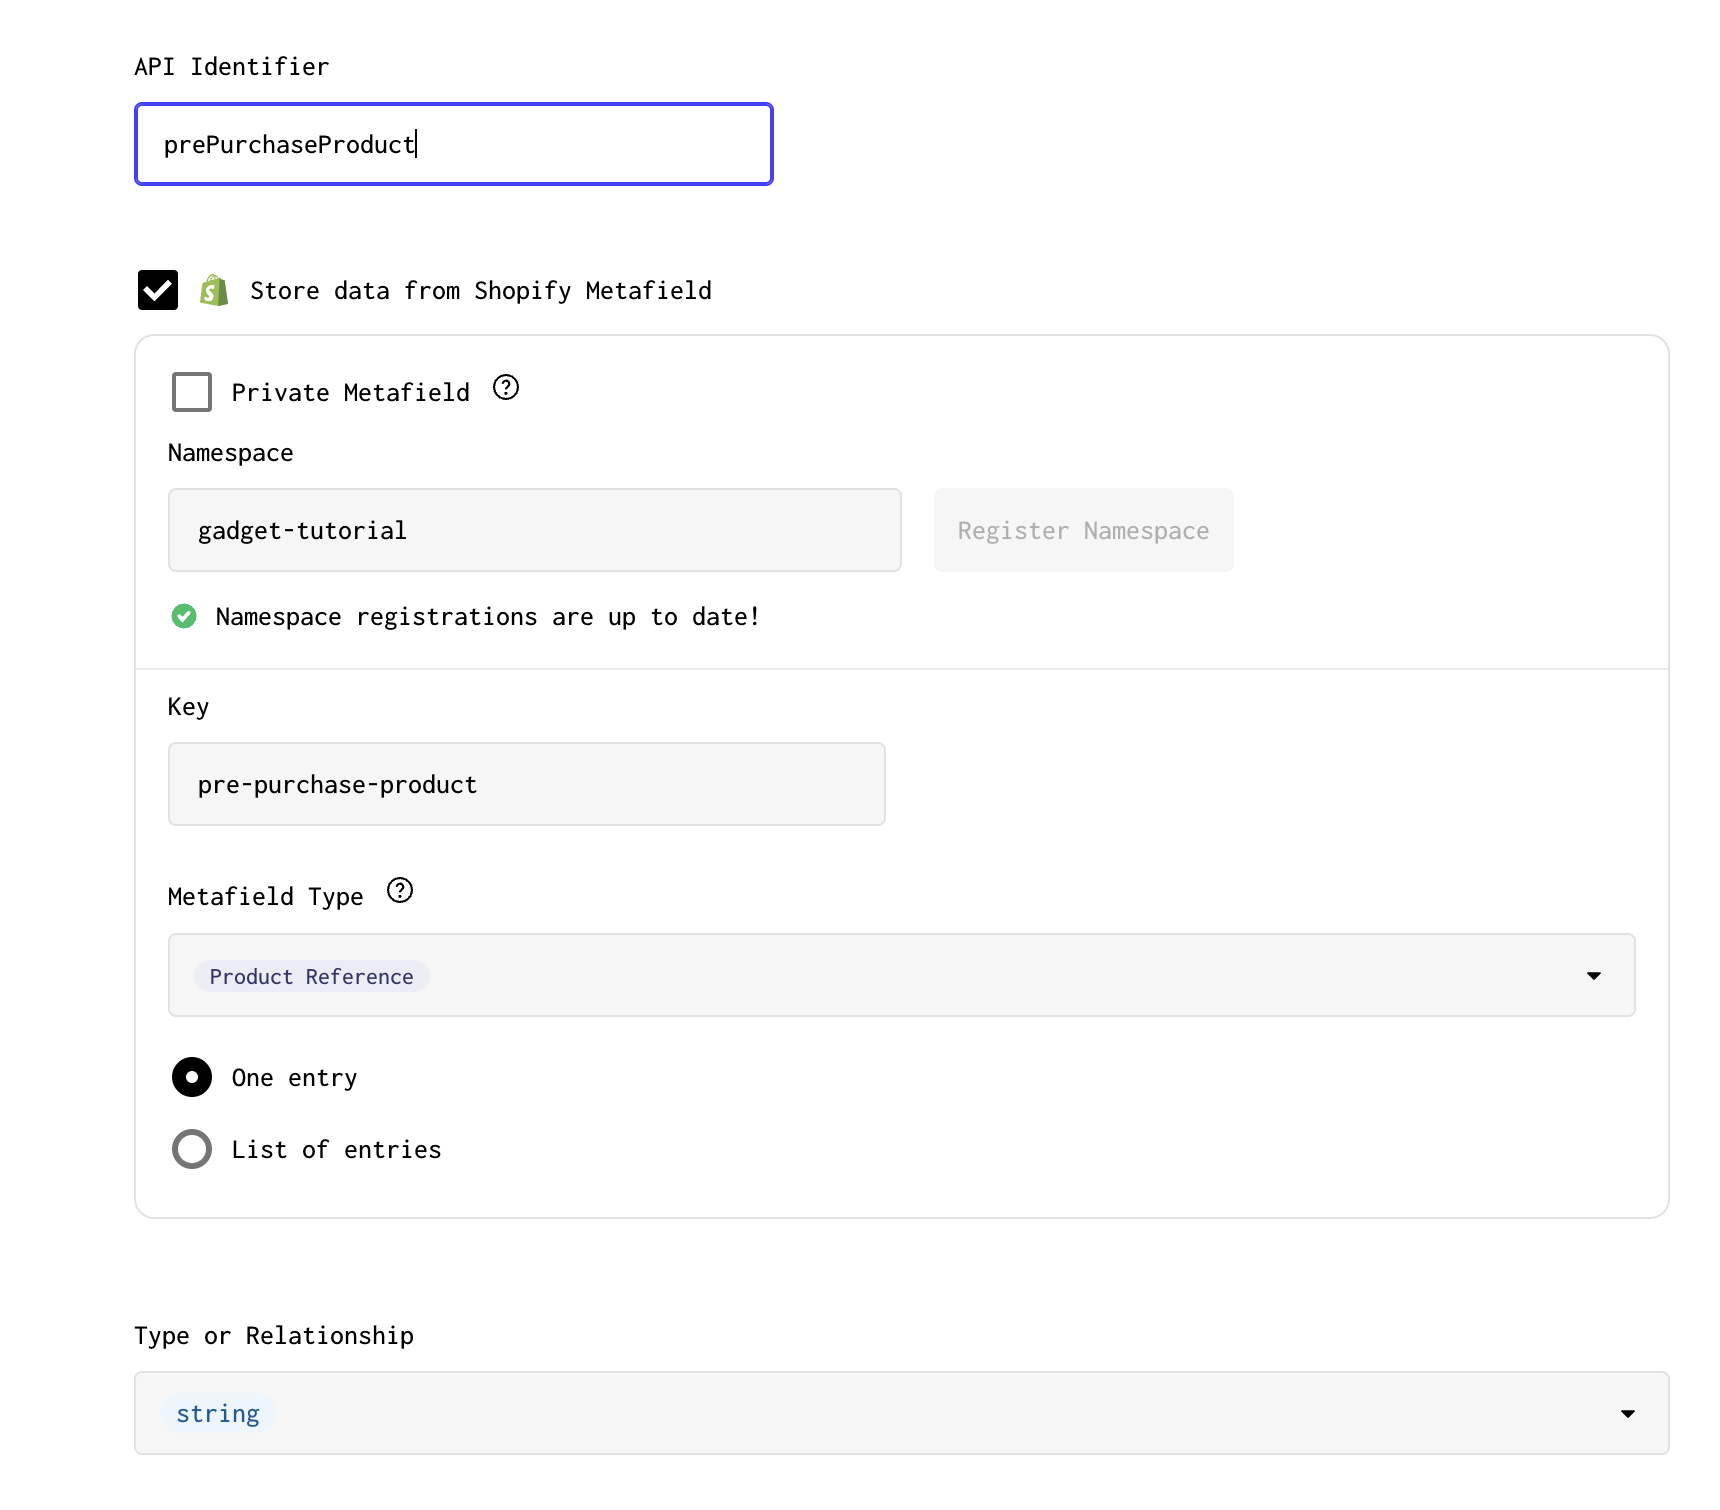
Your metafield is now set up in Gadget and you are subscribed to any metafield changes.
Update permissions on new action
You've created your new action and are almost ready to test it out! If you hook up the <inline-code>savePrePurchaseProduct<inline-code> action to your frontend now your request will return an error: <inline-code>GGT_PERMISSION_DENIED<inline-code>. By default, all custom actions (or CRUD actions for custom models) will not have permission granted to the Shopify App User access role, which is the default role used when making requests to Gadget from an embedded app.
To enable permission:
- Go to Settings -> Roles & Permissions
- Find the <inline-code>savePrePurchaseProduct<inline-code> action in the <inline-code>shopifyShop<inline-code> model
- Give the <inline-code>shopify-app-user<inline-code> role permission to access <inline-code>savePrePurchaseProduct<inline-code> by clicking the checkbox

You can now call your new action from the frontend without errors! The next step is to wire it up to the frontend.
Call new action from frontend
Return to your <inline-code>frontend/ShopPage.jsx<inline-code> file. To call your new action from the frontend, you can use another Gadget React hook: <inline-code>useAction<inline-code>.
- Import the <inline-code>useAction<inline-code> hook from <inline-code>@gadgetinc/react<inline-code>
- Paste the following line of code into <inline-code>frontend/ShopPage.jsx<inline-code>:
Similar to the <inline-code>useFindFirst<inline-code> and <inline-code>useFindMany<inline-code> hooks, <inline-code>useAction<inline-code> gives you a response object you can use to determine what to render in your frontend. The second returned parameter from <inline-code>useAction<inline-code> is a function that can be used to call your Gadget app's API. In this case, it is called <inline-code>saveProduct<inline-code>.
- Modify the <inline-code>saveSelection<inline-code> callback so that it calls <inline-code>saveProduct<inline-code>:
Now when you select a product and click Save in your admin app, the product ID will be saved to a metafield!
You can also use the <inline-code>fetching<inline-code> param, aliased as <inline-code>saving<inline-code> from the <inline-code>useAction<inline-code> hook to disable the Page primaryAction button and Select components, and the <inline-code>data<inline-code> param, aliased as <inline-code>saveResponse<inline-code> to show a success banner.
- Replace the contents of the return statement with the following JSX snippet:
You are done with the embedded app and backend. Now the only thing left to do is build the checkout UI extension.
Build a pre-purchase checkout UI extension
To generate any Shopify extension, you need to create a new Shopify CLI app. The Shopify CLI app will simply be used to manage your extensions, the rest of your app is built in Gadget. These setup steps can be used for any Shopify extension, including Checkout UI extensions and Functions!
- Create a new Shopify CLI app by running the following command in your local terminal
- Select the Start by adding your first extension option
- Once the app is generated, cd into the app's root
- Generate a checkout UI extension:
Make sure you connect to the same Partners app you used to set up your Shopify connection in Gadget, and select the same development store you installed your app on.
The extension code sample below is written in JavaScript React.
This creates an extensions folder at the root of your CLI app. A pre-purchase-ext folder containing your extension code will also be created. Shopify checkout UI extensions have two files that you will need to edit, a configuration file: <inline-code>shopify.extension.toml<inline-code> and the extension source: <inline-code>src/Checkout.jsx<inline-code>. Both of these files will require some changes to pull in your metafield as input.
Checkout UI extension API
Checkout UI extensions have their own API and set of components, separate from the Admin API and Polaris component library. More details about different components and endpoints can be found in Shopify's Checkout UI extension API docs.
Modify the configuration file
The first thing you need to do is modify your extension's <inline-code>shopify.extension.toml<inline-code> file. You need to define your metafield as input and allow access to the Storefront API.
- Paste the following into <inline-code>shopify.extension.toml<inline-code>:
The <inline-code>[[extensions.metafields]]<inline-code> definition allows you to pull in the metafield as input to your extension. The <inline-code>api_access<inline-code> <inline-code>[extensions.capabilities]<inline-code> setting was also enabled, which allows you to query using the Storefront API.
Write checkout UI extension code
Now for the extension itself. This borrows heavily from Shopify's own pre-purchase tutorial, with a couple small modifications. The entire <inline-code>src/Checkout.jsx<inline-code> code file is provided, with additional details provided below the snippet.
- Paste the following into your extension's <inline-code>src/Checkout.jsx<inline-code> file:
Shopify goes though a step-by-step build of the extension in their tutorial. The differences will be highlighted here. Notice that none of the extension code is Gadget-specific! When working with Shopify checkout UI extensions, you are largely working completely in the Shopify ecosystem.
To pull in your metafield, the <inline-code>useAppMetafields()<inline-code> function is called. This, along with all imported components and APIs, is imported from the <inline-code>@shopify/ui-extensions-react/checkout<inline-code> package:
This metafield value, which contains the product ID, is then used to pull the first product variant and first product image available using the Storefront API. The query is wrapped in a <inline-code>useEffect<inline-code> with <inline-code>prePurchaseProduct<inline-code> as the input. The resulting data is then saved to the product state.
Skip the Storefront API call
There is a good chance you want to pick a particular variant and image in the Shopify admin app when selecting a product for pre-purchase. Or maybe the customer can pick a variant! All this can be done with additional metafields or additional code in the checkout UI extension.
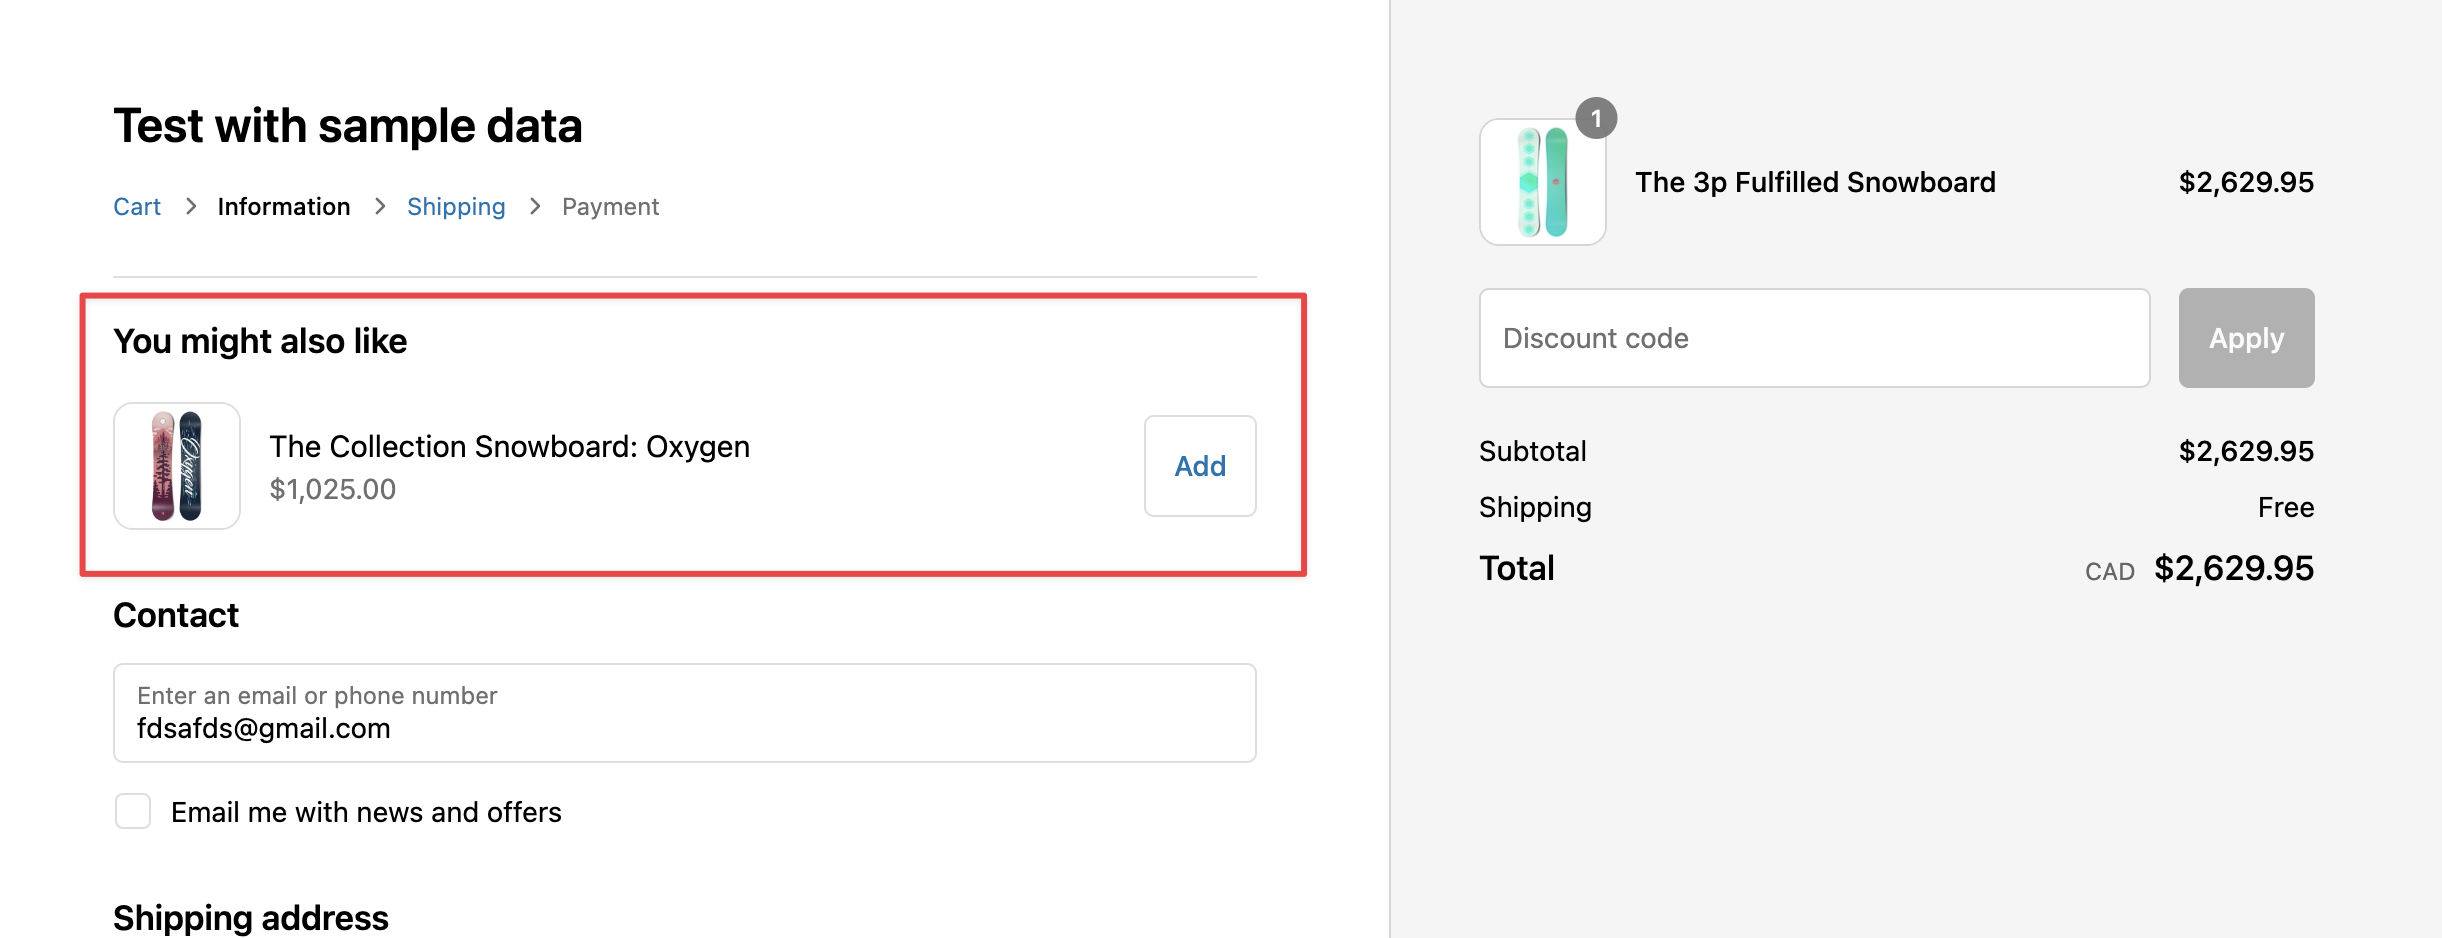
There is some code to check if the product is already in the cart. If it is, the pre-purchase offer is skipped. A null return value simply means that the extension will not be rendered in the checkout:
Finally, the last block of code is the return statement that will render the UI extension. The most interesting block of code is the onPress function param on the Button component. It uses the <inline-code>applyCartLinesChange<inline-code> function to add the additional product variant to the cart.
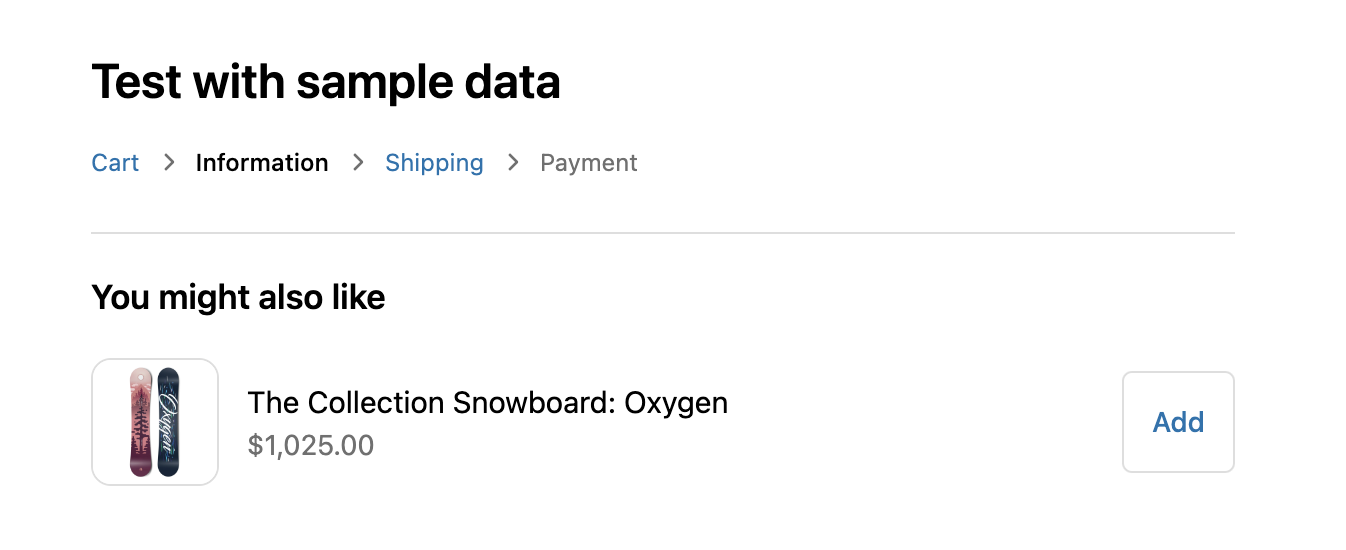
Test your extension
Now that you've built your extension, you need to test it out in a checkout.
- Start the CLI app and extension by running npm run dev or yarn dev from your CLI app's root
- If you haven't already, make sure you select the same development store you used to connect your Gadget app to Shopify!
- Open the Preview URL to access the Shopify Developer Console and open the provided Checkout UI extension URL
- Your extension should be previewed in the checkout!
Deploy your extension
Shopify hosts all checkout UI extension code for you. You don't need to set up hosting yourself, but you do need to deploy your extension to Shopify's infrastructure.
- Stop the dev command you ran in the previous step and run <inline-code>npm run deploy<inline-code> or <inline-code>yarn deploy<inline-code> to publish your extension to Shopify
Now you need to place your extension in the checkout so it is visible for shoppers!
- Go to your development store
- Click Settings -> Checkout -> and then the Customize button for the current theme
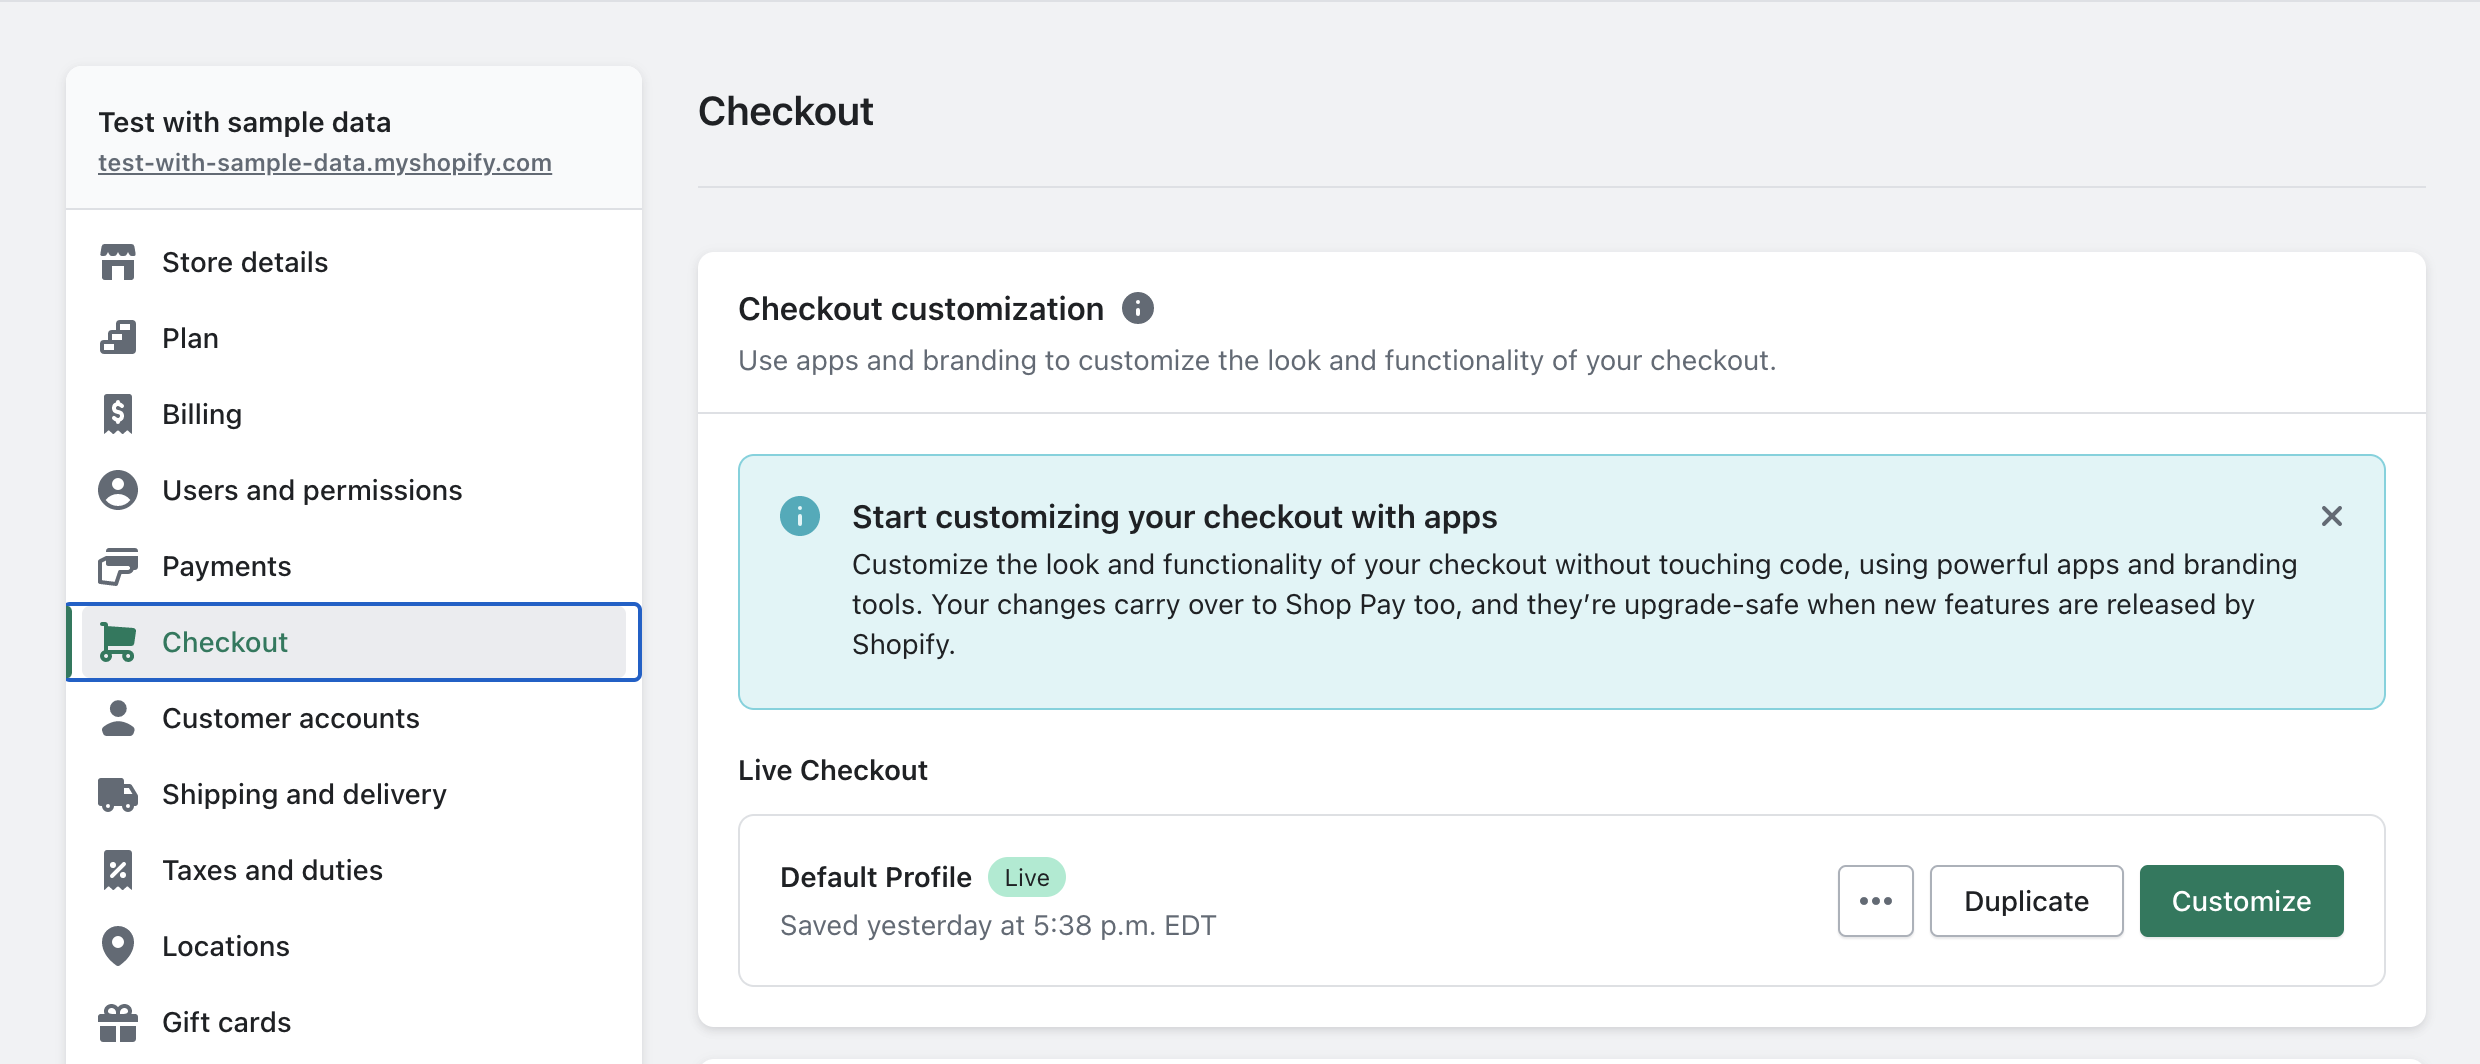
- Click Add app in the bottom of the right panel of the checkout editor
- Select your extension, and drag and drop it in the checkout editor to place it
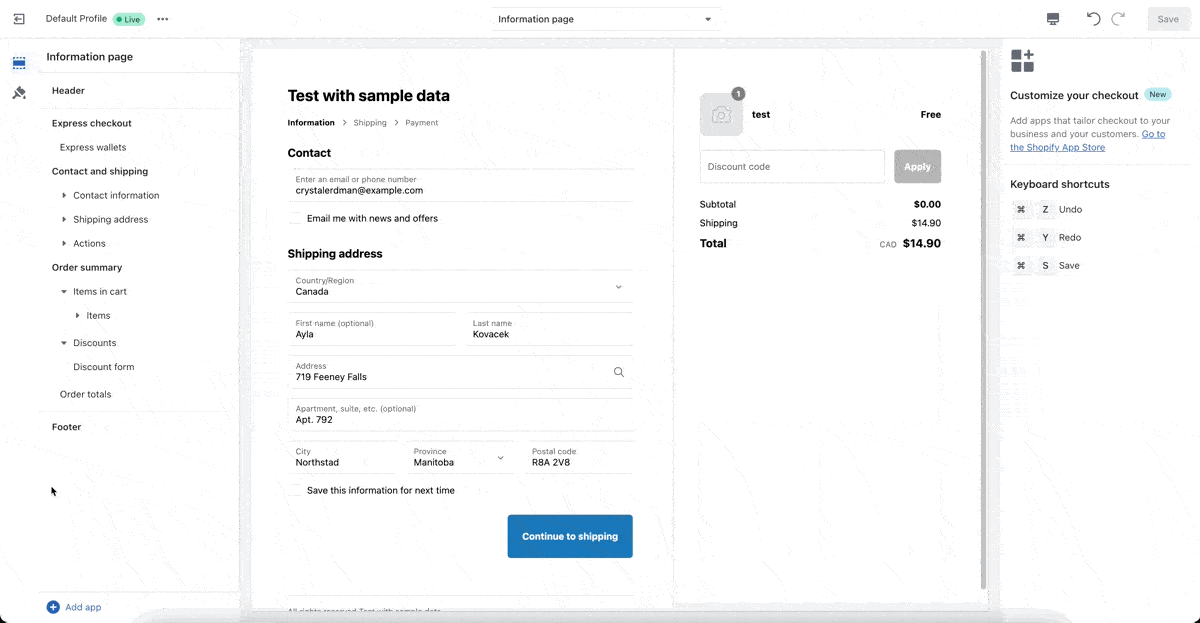
- Click Save in the top right corner of the screenshot
You should now be able to see your extension when you go through your development store's checkout!
Congrats! You have successfully built a full-stack pre-purchase app that includes an admin-embedded frontend and checkout UI extension!
Next steps
Have questions about the tutorial? Join Gadget's developer Discord to ask Gadget employees and join the Gadget developer community!


