Understanding Shopify checkout UI extensions: What they are, and how to build with them

Recently there’s been an increased interest in one of Shopify’s new technologies, checkout UI extensions. But what are they, why should app developers use them, and what can you build with them? We’ll cover it all in this blog post.
What are checkout UI extensions?
Checkout UI extensions were introduced as a new way for Plus merchants to enhance and customize their checkout experience using predefined components and APIs.
Why not just use checkout.liquid?
Although making changes to checkout.liquid is the standard today, Shopify has announced they will be deprecating checkout.liquid. Any functionality you build with it is going to be short-lived, so if you want to future-proof your app, building with the replacements, checkout UI extensions and Functions, is the path forward.
With checkout.liquid you have to manually edit the liquid files for each store to make sure your code doesn't interfere with anything else. That could get hairy, and is one of the reasons why Shopify is phasing out checkout.liquid in favor of pre-defined and predictable components like checkout UI extensions and Functions.
If you’re a developer, this opens up the opportunity to build checkout functionality that you can easily scale to many merchants through the app store.You can distribute your extension to Shopify Plus merchants through the Shopify App Store without having to worry about how it’ll interact with other checkout functionality, while also making extensibility accessible to more merchants.
What functionality do they support?
Unlike checkout.liquid that allows you to do almost anything, anywhere, checkout UI extensions are clearly defined building blocks with limitations of what you can do, how, and where. Here are some of the highlights
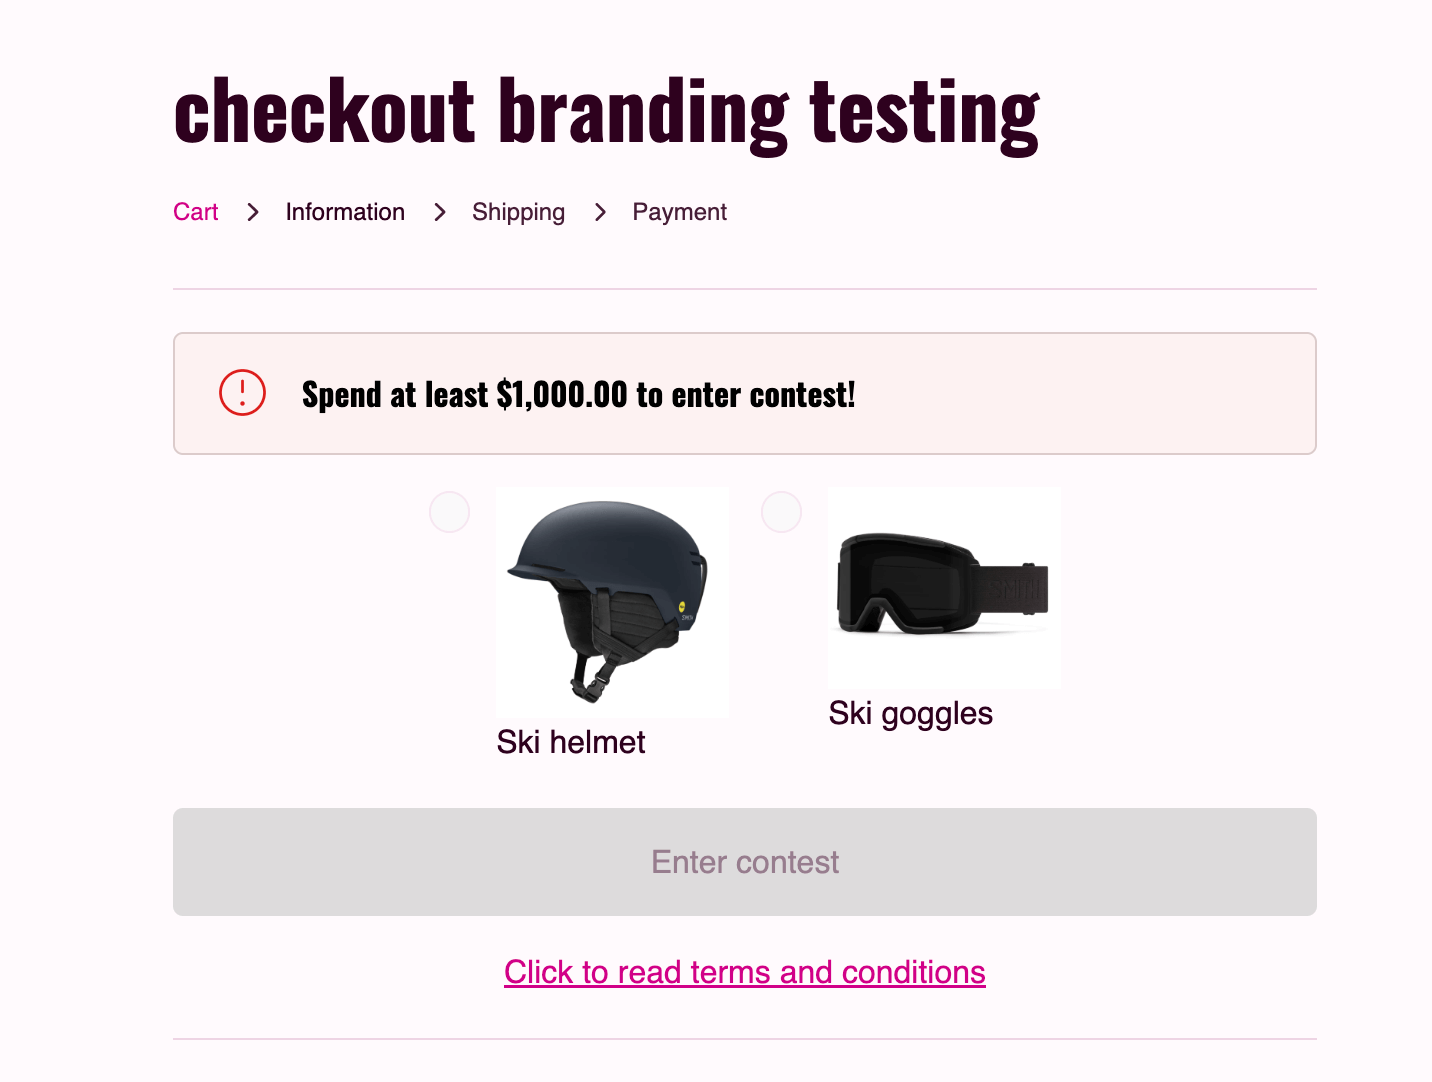
Pre-purchase product offers let you present additional products in the checkout, based on things like what’s already in the cart, customer characteristics, or other data points stored in Shopify or collected during checkout. You can think of it as an upsell, trying to provide buyers with additional items that you think they may be interested in.
Custom banners are pretty much what’s in the name. You can dynamically add custom banners with messages in checkout. These are great if you want to inform customers that orders placed before date X will be delivered by date Y, something a lot of merchants need during the holidays. Other examples include orders with a particular item in the customer’s cart typically take 2 days longer to ship, or that this week 1% of all sales are donated to a particular cause. Whatever the circumstances, whatever the message, and whatever the reason, you can display a banner to buyers when you need to.
Custom fields enable you to collect additional information from your buyers at various stages throughout the checkout. Say you want to allow buyers to add a message to a gift, give shipping instructions, or maybe you need to collect any other information. With custom fields, you can define what you want to collect, from who, where, and when, and save the entered data using metafields.
Client-side validation allows you to halt the ability for buyers to progress their checkout flow based on some validation logic defined in your extension. Maybe you want to temporarily stop orders from being placed by buyers in a particular country or location, and combine it with a custom banner explaining why. You could also pair it with custom fields, and use it to require a buyer to confirm their age is above 18 before completing their purchase. Or maybe you want to disable the ability for buyers to buy more than one unit of a particular limited product.
Order status page extension, currently in development preview, enables you to collect or display information on the order status page after a purchase is completed. Use it to highlight an upcoming event in the city your customer is shipping to, or run a post-purchase survey without getting in the way while customers complete their purchase. Similar to custom fields, the data you collect from your buyers can be stored using metafields in Shopify.
Similar to checkout.liquid, checkout UI extensions are only available to Plus merchants, but as we mentioned previously, what you can build with them is much more narrow. That means that even if you can do a particular thing with checkout.liquid, it doesn’t mean you can with checkout UI extensions or their sibling, Shopify Functions. Checkout extensions do have the benefit of having multiple deployed all at once through a single app, making them easier to combine and keep updated compared to checkout.liquid.
The deprecation of checkout.liquid is fast approaching, so it’s time for developers to learn how to build with these new components. Now that you’ve got some ideas, let’s dig into how to build your first Checkout UI Extension.
How to get started building
Many Shopify devs we’ve spoken to perceive the barrier to get started with checkout UI extensions as high. But it really isn’t that hard. Armed with the information below, we guarantee you’ll get your first Shopify checkout UI extension up and running in no time.
If you want to just dive right in, we suggest following our tutorial that teaches you the steps to create a checkout UI extension from scratch in less than 20 minutes. Because it walks you through the development flow, we won’t cover that here. Instead, we’ll cover useful insights, gotchas, and provide some Shopify resources we’ve found to be helpful in our own extension development.
A few good-to-knows
To build checkout UI extensions you have to use the Shopify CLI. It’s not optional, it’s a requirement, because it’s the only way to generate extensions. If you’ve never used it before, don’t worry, the tutorial we linked above will show you how.
Checkout UI extensions are deployed to and hosted on Shopify's infrastructure. This means you don't need to worry about managing (and paying for) any additional services to add a checkout UI extension to an app. However, this means that an app is a requirement for merchants to install an app to add and activate an extension on their store. This is the same pattern Shopify has established for Functions, which also run on Shopify’s infrastructure. And because of this, it means you can distribute any extension you build at scale through the app store.
An embedded app can be used to allow merchants to define custom input, stored in metafields, for your extensions It can be anything from allowing them to select which products and item limits to apply a validation to, what copy to display in a banner, or the selection of products that should show in a pre-purchase offer. And you can bundle several extensions in the same app, allowing you to offer several types of checkout configurability from a single app.
Although the extensions allows you to change what the checkout looks like, it can’t override the checkout CSS or merchant’s own branding. It means that you build functionality that will behave the same across all checkouts, but look slightly different depending on which store it’s installed on.
The tale of two files
Once you’ve used the Shopify CLI to generate your extension scaffolding there are two files you’ll need in order to make changes: <inline-code>shopify.ui.extension.toml<inline-code> and <inline-code>index.jsx<inline-code>. You can think of the toml file as your extension’s configuration, which defines things like if your extension should have access to the storefront API, what metafields it can read from, and if it should be allowed to block progress in checkout. It’s worth noting that merchants can disable the blocking functionality, if they chose to do so.
You can configure your extension to have access to external resources via APIs that you can access in your logic, but be aware that Shopify reviews and approves apps that request this on a case-by-case basis. So there’s no guarantee that what you build will be approved by Shopify.
You also configure where in the checkout your extension should appear using the toml file. Depending on the use-case, your extension can either choose to use a dynamic placement, where merchants can select where it should be placed, or you can define a static placement to ensure it always shows on a particular page and location. If you’re curious about the options, Shopify provides a handy visual overview of the available extension points.
To learn more about the toml file and what settings you can define in it, make sure to read the Shopify documentation.
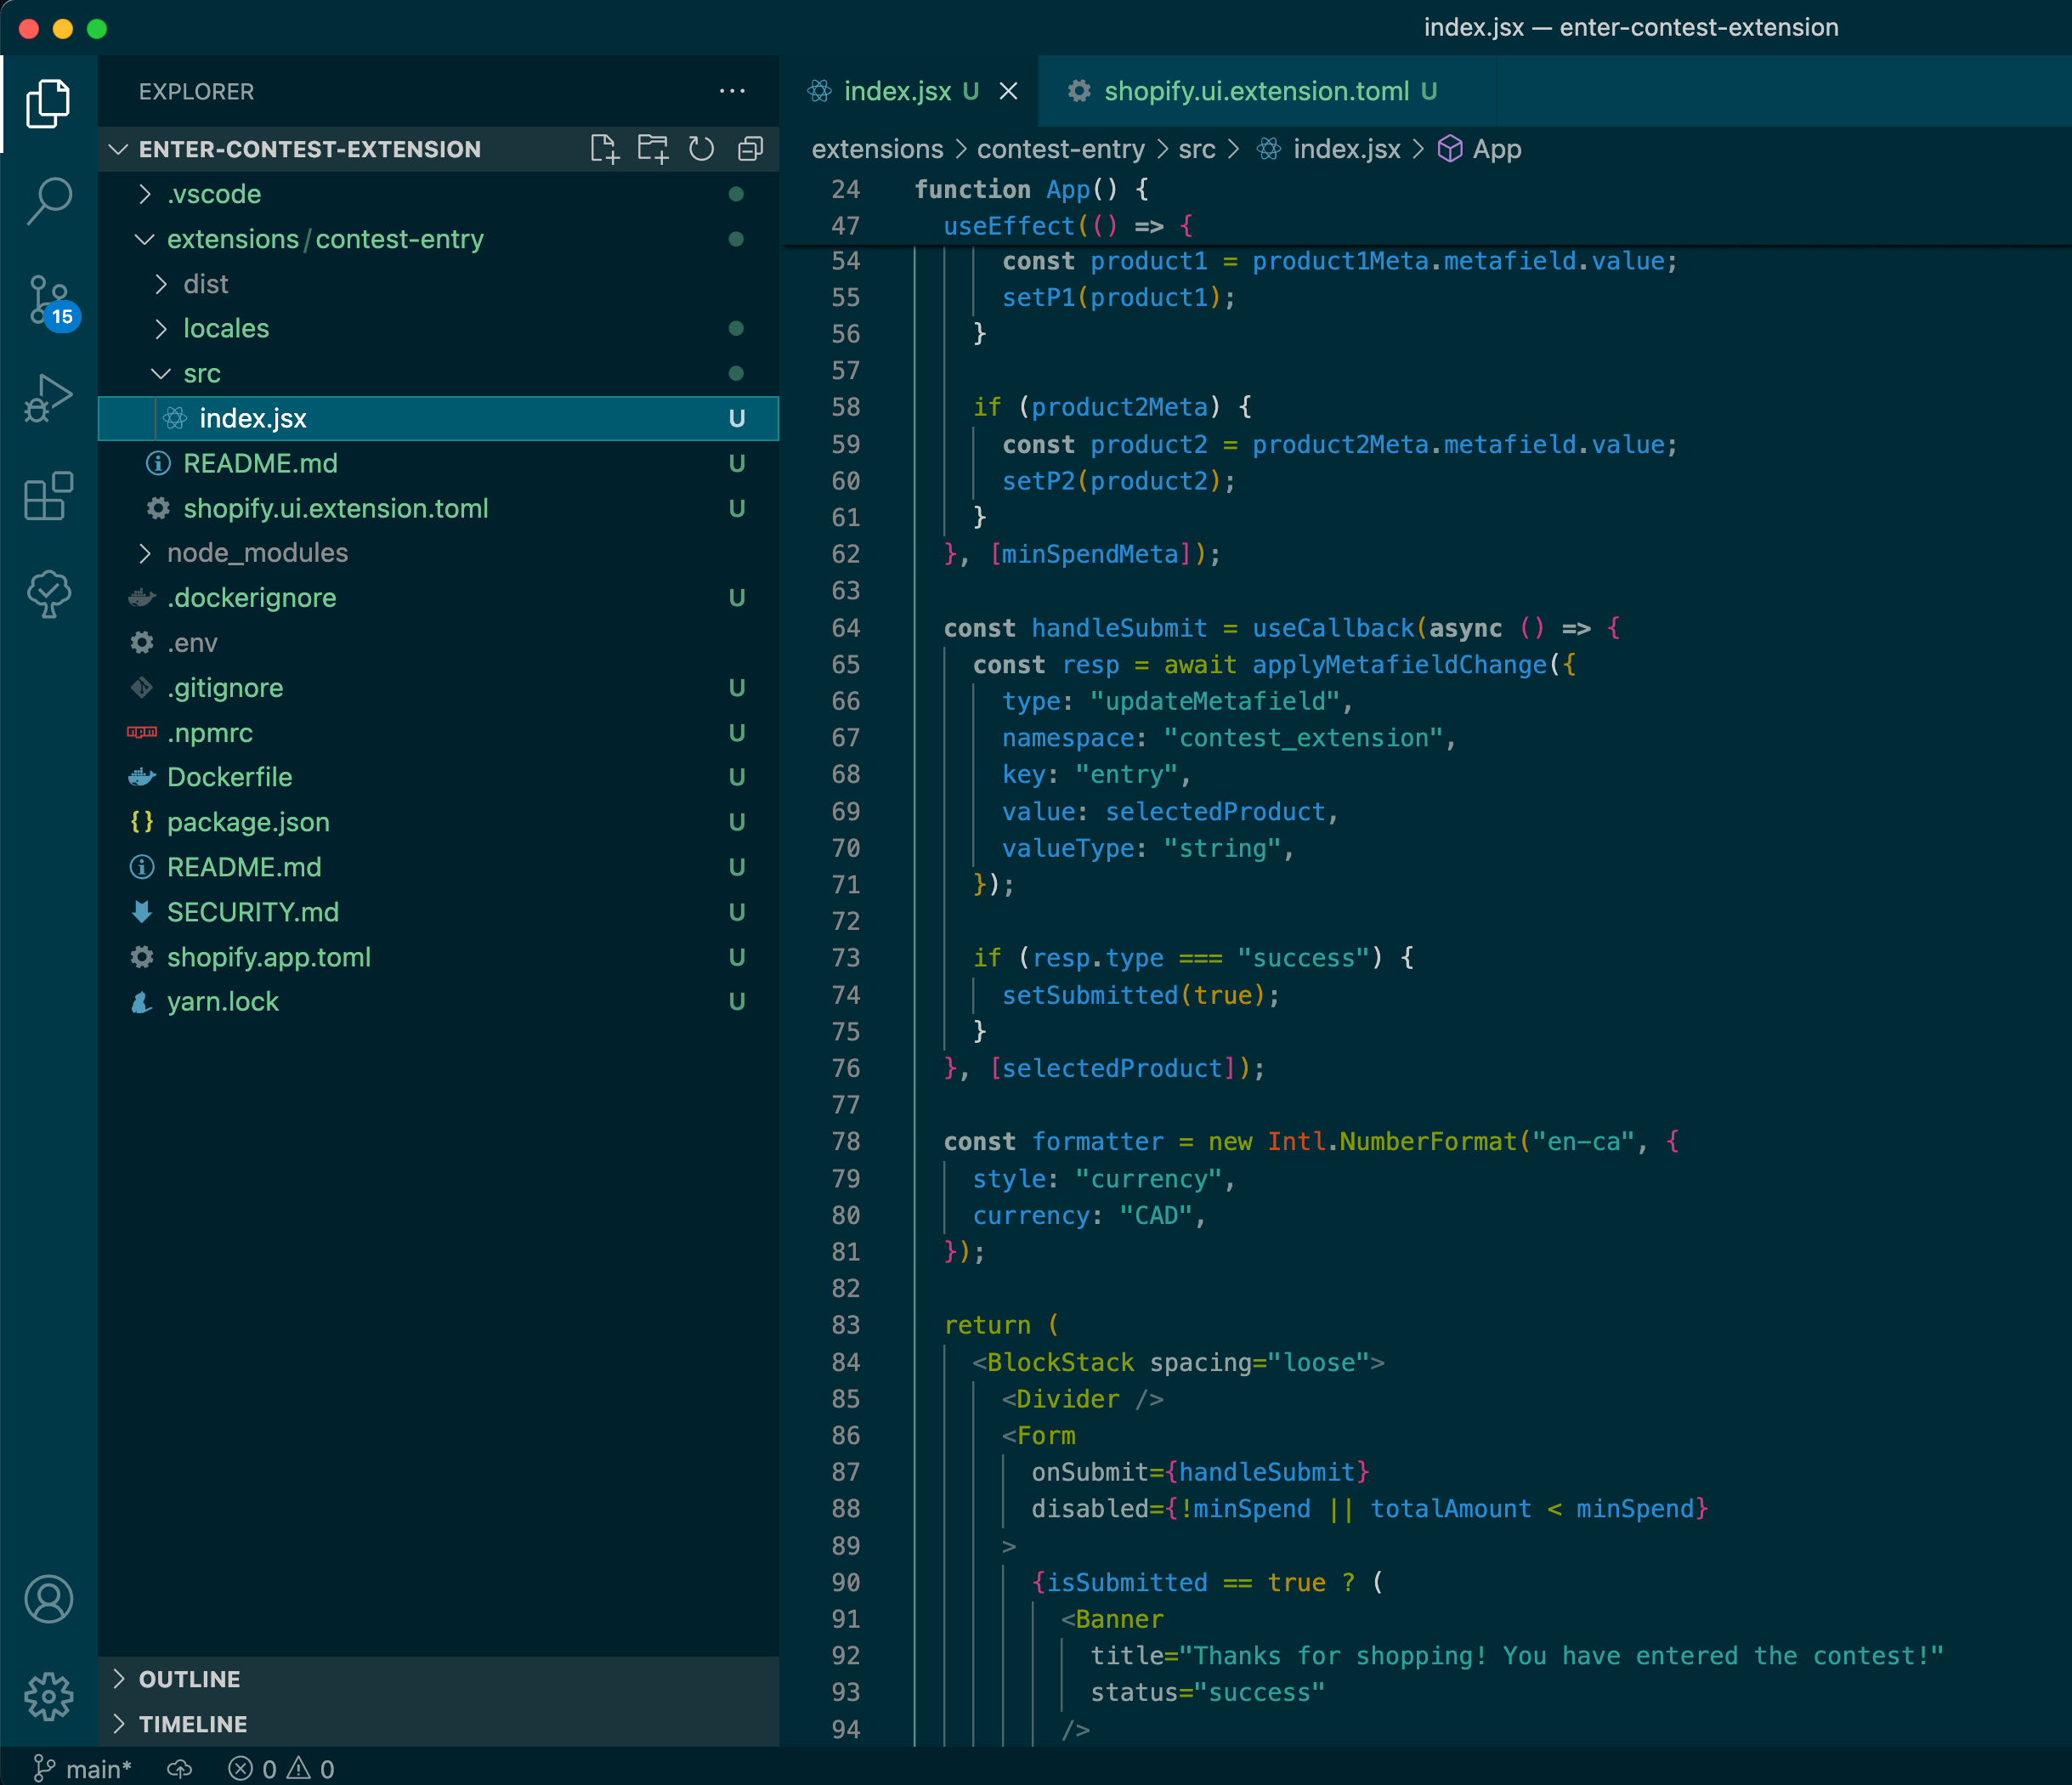
Your actual extension code, including logic and components, is found in the <inline-code>index.jsx<inline-code> file. You can use GraphQL to fetch data, JavaScript to mutate it, and React to display it. There are other options when it comes to language, but for simplicity we’ve chosen to focus on those.
Something to be aware of however is that you’re limited to using Shopify’s own buyer-facing UI component library and out-of-the-box React/JS functionality. This means that you don’t have access to all of the components that are available in Polaris, and in some cases where components are available in both libraries, there is a different API. For example, the Checkout UI Button component has an onPress action, whereas the Polaris button has onClick and onKeyPress callbacks.
Two resources we’ve found useful but hard to find at times, are which fields and resources you can access through the Shopify Storefront API, and all checkout UI extension react hooks you can use in your extension logic.
Develop, deploy, distribute
As we explain in our extensions tutorial, you develop your extension locally, test it using the Shopify CLI-provided tunnel, and deploy it to Shopify once it's ready to be used by merchants. But something we’ve seen several developers find confusing is why a deployed extension doesn’t show up in checkout after a merchant has installed it.
Merchants have to manually add any checkout UI extension to their checkout using the admin storefront and checkout editor in order for them to appear. If you’ve configured your extension to use a dynamic rather than fixed mount point, they can drag and drop it to where they want it to appear. If you want your extension to be deployed immediately upon install, it’s best to use a fixed mount point. Otherwise, be sure to include some instructions for first-time users, as this will be a learning curve for both developers and merchants alike.
This all may sound daunting, but we’re confident that between our tutorial and the knowledge in this blog post you’re ready to create and ship your first checkout UI extension. If you have any questions, please reach out in our developer Discord.


