Build an Automated Product Tagging app for a Shopify store
Looking to build with Gadget? You can follow all the latest tutorials and guides in our docs. Learn to build an automated product tagger here.
A Shopify merchant needs an automated way to tag products being added to their Shopify store inventory. They source hundreds of products weekly from various dropshippers and upload the unstructured data to Shopify programmatically. Because the data is unstructured, Shopify is unable to power the merchant's storefront search. While the merchant can add tags inside the Shopify Admin, the experience of doing this on hundreds of products weekly is time-consuming.
To solve this, the merchant wants to build a custom Shopify app on Gadget that will run every new product description through an automated tagging script.
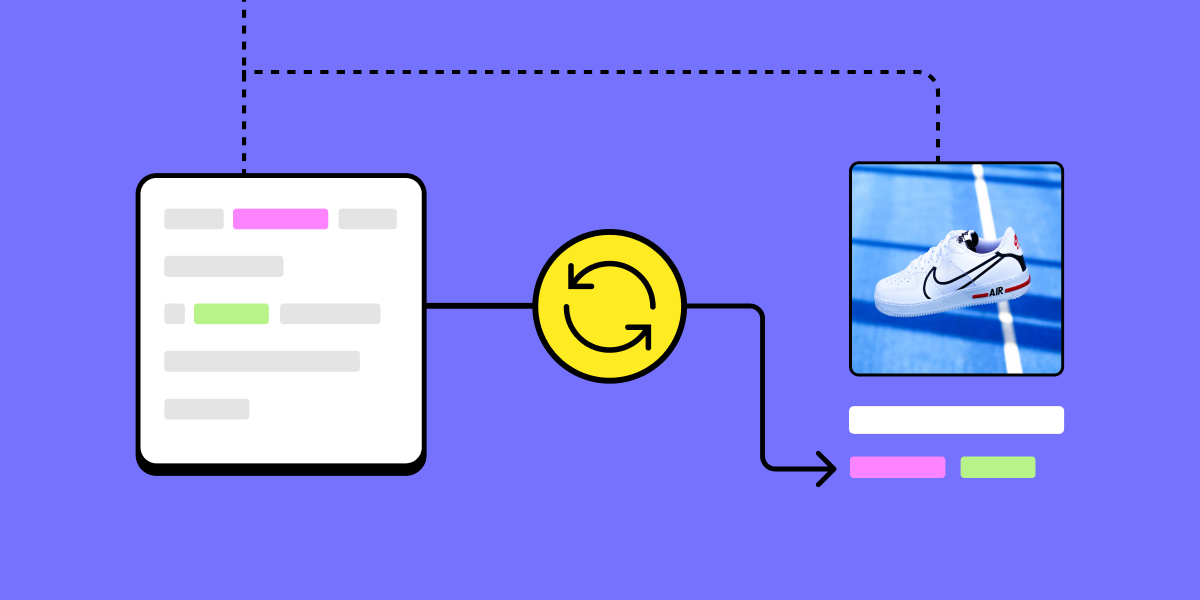
In this example, we'll show you how to build a custom product tagging app that listens to the product/create and product/update webhooks from Shopify, runs product descriptions through a tagging script, and sets tags back in Shopify.
Requirements
To get the most out of this tutorial, you will need:
- a Shopify Partners account
- a development store
- at least one product in your store that has a product description
You can fork this Gadget project and try it out yourself.
You will still need to set up the Shopify Connection after forking. Continue reading if you want to learn how to connect Gadget to a Shopify store!

Step 1: Create a Gadget app and connect to Shopify
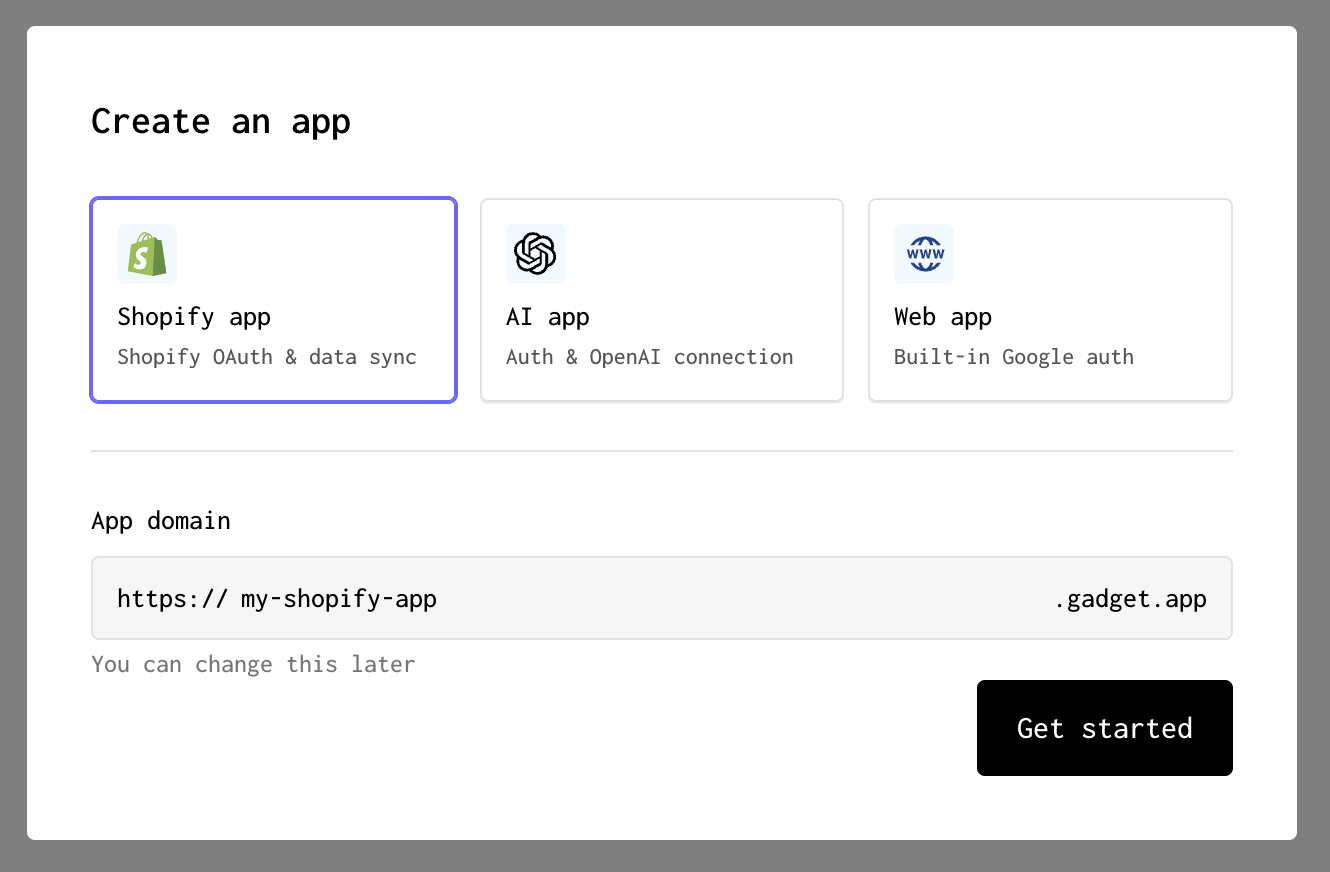
Our first step will be to set up a Gadget project and connect our backend to a Shopify store via the Shopify connection. Create a new Gadget application at gadget.new and select the Shopify app template.
Because we are adding an embedded frontend, we are going to build an app using the Partners connection.
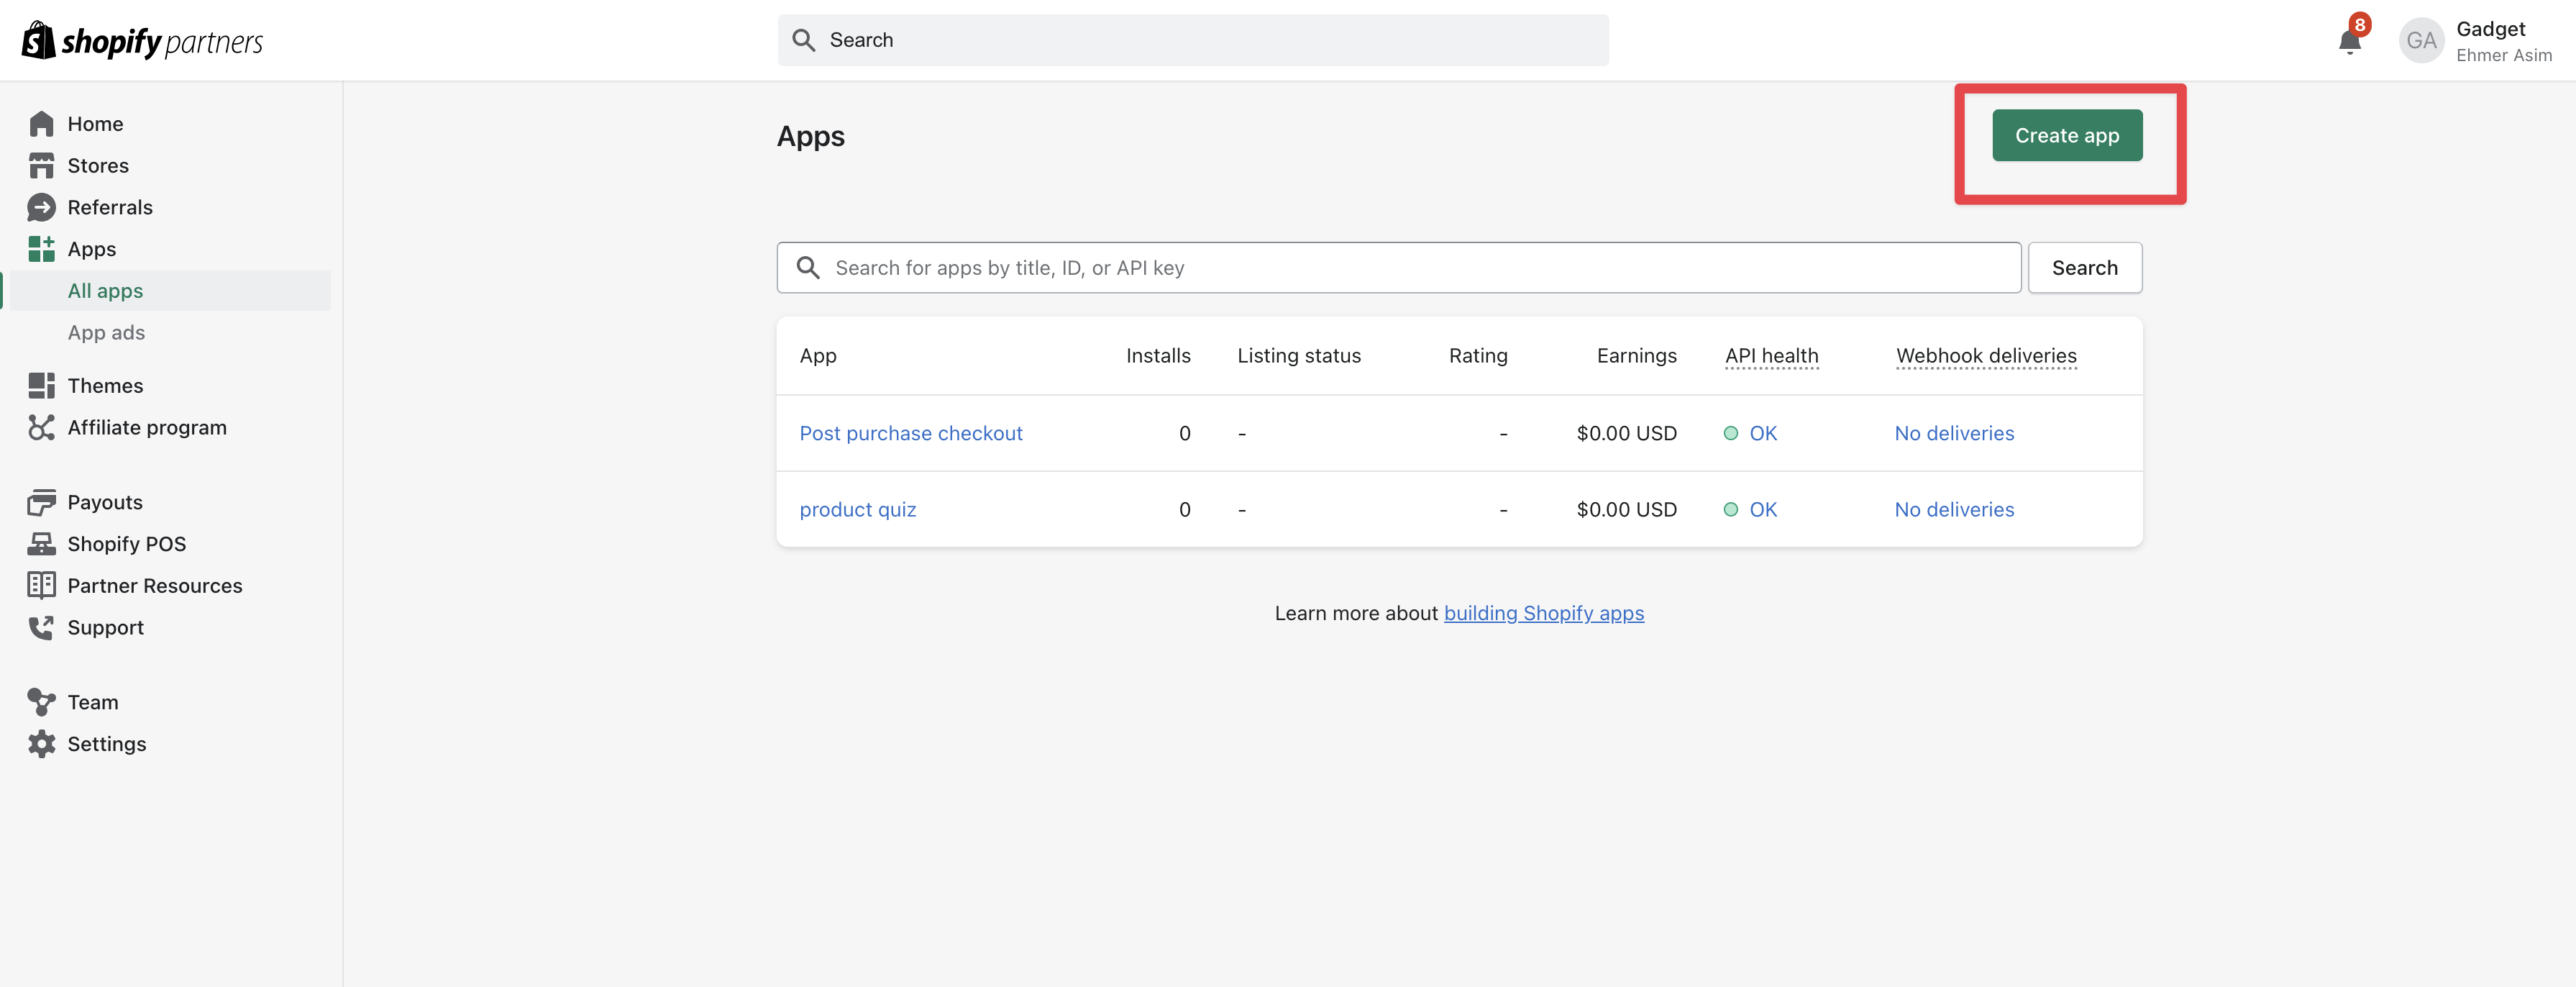
Both the Shopify store Admin and the Shopify Partner Dashboard have an Apps section. Ensure that you are on the Shopify Partner Dashboard before continuing.
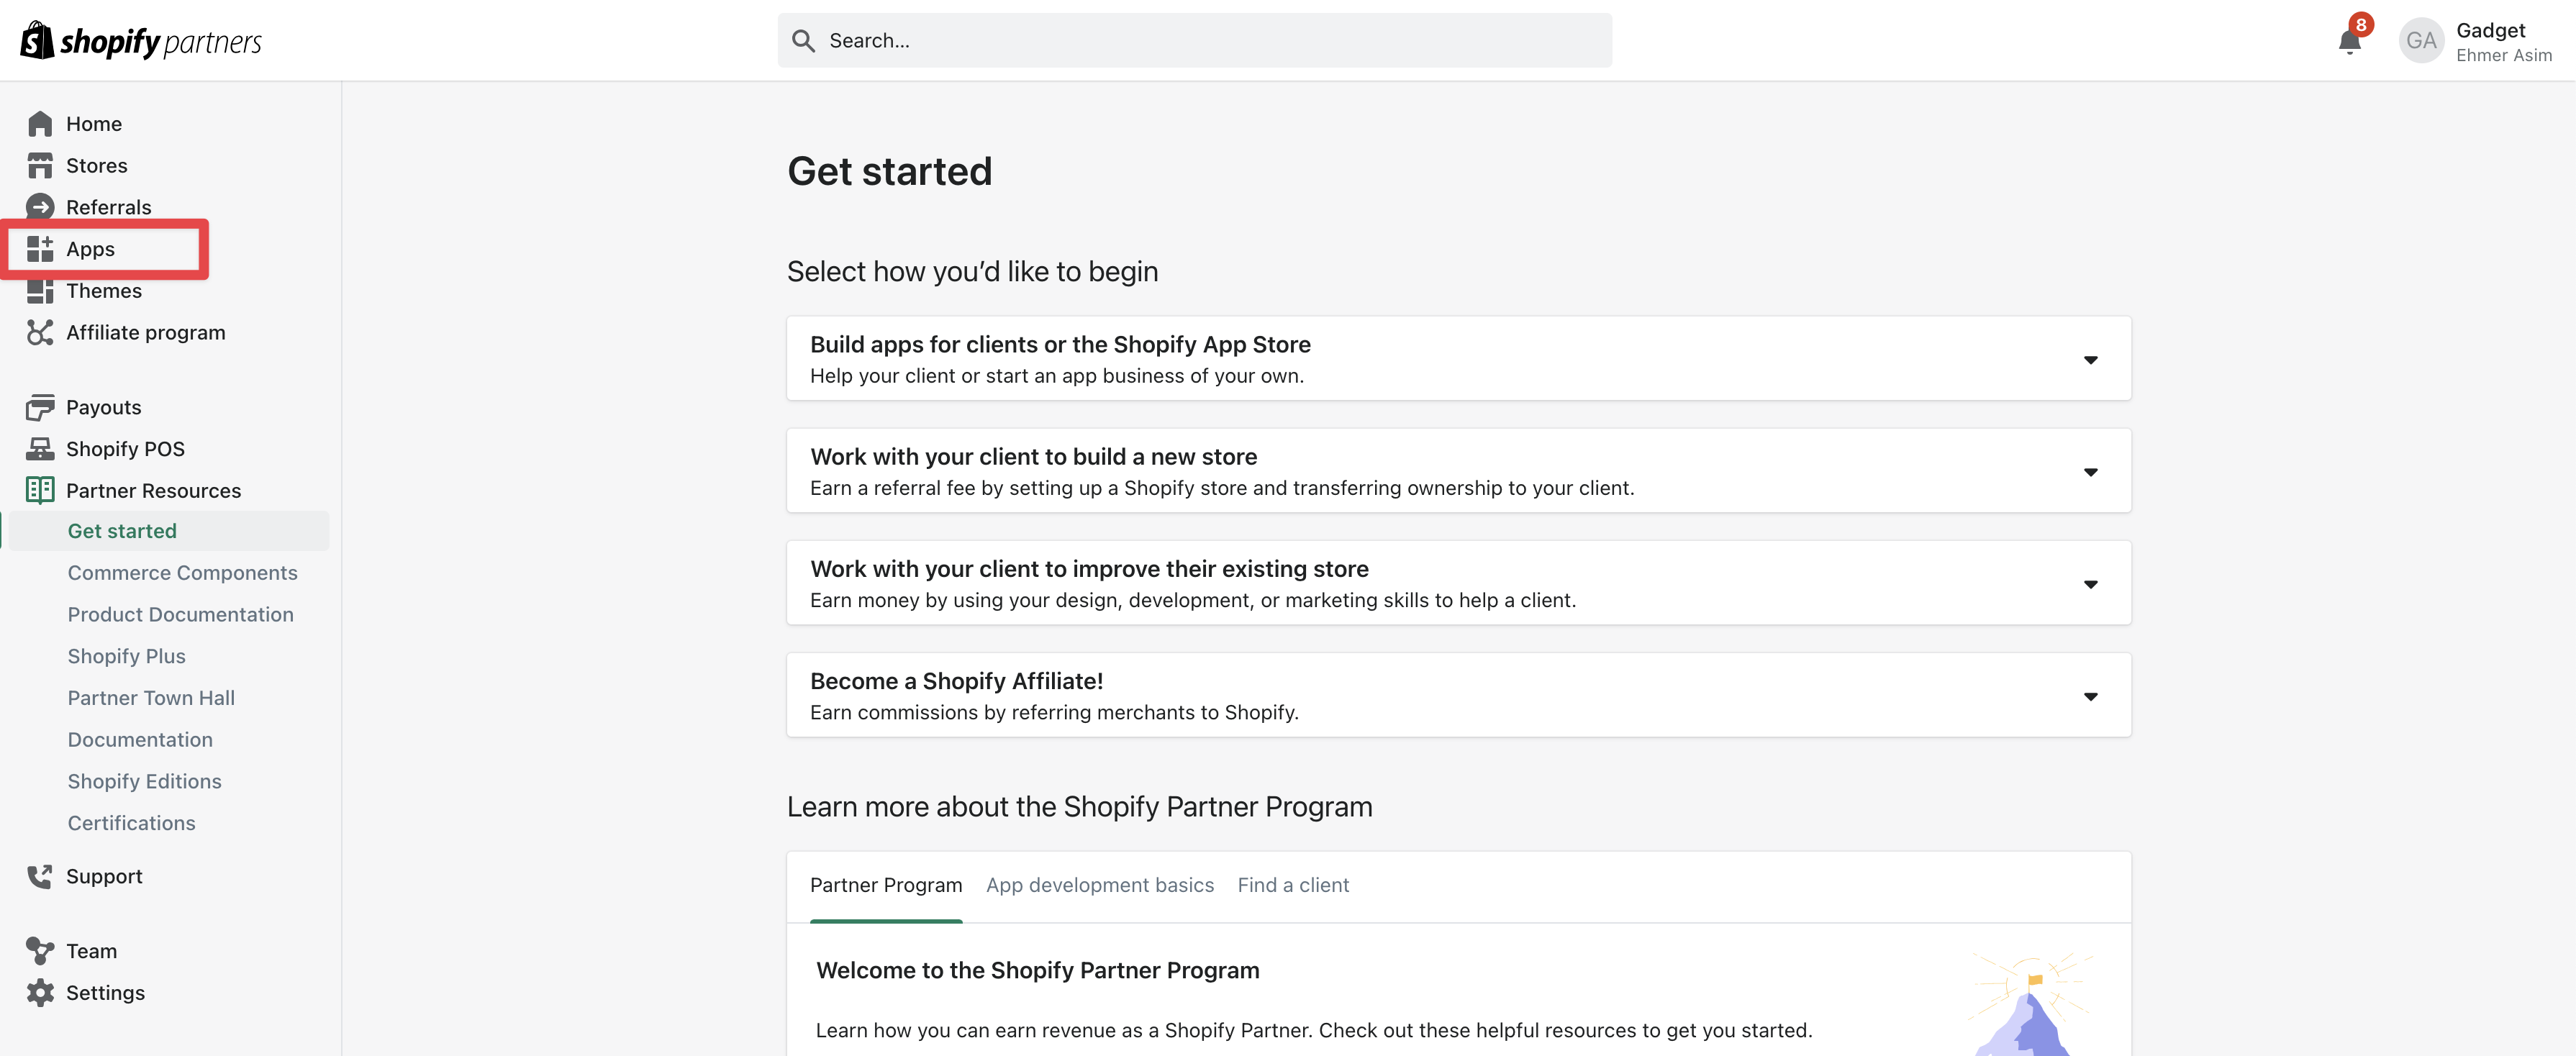
- Click the Create app button
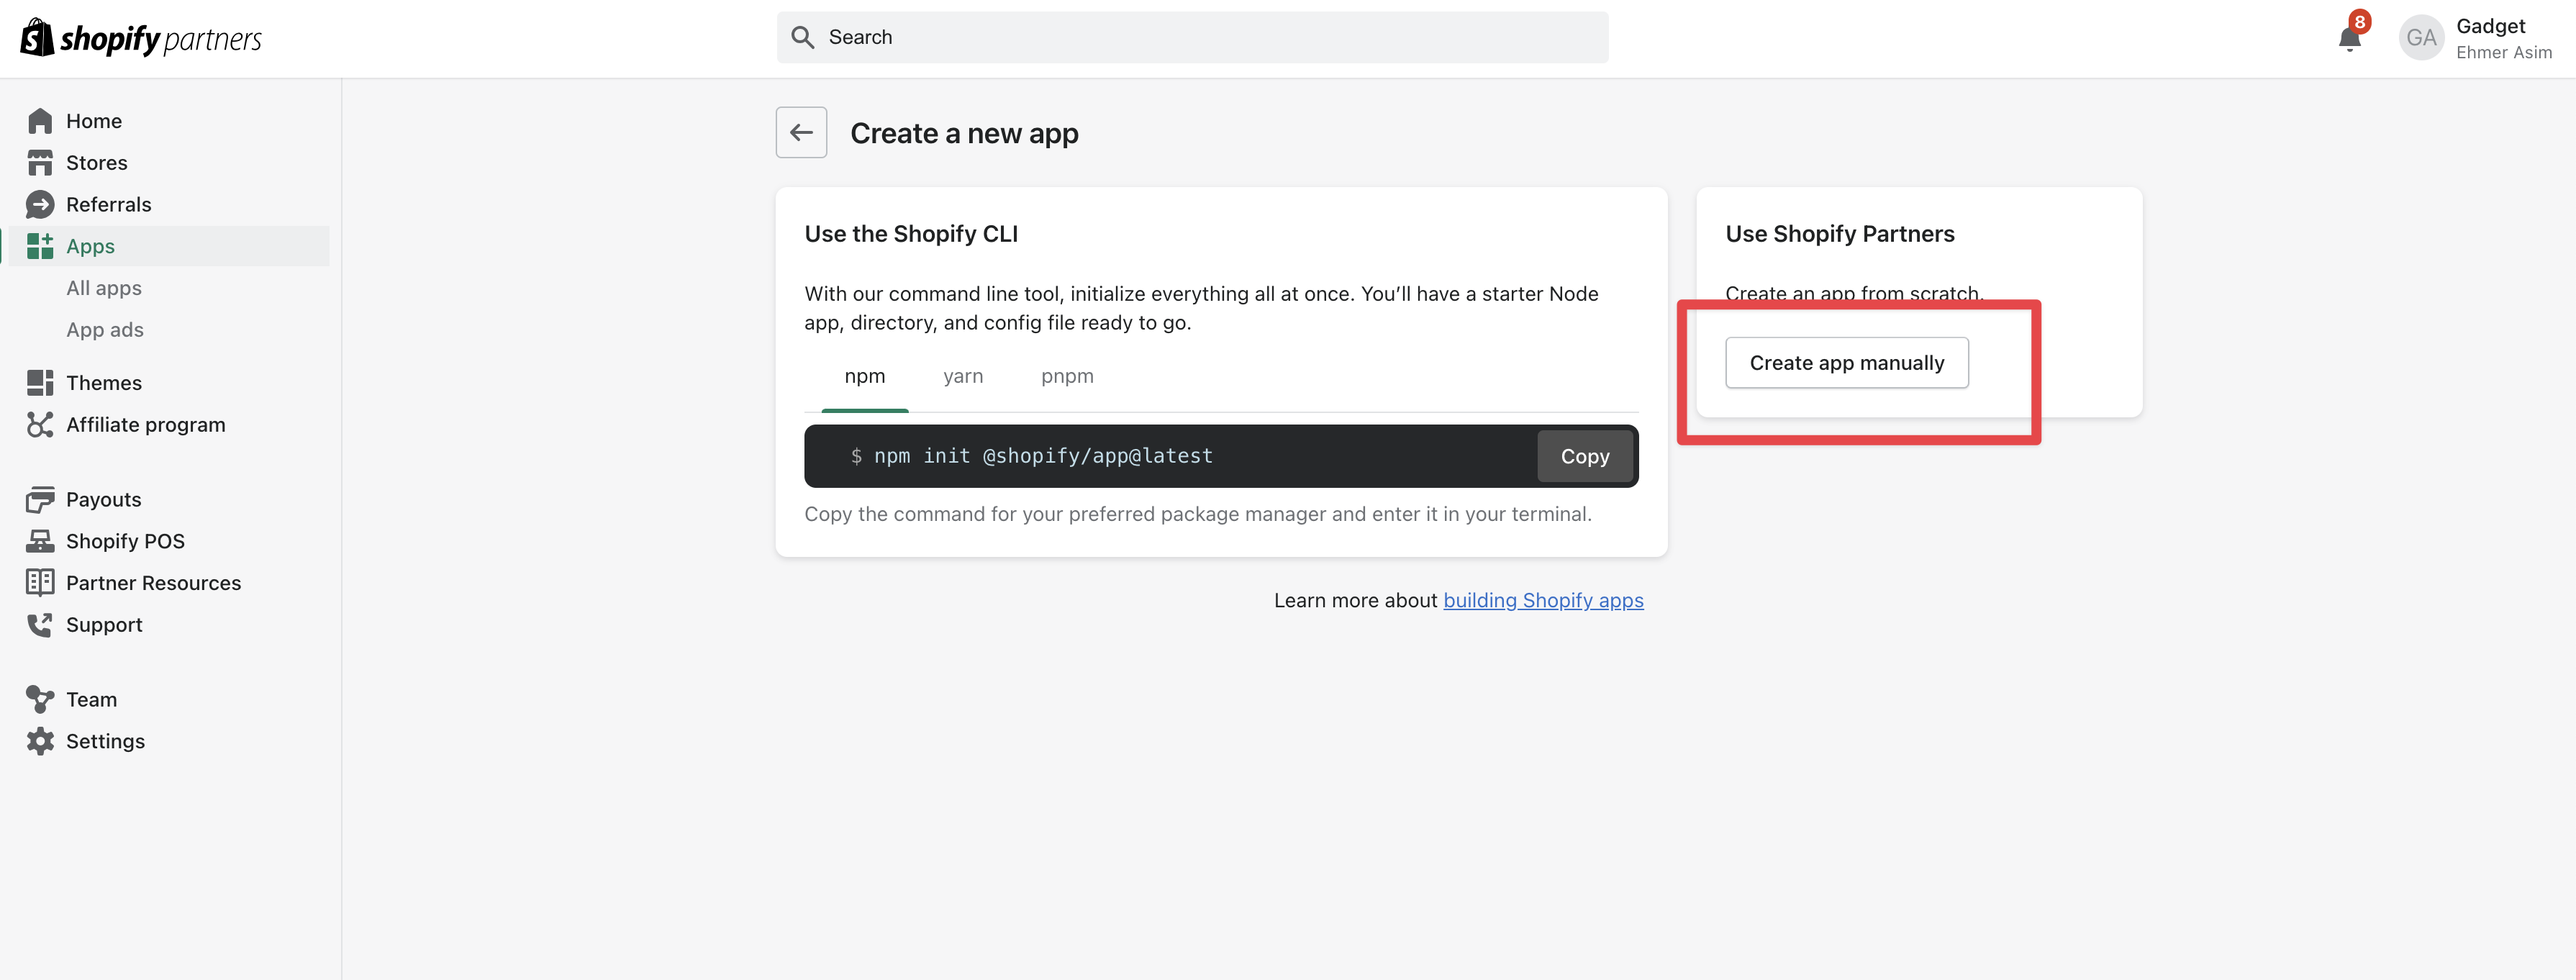
- Click the Create app manually button and enter a name for your Shopify app
- Go to the Connections page in your Gadget app and click on Shopify
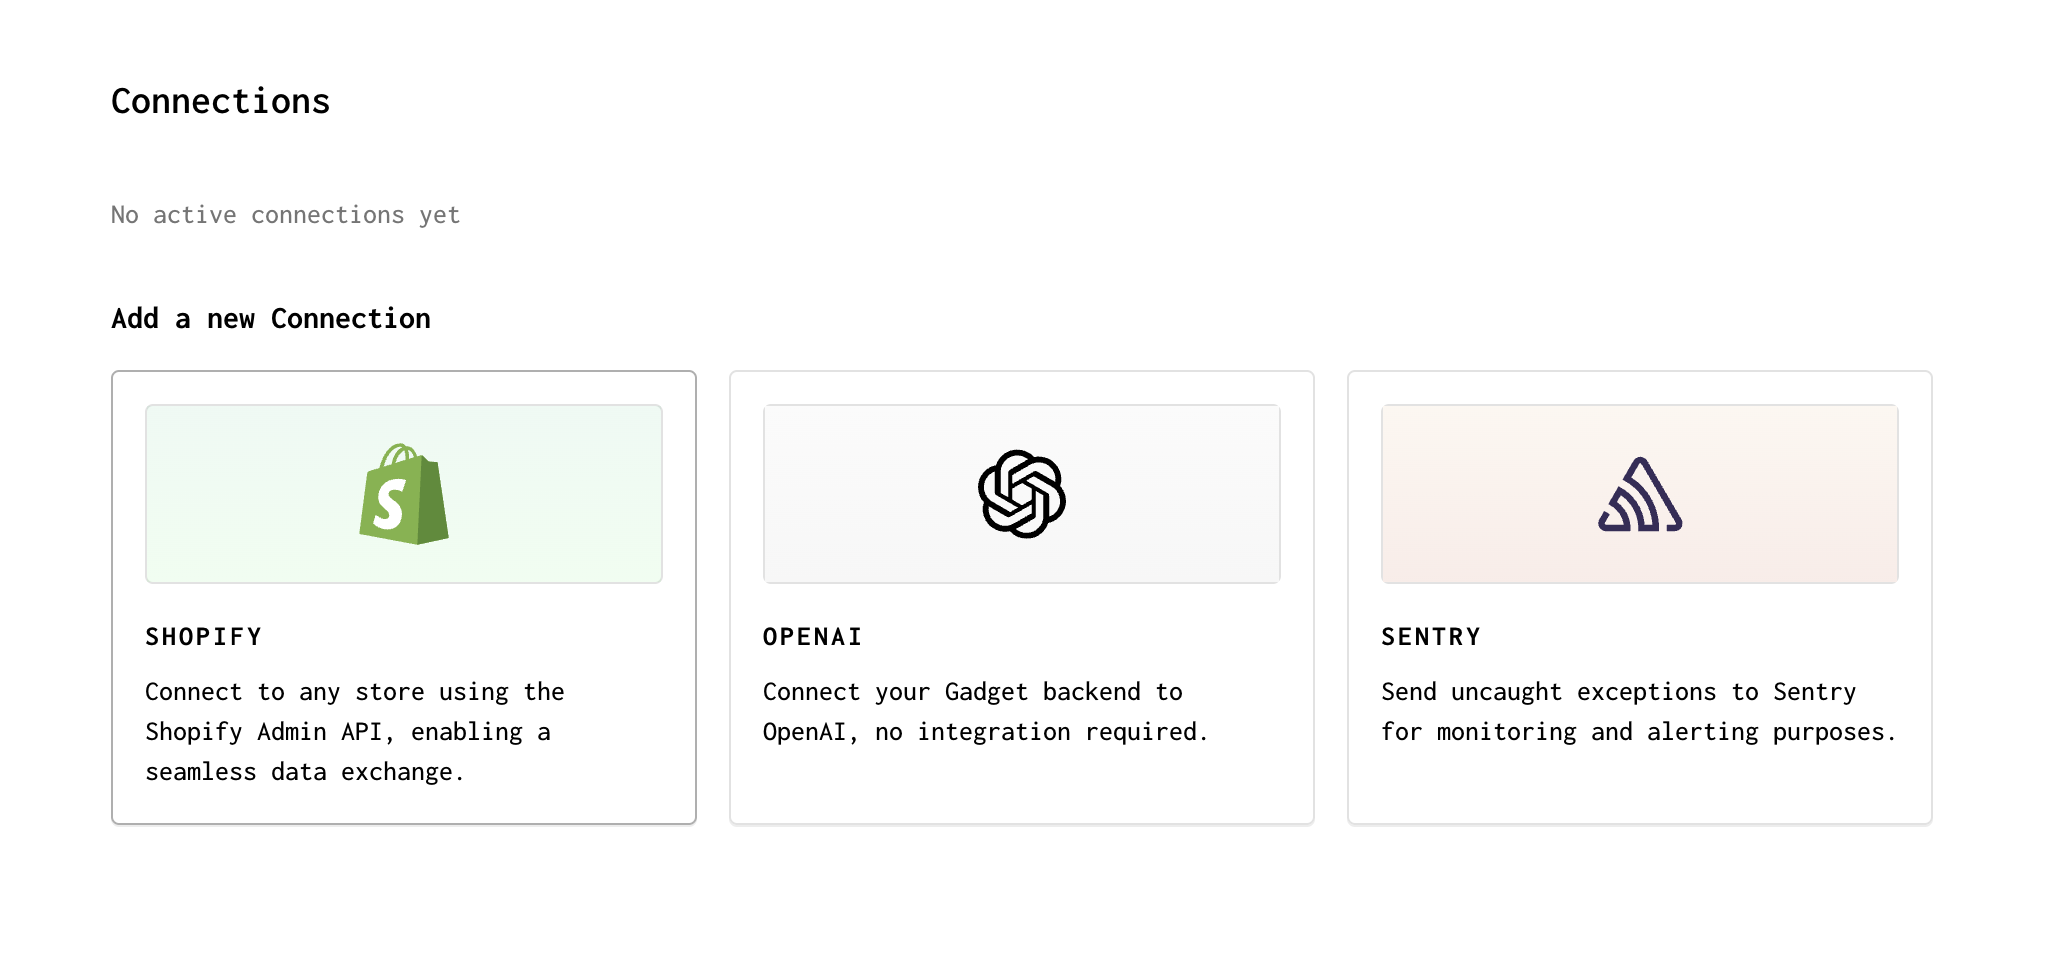
- Copy the Client ID and Client secret from your newly created Shopify app and paste the values into the Gadget Connections page
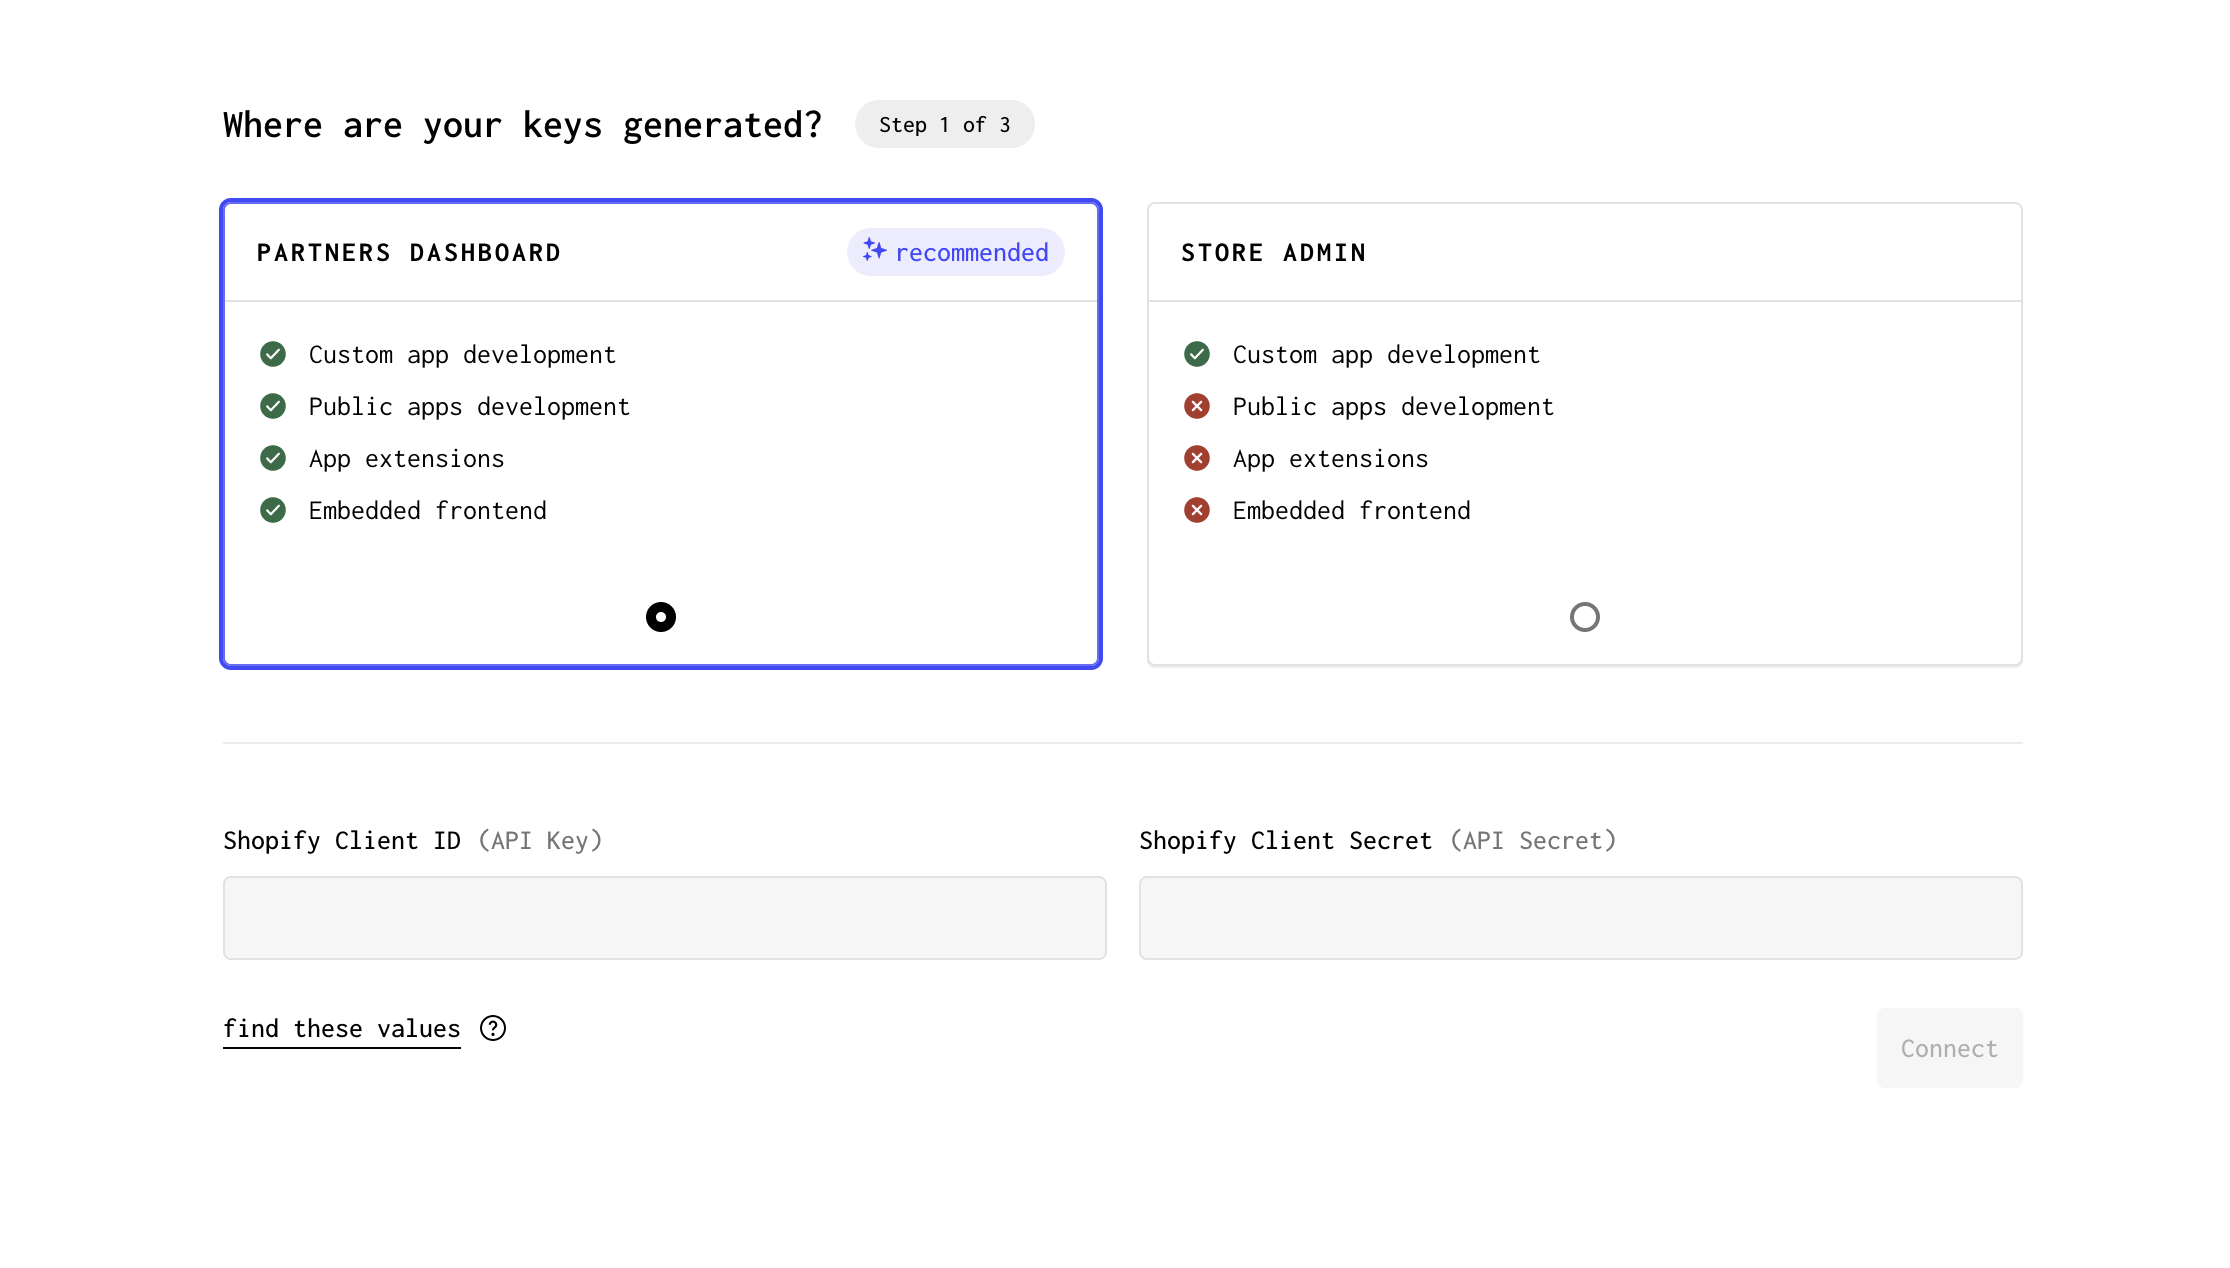
- Click Connect on the Gadget Connections page to move to scope and model selection
Now we get to select what Shopify scopes we give our application access to, while also picking what Shopify data models we want to import into our Gadget app.
- Enable the read and write scopes for the Shopify Products API, and select the underlying Product model that we want to import into Gadget
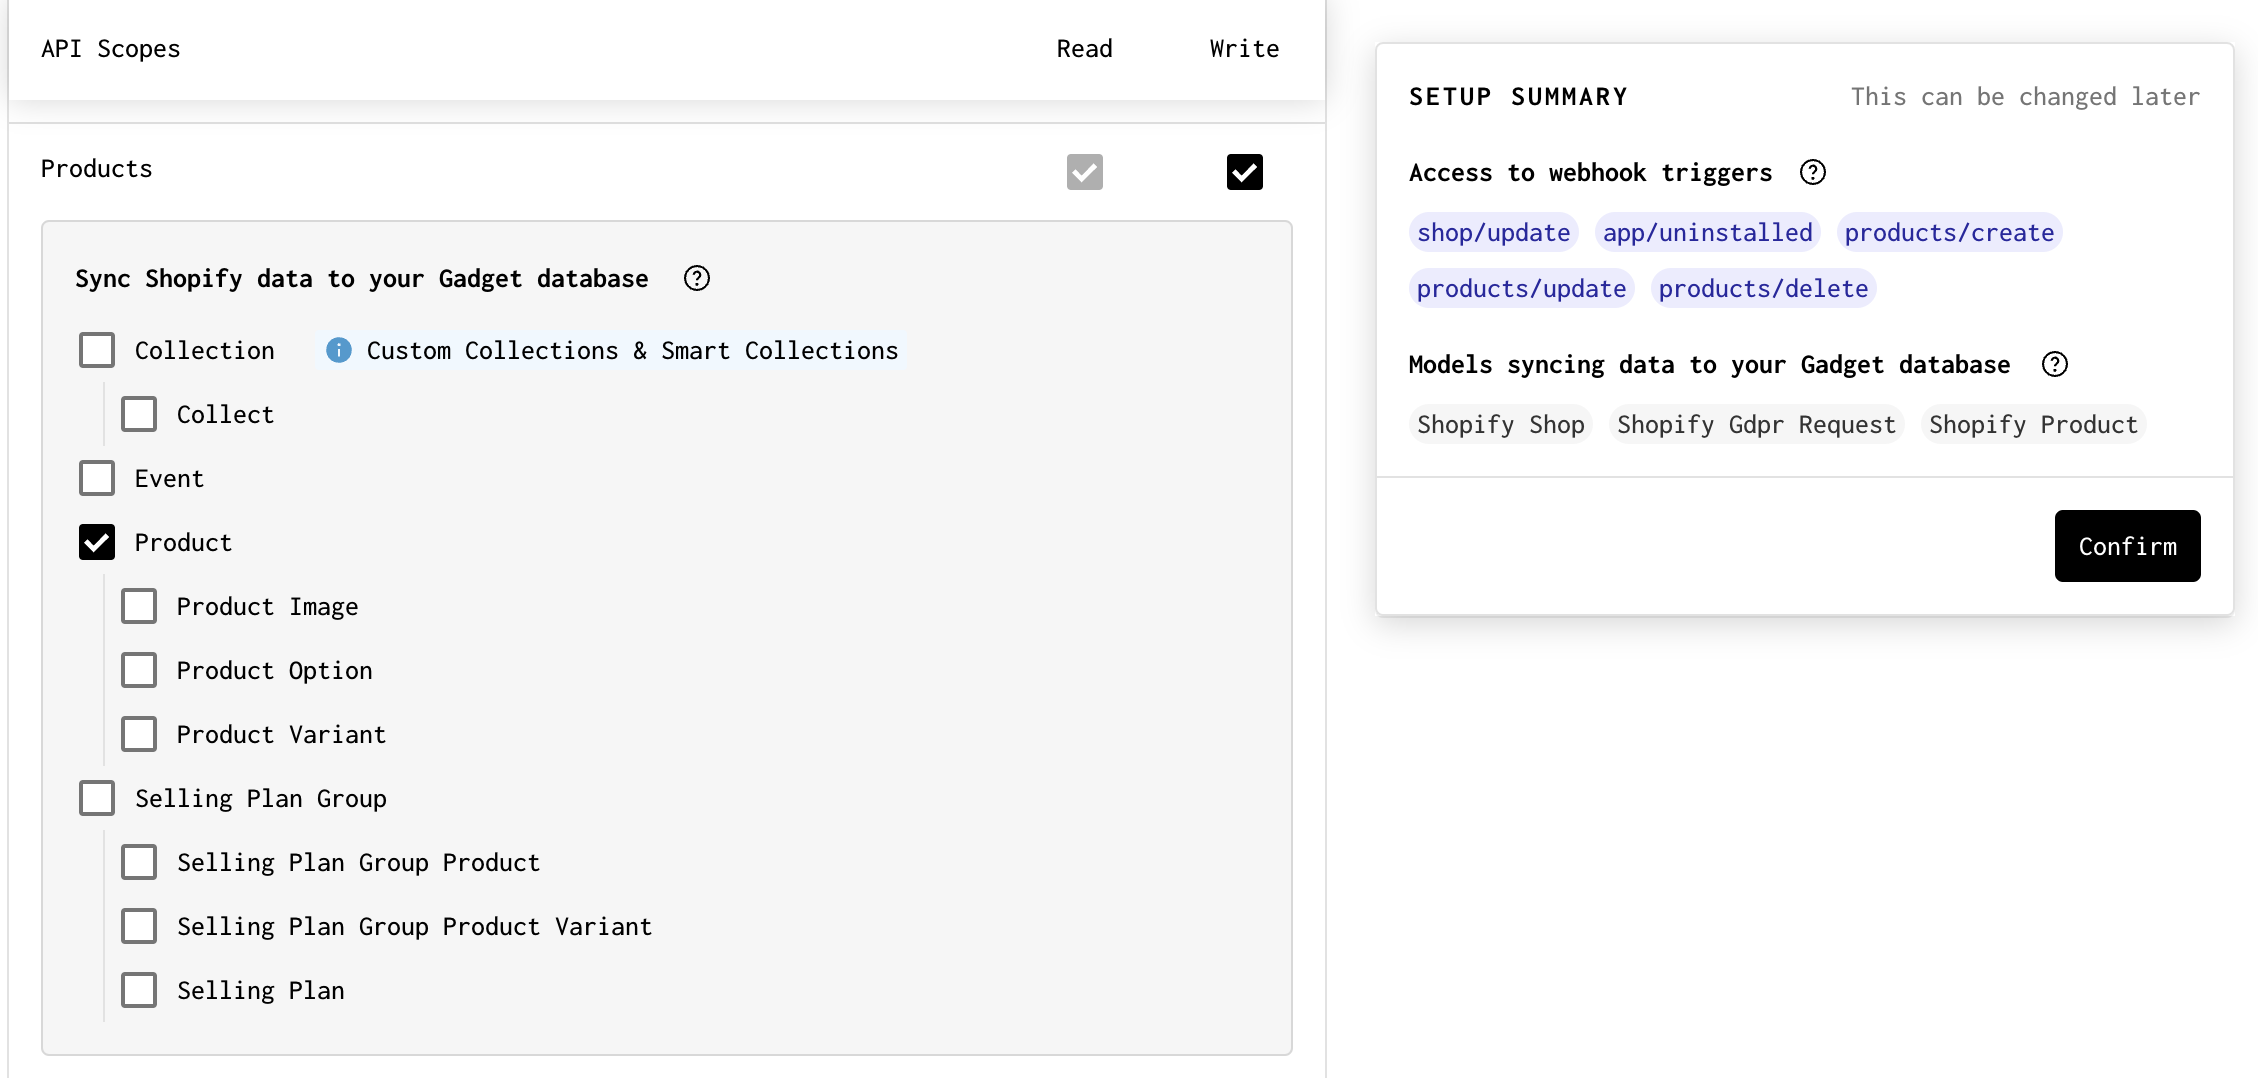
- Click Confirm
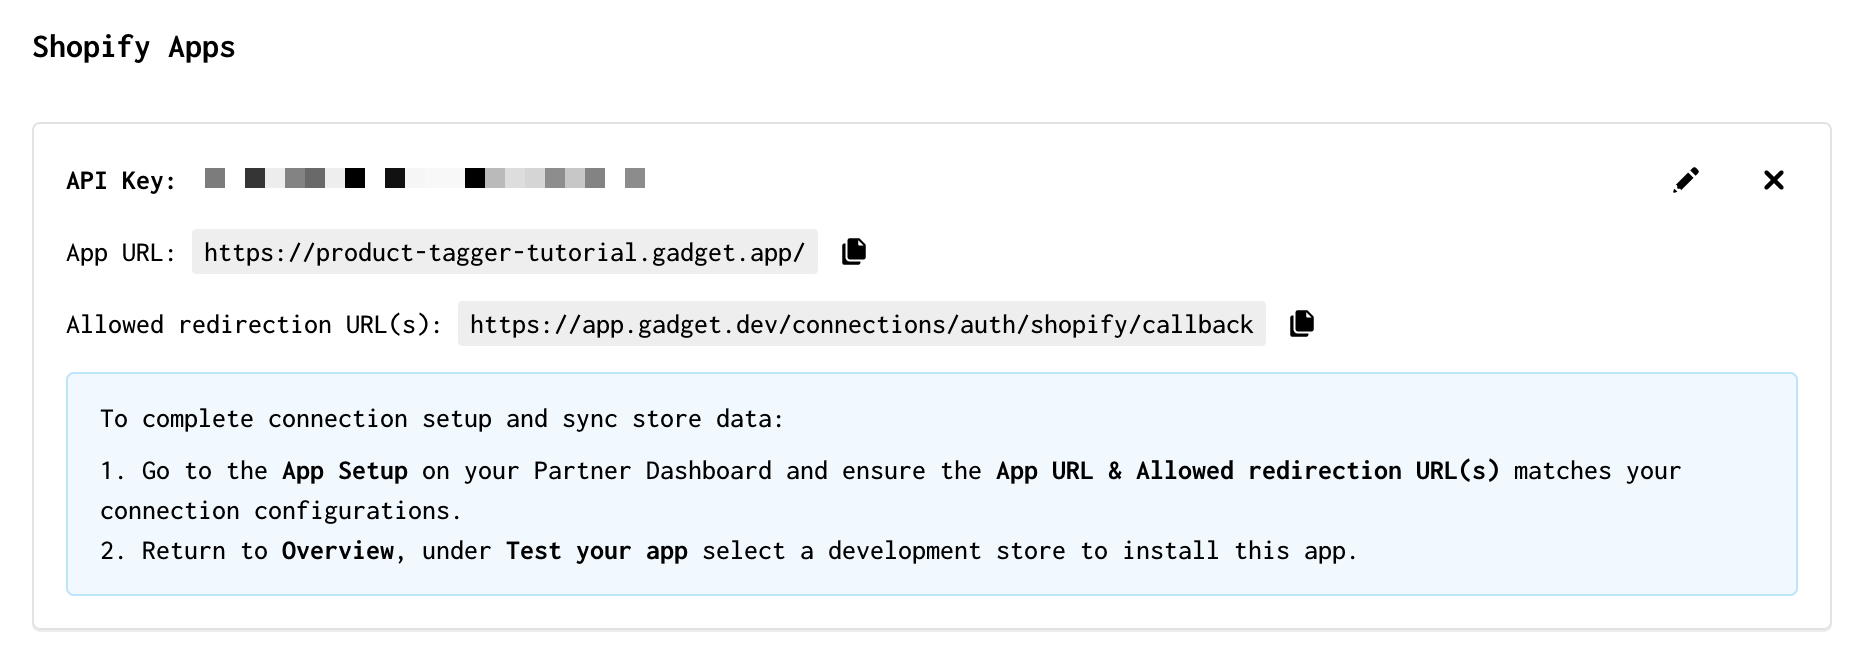
Now we want to connect our Gadget app to our custom app in the Partners dashboard.
- In your Shopify app in the Partners dashboard, click on App setup in the side nav bar so you can edit the App URL and Allowed redirection URL(s) fields
- Copy the App URL and Allowed redirection URL from the Gadget Connections page and paste them into your custom Shopify App
At this point, Gadget copies the selected Shopify models, their types, validations and associations into your Gadget backend. These models are ready to process webhooks as soon as you install the app on a Shopify store.
We opted to install this app on our development store, using the Test on Development Store link on our Shopify Partners dashboard. Gadget handles OAuth for us, all we need to do is grant permission to the API scopes and the connection is made.
Step 2: Add new model for tag keywords
The next step is to create a model that will store our list of vetted keywords that we can use to power our tagging script. These keywords can be different types of products or brands. Make sure to add keywords that will be found in your products' descriptions!
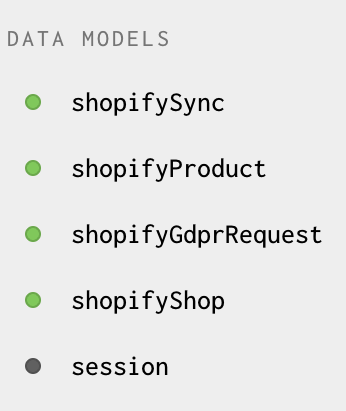
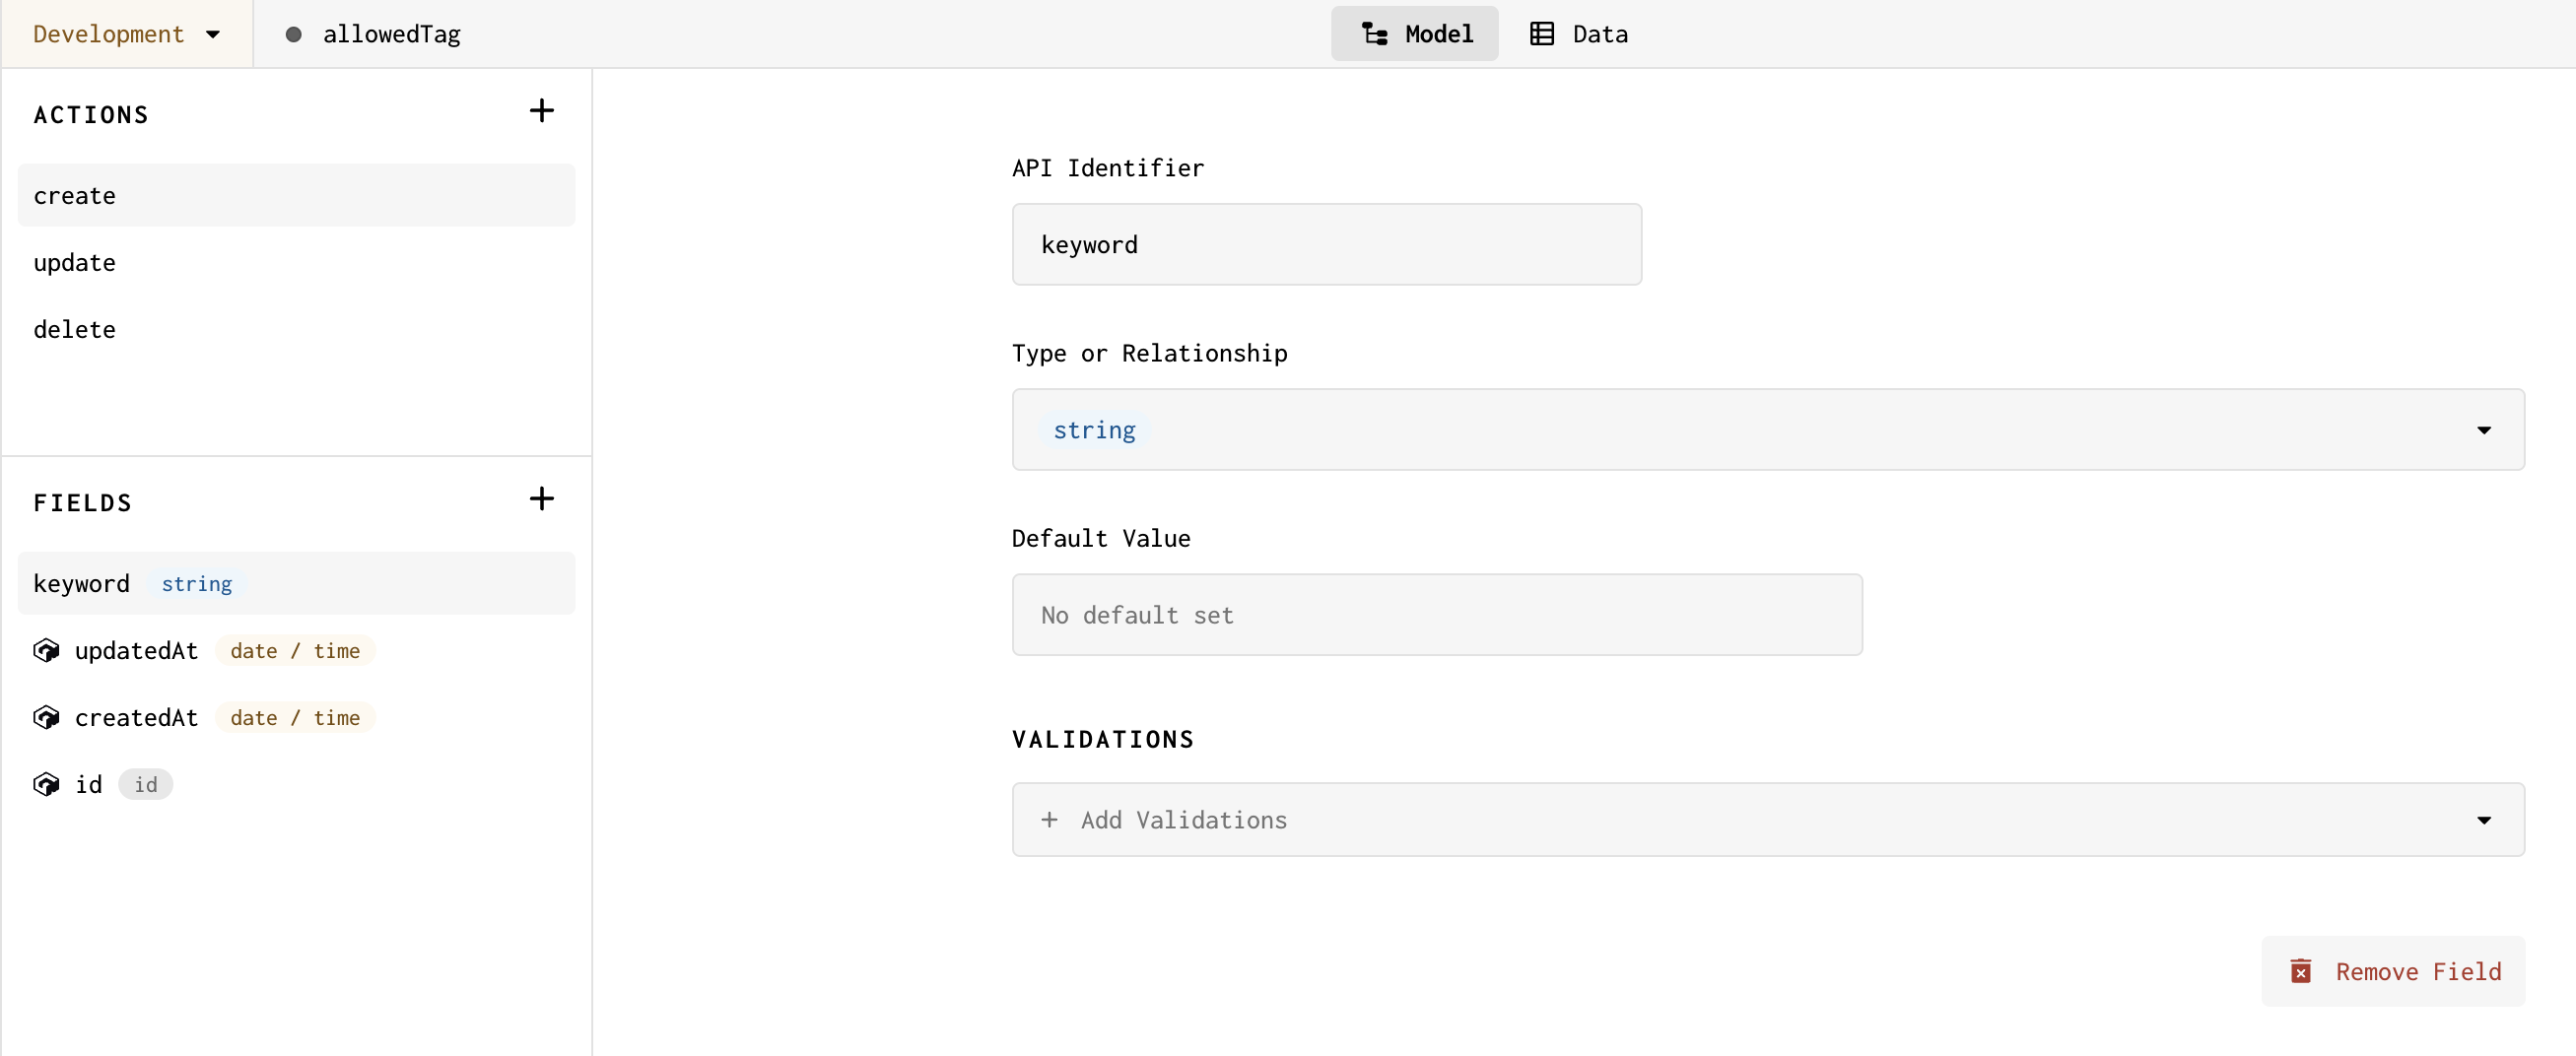
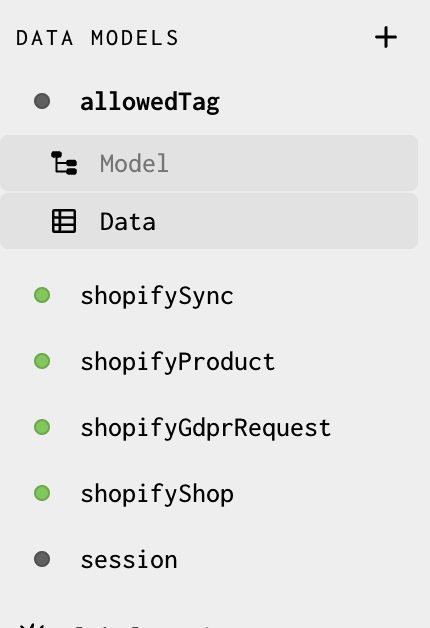
- Click + next to the DATA MODELS header in the nav to add a model, and call it <inline-code>allowedTag<inline-code>
- Click + in the FIELDS section to add a field, and name it <inline-code>keyword<inline-code>
Gadget instantly creates and documents a GraphQL CRUD API for this model. Test it out in the API Playground!
- Click on the API Playground link in the bottom of the left nav bar
Using the API Playground, we can make a Create call to our <inline-code>allowedTag<inline-code> model to store a new keyword.
We can run the same mutation again with a different keyword value to store additional keywords.
We can also check to make sure our tag keywords have been saved. Go to the Data page for the <inline-code>allowedTag<inline-code> model and you should be able to see an entry for any tags that have been added.

Step 3: Build your tagging script
Gadget keeps your app and store in sync by generating a CRUD (Create, Read, Update, Delete) API around each of your cloned models and wiring up each of the API actions to their corresponding Shopify webhook. If the Shopify store fires a <inline-code>products/update<inline-code> webhook, Gadget will run your Create action on the Product model. By default, this action uses the incoming params from the webhook to create a record in your database. Similarly, if Shopify fires the <inline-code>products/update<inline-code> webhook, Gadget will run your Update action which updates the record with the incoming params.
What makes Actions special is that they can be completely customized. You can learn more about working with Gadget actions in our docs.
Now that we have keywords to check against, we can write our tagging script. Because we want this script to run every time a product record is created or updated, we'll add an Effect to the <inline-code>create<inline-code> and <inline-code>update<inline-code> actions on <inline-code>shopifyProduct<inline-code>:
- Go to the Model page for <inline-code>shopifyProduct<inline-code> and select the <inline-code>create<inline-code> action
- Replace the contents of the <inline-code>shopifyProduct/create.js<inline-code> code file with the following snippet:
That's not a lot of code!
This snippet will run on every incoming <inline-code>products/create<inline-code> webhook that is sent by Shopify, and determines if tags need to be added by cross-referencing the <inline-code>body<inline-code> of the incoming payload against the stored keyword records by making an internal API request to Gadget. Should any words match, they're sent back to Shopify as new tags for the product.
Gadget gives us a <inline-code>connections<inline-code> object as an argument to our effect function, which has an authenticated Shopify API client ready to go. We use this object to make API calls back to Shopify to update the tags and complete the process.
Sharing code between actions
We also use Gadget's <inline-code>changed<inline-code> helper on our <inline-code>record<inline-code> to avoid entering an infinite loop. This looping can occur when a Shopify webhook triggers code that updates our Shopify store. Because we have added this change detection, we can use the same code for both the <inline-code>create<inline-code> and <inline-code>update<inline-code> actions.
- Instead of duplicating the code in both places, we can create a new <inline-code>shopifyProduct/utils.js<inline-code> file to hold our shared code:
- Import the applyTags function into <inline-code>shopifyProduct/create.js<inline-code> and <inline-code>shopifyProduct/update.js<inline-code> and call <inline-code>applyTags<inline-code> from the <inline-code>onSuccess<inline-code> function:
Now this code will be run every time a product is created or updated in a Shopify store.
The <inline-code>record.changed<inline-code> helper is a special field that Gadget has included to help prevent an infinite loop when updating Shopify records.
When we call <inline-code>shopify.product.update(...)<inline-code> the product in our Shopify store will be updated. This update action will fire Shopify's <inline-code>products/update<inline-code> webhook. If we are using this webhook as a trigger for running custom code that updates a product, we will be stuck in an endless loop of updating our products and running our custom code.
We can use <inline-code>record.changed<inline-code> to determine if changes have been made to the key on this record and only run our code if changes have occurred.
For more info on change tracking in Gadget, refer to the documentation.
Step 4: Add shop tenancy and permissions to allowedTag model
Right now the <inline-code>allowedTag<inline-code> model only has a single field, keyword. If you're building a public Shopify app, you also need to associate keywords with individual stores so that all the shops that install your app don't share keyword records.
It's also important to grant your embedded app permission to call the create and delete actions on the <inline-code>allowedTag<inline-code> model. Access to custom model APIs are always disabled by default for embedded app users. If you encounter a <inline-code>GGT_PERMISSION_DENIED<inline-code> error when building an embedded app, you probably need to go into the Roles and Permissions page and grant embedded app users access to your Gadget app API.
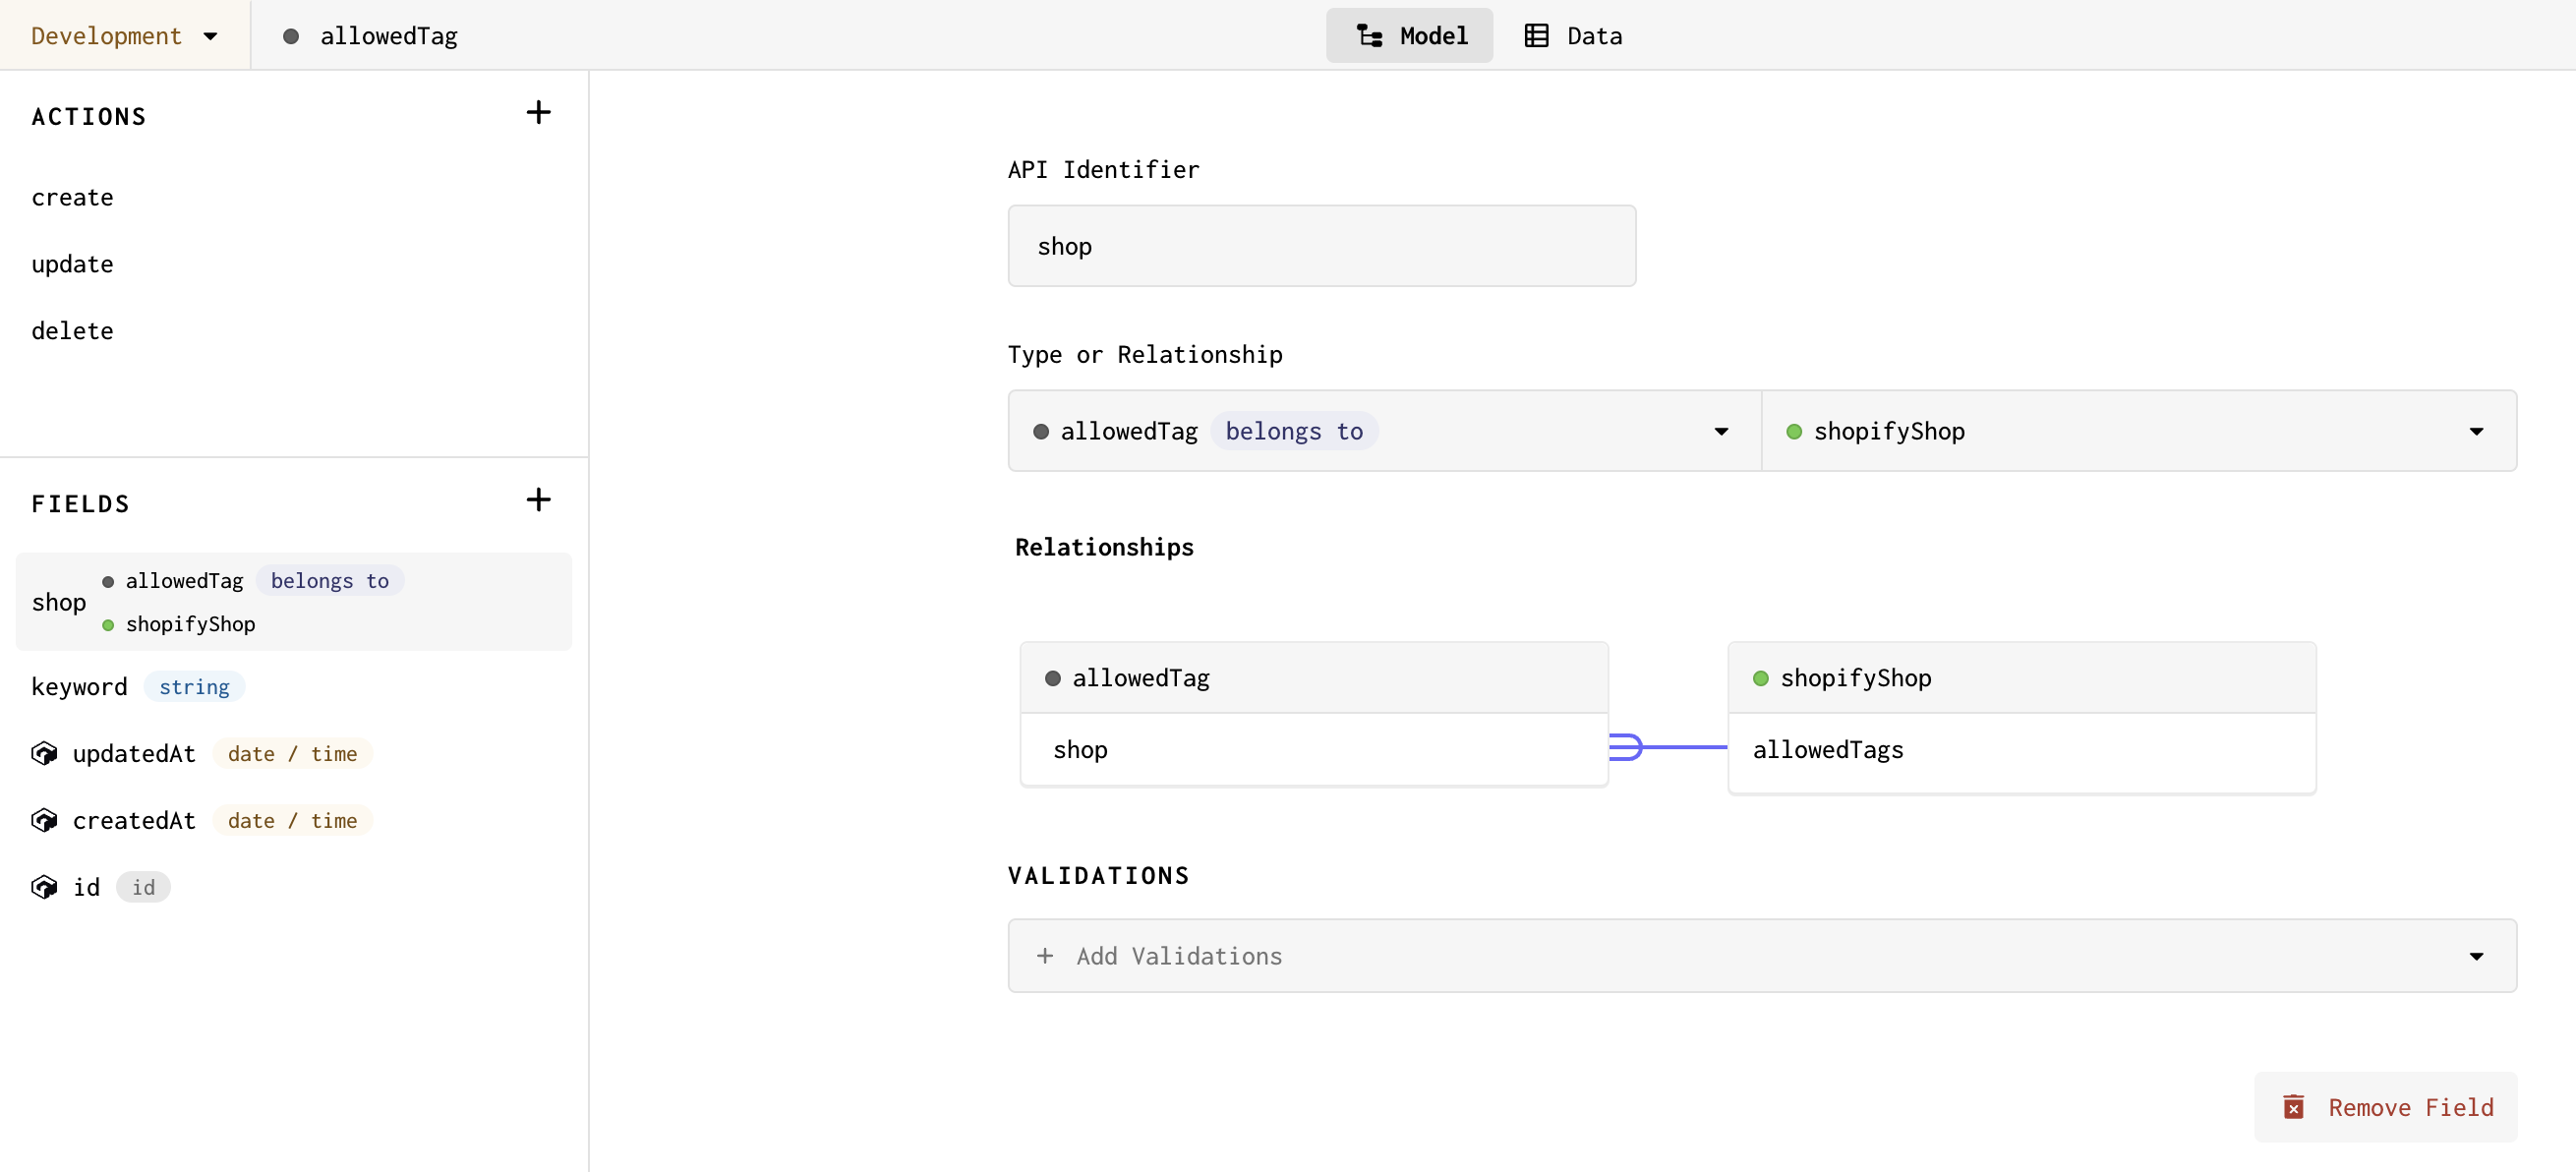
- Add a new field named shop to the <inline-code>allowedTag<inline-code> model
- Make shop a belongs to relationship field and select <inline-code>shopifyShop<inline-code> as the related model
- Select the has many option when defining the inverse of the relationship so that <inline-code>shopifyShop<inline-code> has many <inline-code>allowedTags<inline-code>
With this added Shop relationship, you will be able to track what keywords are used for individual shops. To automatically filter by the current shop when reading from your <inline-code>allowedTag<inline-code> model, you can add a Gelly snippet to enforce shop tenancy automatically.
- Go to Settings in the nav bar and select the Roles & Permissions page
- Enable the read, create, and delete actions for your <inline-code>allowedTag<inline-code> model on the shopify-app-users role

- Click + Filter next to the read action, type tenancy into the input, and hit Enter on your keyboard to create a new Gelly file
- Go to the file by clicking on the File icon
- Add the following Gelly fragment
This snippet selects all <inline-code>allowedTag<inline-code> records when the related shopId is equal to the shop id of the current session. The current session is managed for you when you connect to Shopify, and session records including the current session can be viewed by session on the Data page in Gadget.
This handles shop tenancy for your read action, and will also be applied for update, delete, or custom model actions. For custom actions, it's advisable to leverage Gadget's <inline-code>preventCrossShopDataAccess<inline-code> helper which prevents the modification of the shop relationship on all model actions to which it is applied.
- Go to your <inline-code>allowedTag/actions/create.js<inline-code> file and paste the following code:
The relationship to the current shop is automatically set up by the <inline-code>preventCrossShopDataAccess<inline-code> helper in the run function. By using this helper, the <inline-code>shopId<inline-code> cannot be spoofed by malicious users.
The <inline-code>preventCrossShopDataAccess<inline-code> helper is also useful for other model actions, such as delete, to enforce data tenancy in public apps.
- Go to your <inline-code>allowedTag/actions/delete.js<inline-code> file and paste the following code:
For delete actions (or update, or other custom actions), using <inline-code>preventCrossShopDataAccess<inline-code> in the run function verifies that the shopId associated with the current record matches the shopId for the current session. If these values do not match, an error is triggered, resulting in the failure of the action.
You also need to update how you read your <inline-code>allowedTag<inline-code> data in the <inline-code>shopifyProduct<inline-code> update and create actions. You must filter by the <inline-code>currentShopId<inline-code> to ensure that you are only reading the <inline-code>allowedTag<inline-code> records for the current shop, as Gelly tenancy is not applied when making API requests in your backend actions.
- Paste the following code into <inline-code>shopifyProduct/utils.js<inline-code>:
Now you have a multi-tenant backend. The final step is building an embedded frontend.
Step 5: Build a Shopify admin frontend
New Gadget apps include a frontend folder. When you set up a Shopify connection, Gadget automatically makes changes to this frontend folder by:
- initializing your Gadget API client in <inline-code>frontend/api.js<inline-code>
- setting up a default React app in <inline-code>frontend/main.jsx<inline-code>
- adding a routing example in <inline-code>frontend/App.jsx<inline-code>
- has two examples of rendered pages and navigation with <inline-code>frontend/ShopPage.jsx<inline-code> and <inline-code>frontend/AboutPage.jsx<inline-code>
Additional packages have also been added to your <inline-code>package.json<inline-code> upon connecting to Shopify, including <inline-code>@gadgetinc/react<inline-code> which allows for the use of Gadget's handy React hooks for fetching data and calling your Gadget project's API, and <inline-code>@shopify/polaris<inline-code> which allows you to use Shopify's Polaris components out of the box when building embedded Shopify apps.
Start building!
The entire tagger frontend code snippet is below. Additional details on some of Gadget's provided tooling are below the snippet.
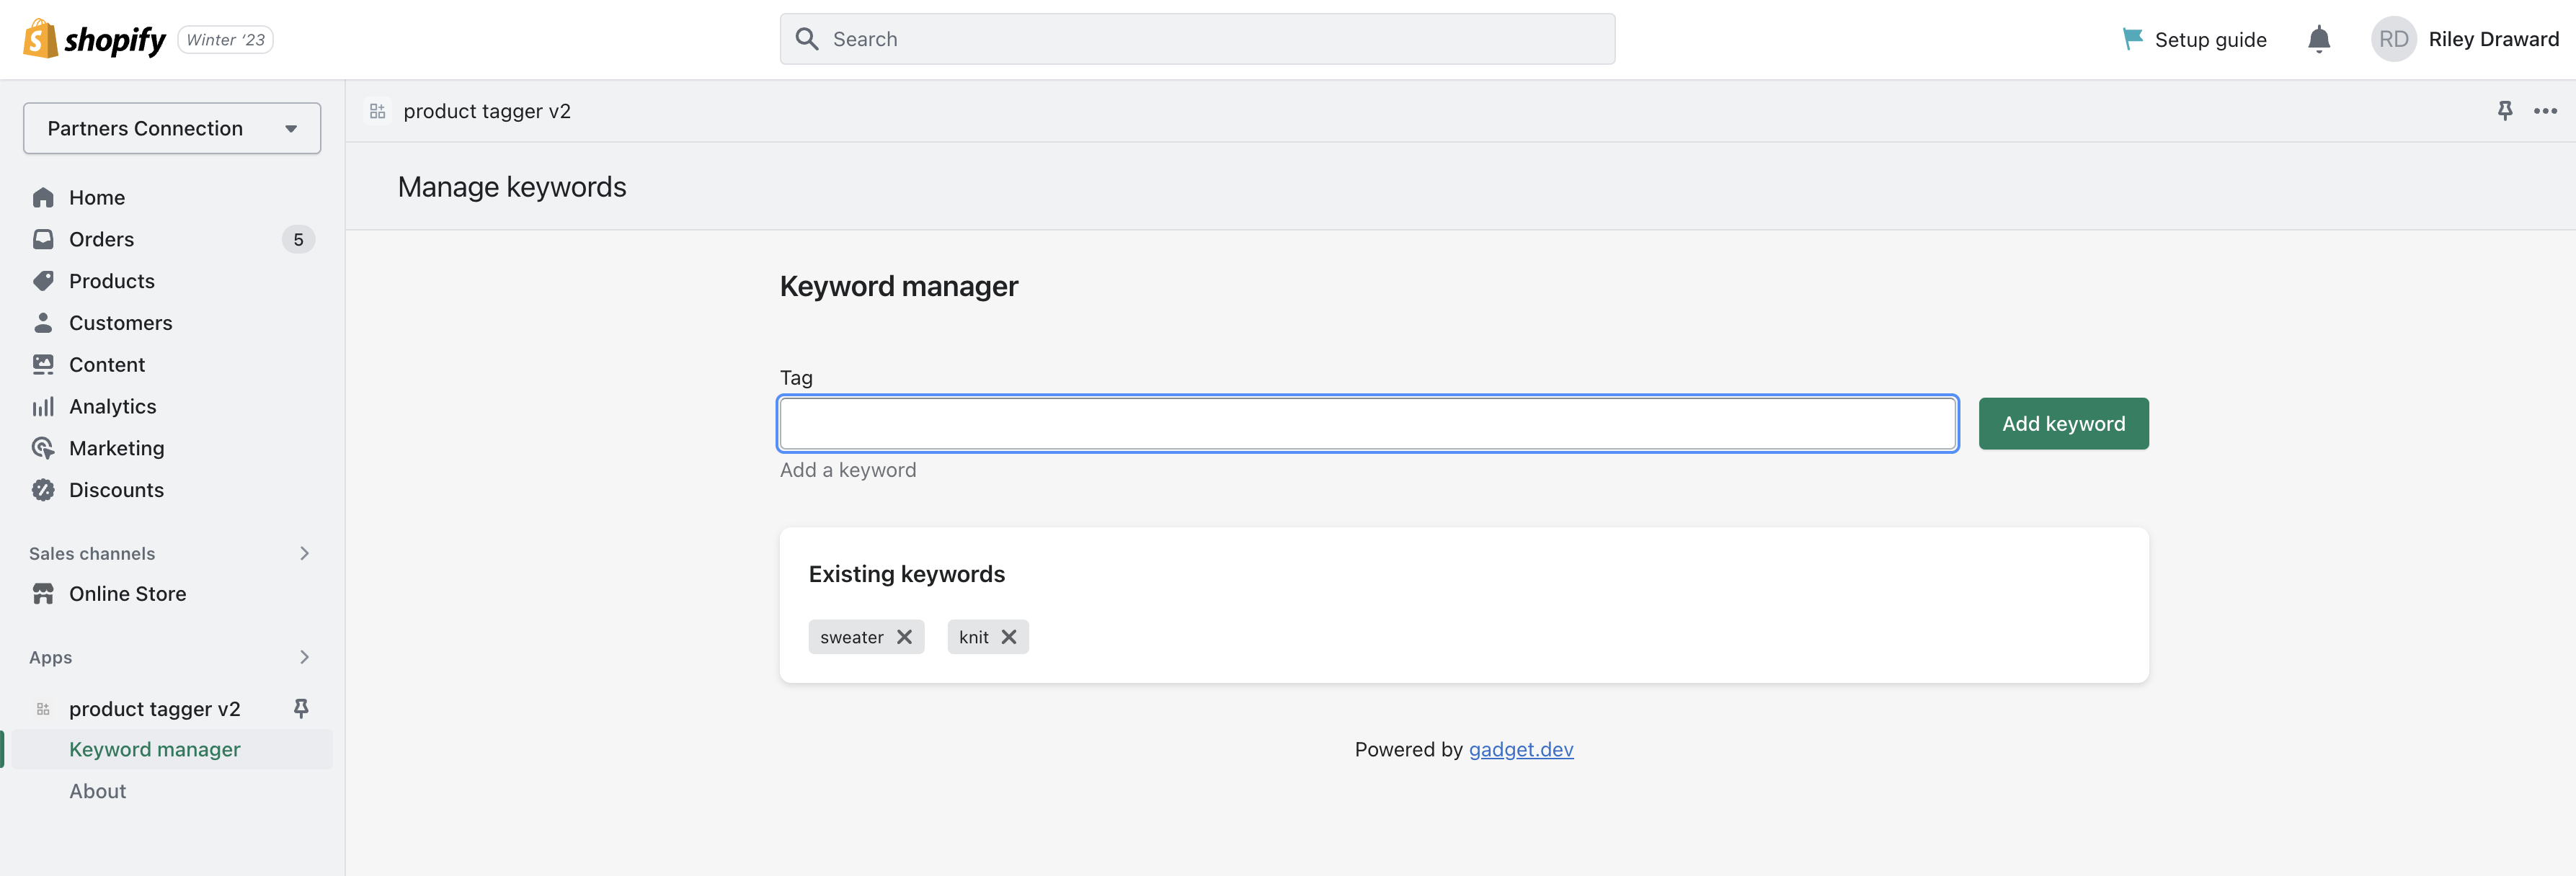
- Paste the following code into <inline-code>frontend/ShopPage.jsx<inline-code>
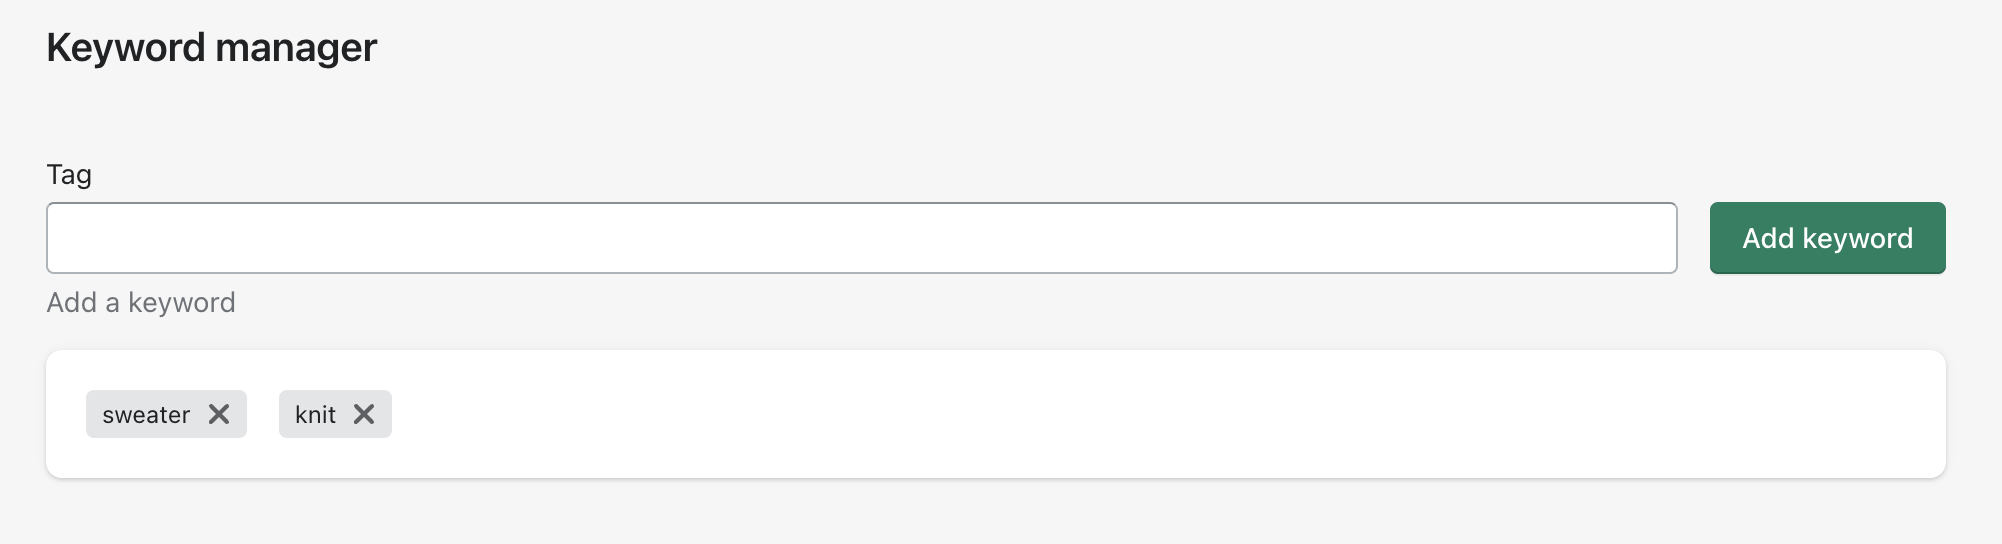
If you go to your development app, you should now be able to test it out! Go back to the embedded frontend in your store admin and start adding custom tags. You'll be able to see the created tags, along with the related shop ID, in the <inline-code>allowedTag<inline-code> Data page in Gadget.
How the frontend reads and writes data
The above snippet has everything you need to build a frontend for your app. Let's take a closer look at how you read and write data using Gadget's React tooling.
Using the API and hooks to fetch data
Your Gadget API client is already set up for you in <inline-code>frontend/api.js<inline-code>! You can use this API client to fetch data from our models using the product tagger application's auto-generated API. You can also make use of some Gadget-provided React hooks that help to read (and write) using your app's API.
The <inline-code>useFindMany<inline-code> hook will run <inline-code>api.allowedTag.findMany()<inline-code> and return a response that has data, error, and fetching as properties. You can use fetching to display a Polaris Spinner while the data is being fetched, and the error property to display and handle any request errors.
Here is the code snippets from your tagger frontend that use the <inline-code>useFindMany<inline-code> hook:
Using the API and hooks to write data
Now you need to send a request to your Gadget app's backend API to create entered keywords in your app's database. The <inline-code>@gadgetinc/react<inline-code> package also has a <inline-code>useAction<inline-code> hook that will assist with making requests to any of your model actions. Similar to <inline-code>useFindMany<inline-code>, the useAction hook returns an object with data, fetching, and error properties. Additionally, <inline-code>useAction<inline-code> returns a function that needs to be called to actually run the action.
For the product tagger, you are using the <inline-code>useAction<inline-code> hook to call the <inline-code>api.allowedTag.create<inline-code> and <inline-code>api.allowedTag.delete<inline-code> actions:
Congrats! You have built a full-stack and fully functional embedded product tagger application! Now you can test it out.
Test it out!
Go back to the Connections page in Gadget and click Shop Installs and then Sync on the connected store if you set up a custom app through the Partners dashboard, or just click Sync if you used the store Admin to set up your app.

Gadget will fetch each of the records in Shopify and run them through your actions. Not only will this populate your Gadget backend with the store's inventory, but it will also run the effects we added, updating the tags for each synced product. Our tagging application will also run on products when they are added to the store, so any new products will also be tagged for us automatically.
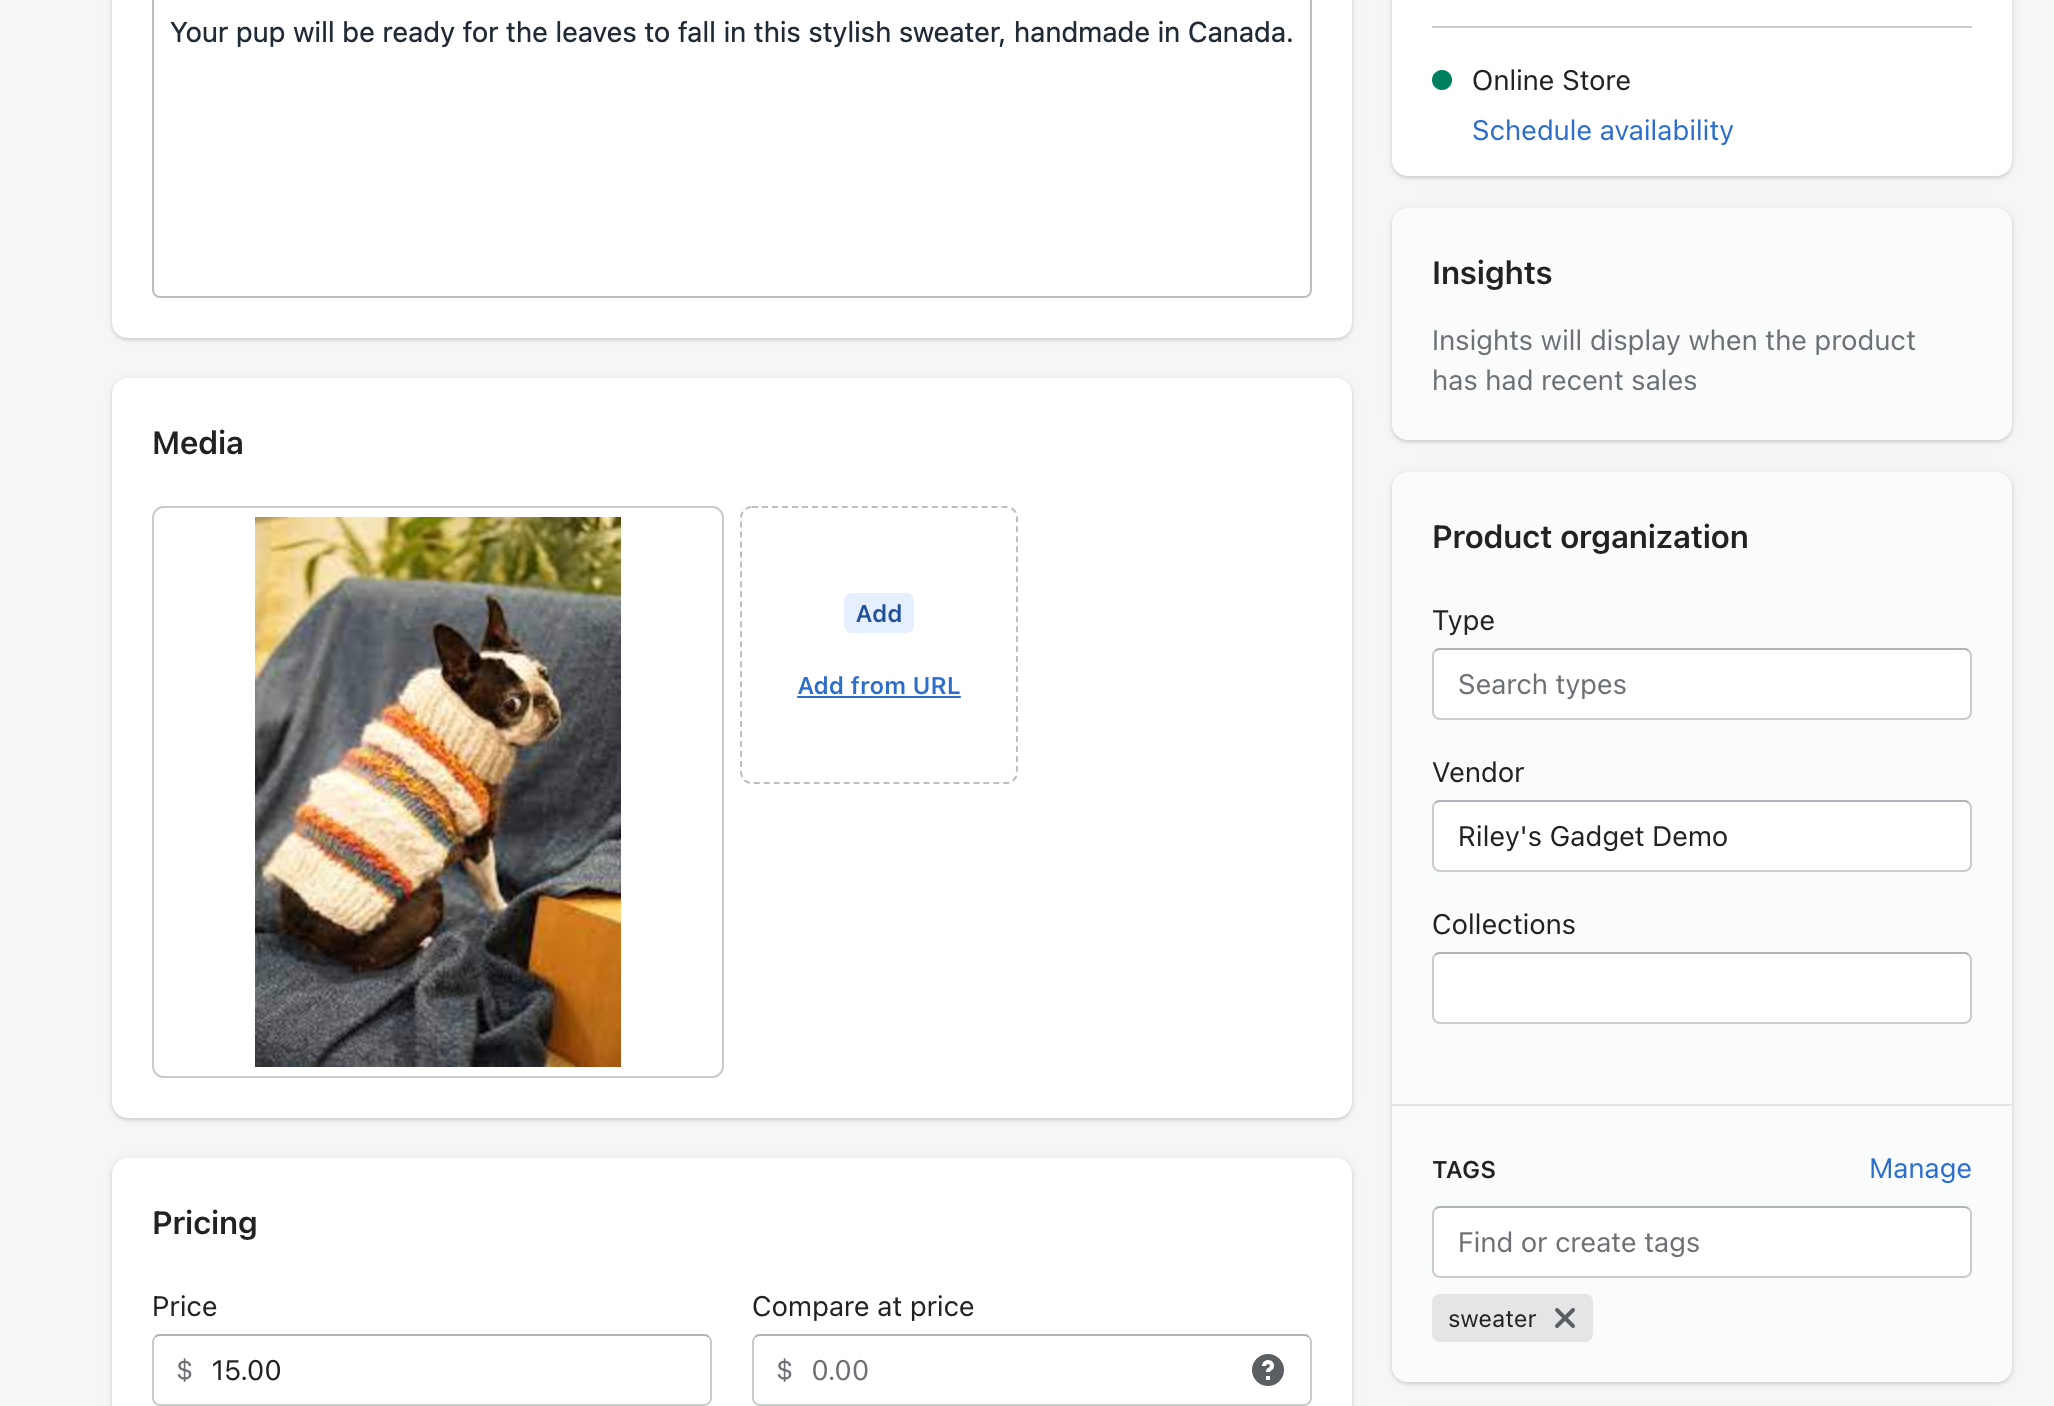
Congratulations! In about 20 minutes you were able to build a custom app that updates tags in Shopify each time there is a match against the list of Allowed Tags.


