Building a 3D shipment tracker globe with Gadget
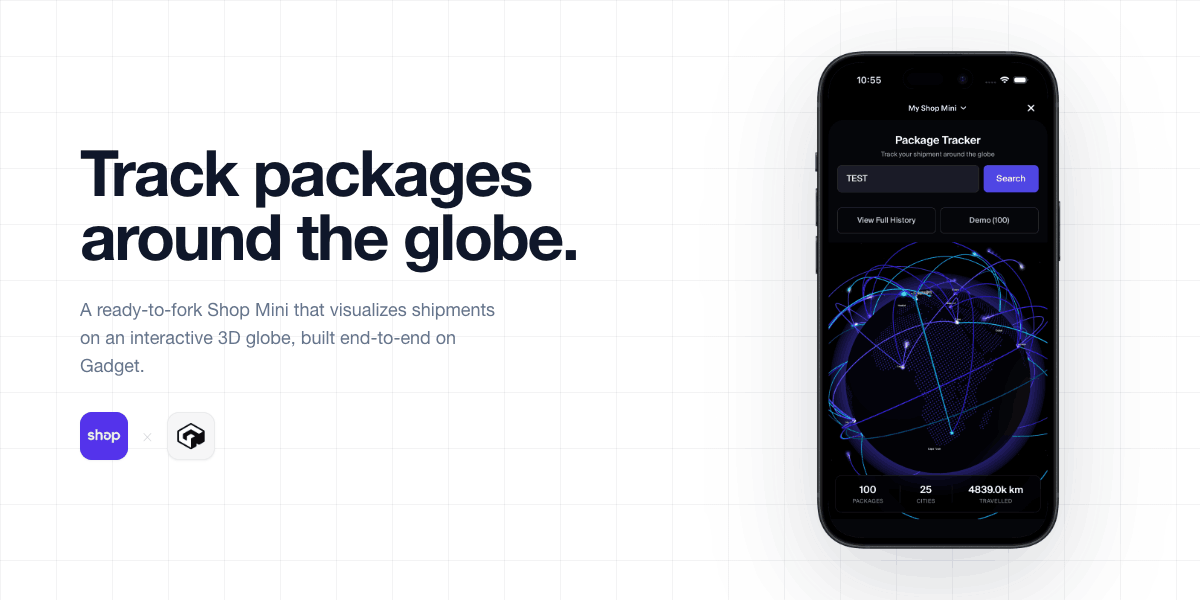

What is a Shop Mini?
As the name implies, these are little apps that run directly inside Shopify's Shop app. Unlike typical Shopify apps, these aren't merchant-specific. Instead, each buyer interacts with them across all available merchants. They're built with React and Tailwind, and for the backend, you bring your own. Shopify's reference implementation uses Supabase Edge Functions, but you can use any backend service like we are here with Gadget. The challenge with building these apps is that it's a highly restrictive environment, since they're running inside another app.
Why a globe?
I wanted to create something that was both visually impressive and a good use case for the tools I'm explaining. This globe visual has been done to death, but it's still quite visually appealing. I wanted something flashy enough to get clicks, but with enough depth to talk about in a tutorial. This was also heavily inspired by the Shopify BFCM globe and the GitHub commit globe, as both of those are interesting visual representations of the traffic those platforms receive.
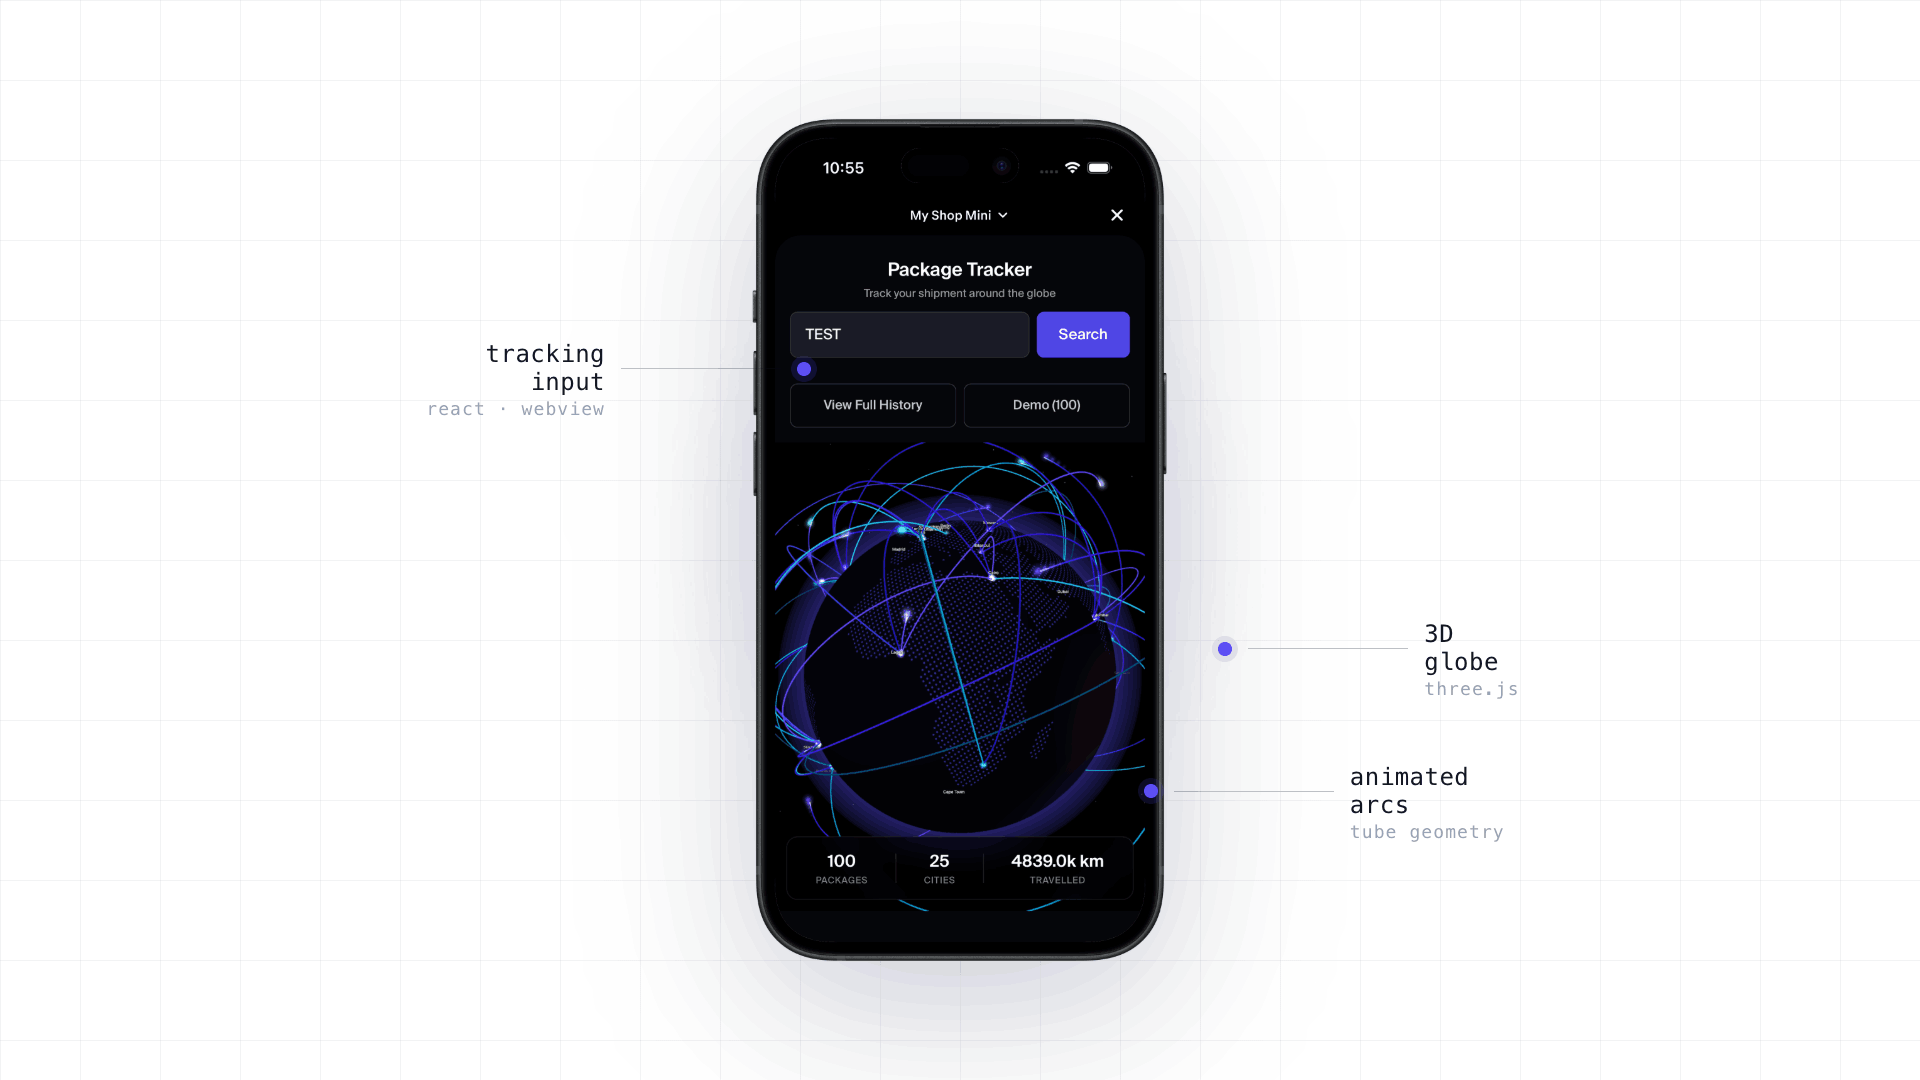
The globe was harder than expected
The globe is where this project started, and it was more difficult than I expected. When building Shop Minis, you're limited to a small number of pre-approved packages. While Three.js, the package used for rendering 3D objects on the web, is approved, Three-Globe, the package commonly used for displaying data like this, is not. That means all of the logic for content rendering, arc rendering, atmosphere, and more has to be done from scratch.
You may think, as I did, that I could just throw it all at Claude and let it figure it out. What I got was somewhat useful, but nothing close to what I intended: a black background with a white sphere and a solid blue atmosphere. Nothing close to what I wanted. After wrestling with it for a bit, I went in search of other answers. That's when I came across this GitHub engineering blog post about how they did the commit globe. With this newfound knowledge, I was able to get Claude to generate something much closer to what I was looking for.
Painting the landmasses
Once I had the globe rendering, the next step was to paint the landmasses. This was done by loading an earth texture from a CDN (https://cdn.jsdelivr.net/gh/vasturiano/three-globe@master/example/img/earth-water.png) and placing instanced dots everywhere there is land. The image looks like this:
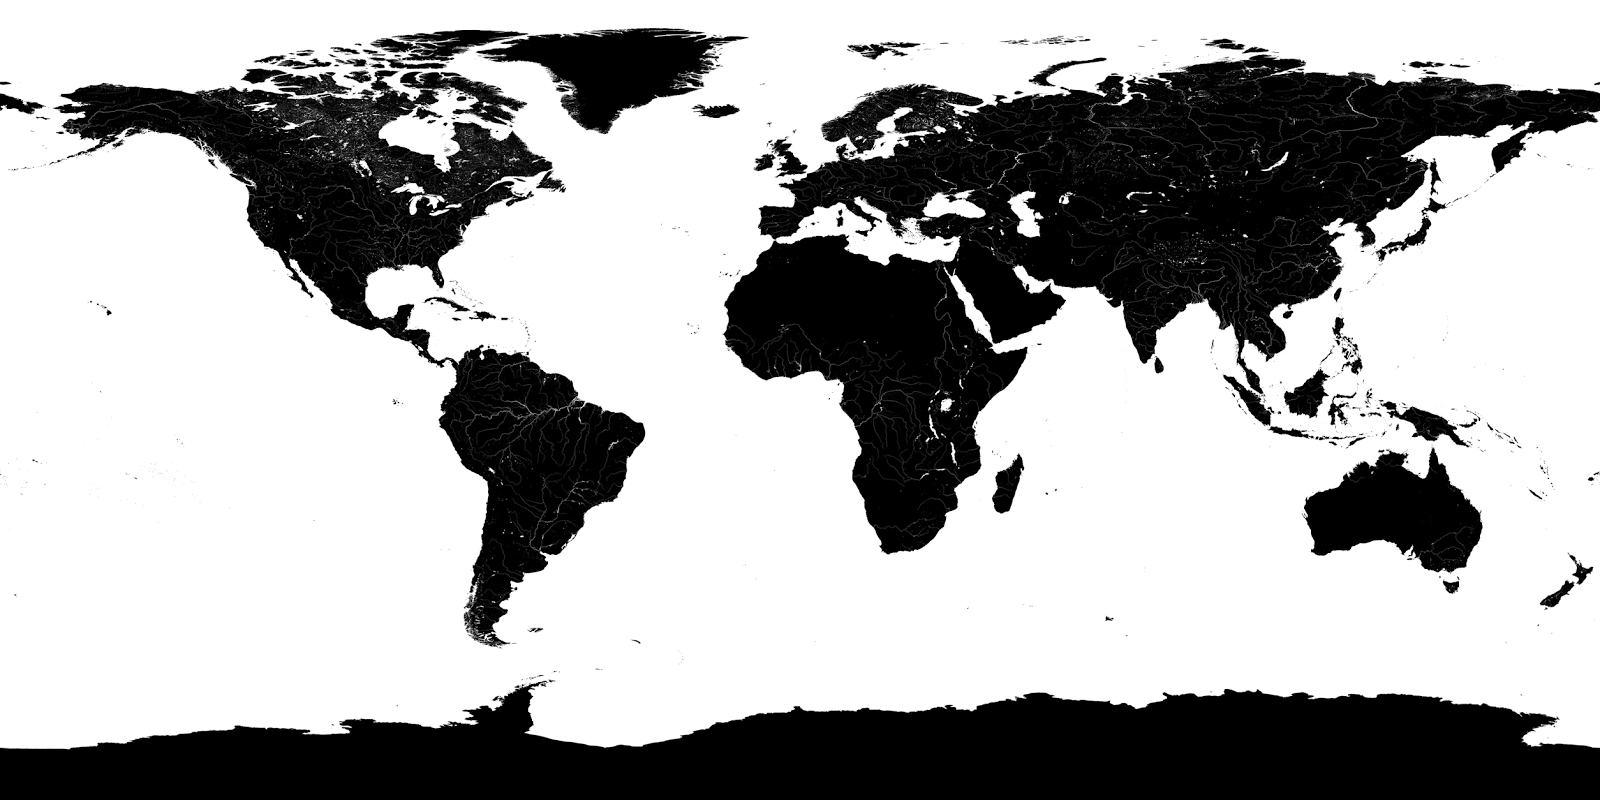
This makes it much clearer what we're actually doing here. Basically, we map the 2D image to the 3D sphere, then we check the value of each pixel. If it's white, we know it's water, and we should ignore it. If it's black, we know it's land, and we should place dots. The land mask is an equirectangular projection, so the math for mapping from this mask is pretty simple, just two ratios, and we invert the latitude because the image rows increase downward, while latitude increases northward.
Then, to actually sample the pixel:
Wiring up the backend with Gadget
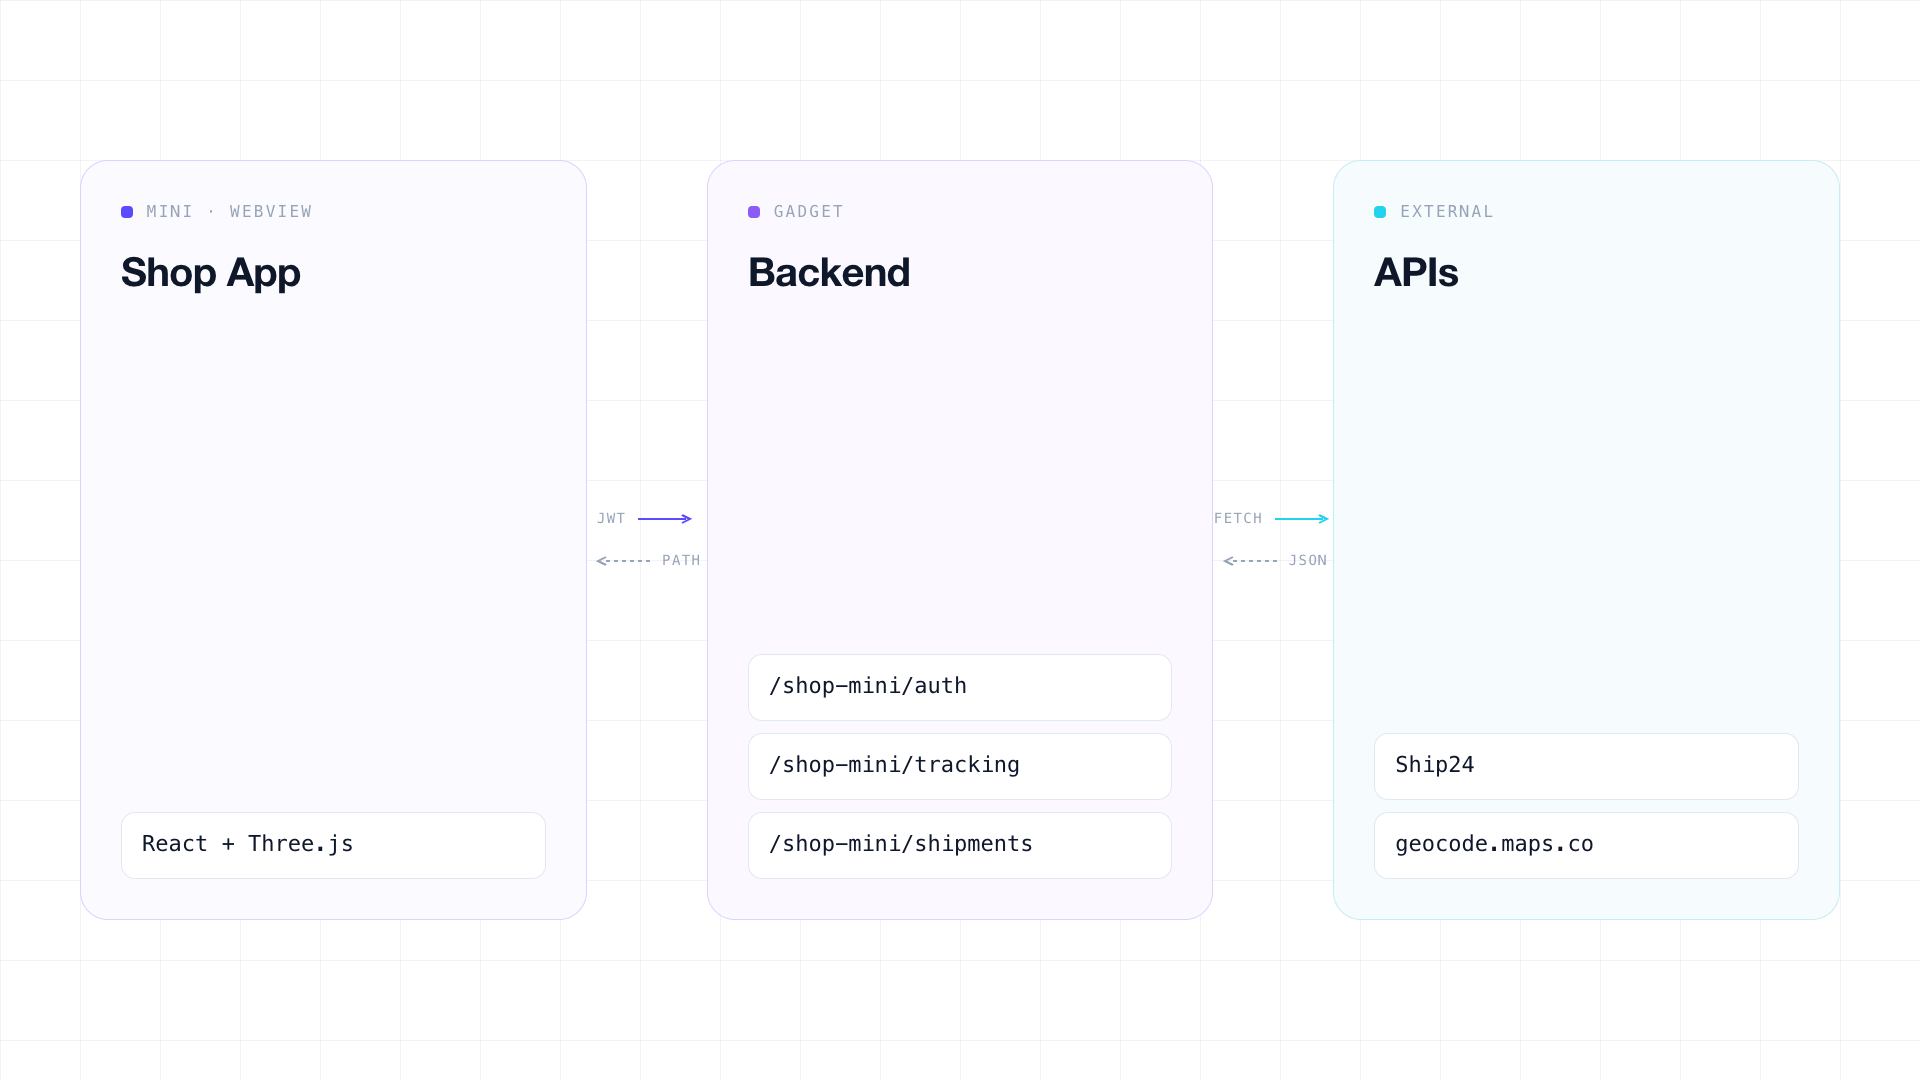
Now, for the actual shipment tracking functionality, this is where Gadget comes in. Gadget gives us a serverless Node backend and a PostgreSQL DB. We also get a hosted production environment and dev environments. For this project, it's handling the auth and session management as well as all the external API requests. Basically, to track a shipment, we get the tracking number from the user. When they press search, we check if the Shop Mini's secure storage has a valid JWT. If so, we fire off a request with the tracking number to our Gadget backend. If not, the Mini fetches a mini token from Shopify and sends a request to our auth route on Gadget. This route saves the Mini's "buyer token", creates a session, and returns a Gadget-signed JWT.
.png)
The tracking flow
Back to our tracking request, we now have an authenticated user asking for tracking information, so on our backend, we fire off another request to Ship24 to obtain the actual shipping information. We're using Ship24 instead of pulling directly from Shopify because, while Shopify does provide a carrier service API, it doesn't actually tell us where the package is. We could use any shipment tracking API, but this one just happened to have a free tier. Once that information comes back, we have another step. Ship24 returns a list of locations as addresses, not as coordinates, so this is where our second API comes in. This one takes those addresses and returns actual coordinates we can use to draw our arcs. The final step in this process is updating the shipments table to keep track of each user's tracking history.
Persisting tracking history per user
Gadget's Node backend runs on Fastify, which means a route in Gadget is a Fastify handler with a few extras injected. In this case, api and session:
Sessions are JWT-backed and tied to a miniBuyer record. The first time we require auth, we verify the Shop Mini token with Shopify, upsert a miniBuyer keyed on the publicId (the token we get from Shopify), link a session to it, and hand back a JWT whose sub is the session ID. Then the front-end stores it in secure storage and sends it along with every future request. The per-user history comes from the schema. We just tell it that shipment belongs to miniBuyer:
When POST /tracking finishes geocoding, it upserts scoped by both fields:
Drawing the arc
Now all that's left is to draw our arc on the globe, so we return the data to our front end and render it. We also do some camera math to frame the start and end points of each step of the arc. There are four parts to drawing the arc: the curve, the tube, the shader, and the comet. The curve is a great circle path from point A to point B with a sin bump in the middle, so it doesn't sit on the globe.
Then we have the tube, which is just a thin pipe along the length of the curve:
Next, we have the shader, which moves from 0 → 1, throwing away every pixel past uProgress, slowly revealing the tube over the duration we set:
Finally, we render a glowing sprite that hovers at the head of the curve to give that comet effect:
Wrapping up
And that's it. We have a fully functional Shop Mini app ready for production and able to scale in seconds, thanks to Gadget handling the backend. This was a super fun first Shop Minis project, and it really helped me understand a lot about how Gadget works. Overall, I'm super happy with the result, and I'm looking forward to creating a full tutorial.


.png)

