How to: Add unit tests to your Gadget app
TL;DR: Set up a unit test suite for your Gadget apps using FileSync and your test framework of choice (we like Vitest!)
Proper testing is an essential part of developing and maintaining software applications both large and small. Unit testing ensures that your application is working as expected, and can prevent regressions when new code and features are added to your projects.
In this post, we will show you how to set up a unit test framework for your Gadget application so you can quickly test your application actions, HTTP routes, helper functions, and React frontends. We also walk through the setup of a CI/CD pipeline using GitHub Actions so that tests are run automatically when pull requests are opened or branches are merged.
Check out our documentation for more in-depth instructions on setting up a unit test framework. We also have a public GitHub repo containing a Gadget app set up with the Vitest unit test framework and GitHub Actions if you want an example to browse through.
Setting up a unit test framework
There are 3 major steps that need to be completed in order to use a unit test framework to test your Gadget app:
- Use FileSync, Gadget’s ggt CLI tool, to pull your Gadget code down to your local environment
- Install and set up your test framework
- Initialize an API client that can be used to run your Gadget app’s actions and HTTP routes
Step 1: Use FileSync to write code on your local machine
Gadget’s ggt CLI tool allows you to use FileSync to pull code from your hosted Gadget project down to your local machine, and, while FileSync is left running, will keep your local environment and Gadget project in sync.
This means that you can write and run tests (and any other code!) locally, and it gives you a place to run your unit tests manually.
Your Gadget app has a link at the bottom of the editor that you can copy and paste into your terminal to kick off FileSync for that project.
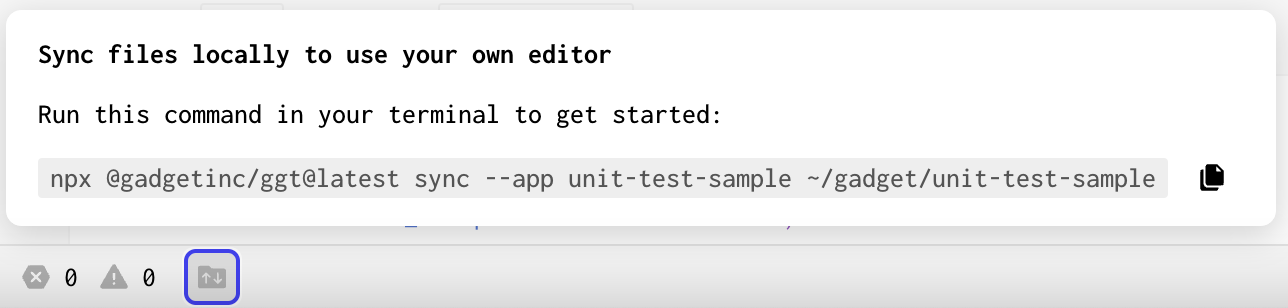
You can also follow our docs to install the ggt CLI tool locally if desired.
Once you have your Gadget app’s code files synced locally, move to Step 2.
Step 2: Setting up a unit test framework
Now that you have your code on your local machine, you can set up a unit test framework to run tests against your Gadget project.
We’re using Vitest because it plays nicely with Vite, which powers Gadget’s React frontends. You can use a different unit test framework, but the setup steps and required configuration might be different.
The dotenv and react-test-renderer packages are also used to manage environment variables and handle snapshot testing, respectively.
- Run <inline-code>yarn add vitest dotenv react-test-renderer<inline-code> in your local Gadget folder to install dependencies
- Add a test script to your <inline-code>package.json<inline-code> to run vitest
- Modify your <inline-code>vite.config.js<inline-code> to include a vitest types reference and a test config for vitest that reads environment variables from a <inline-code>.env.local<inline-code> file
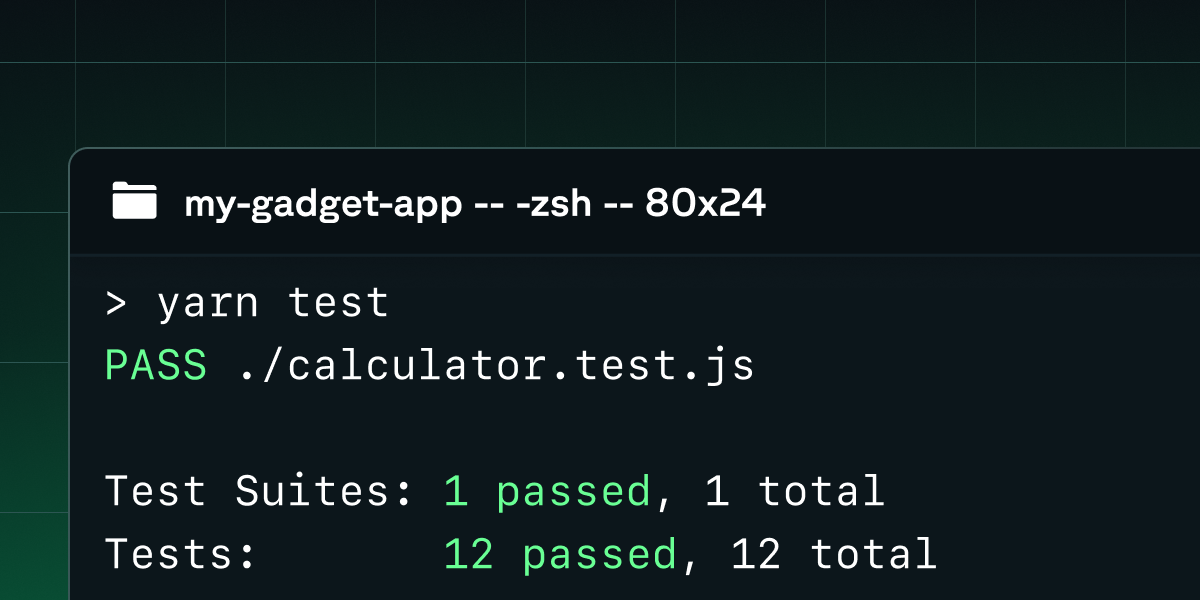
Now you can run any tests locally using yarn test
But before we run tests, we need to write tests. We can make sure our test framework is set up properly by testing a utility function or frontend component that does not rely on our Gadget project’s API client.
For example, if you have a file <inline-code>utils/getWordCount.js<inline-code> file that accepts a string as input and returns the word count:
You could add a <inline-code>getWordCount.test.js<inline-code> file to test the function:
Now if you try <inline-code>yarn test<inline-code> from the terminal, you should see the tests run and pass.
You can also use other test framework capabilities like mocks, spies, and snapshots to test frontends.
For example, you might have a frontend route that makes use of Gadget’s <inline-code>useUser<inline-code> and <inline-code>useFindMany<inline-code> hooks, as well as an API client you want to mock when running snapshot tests:
You can test frontends and utilities without any additional setup. But to test backend actions or HTTP routes, you’ll need to initialize an API client that can be used to call these actions.
Step 3: Setting up a test API client
In order to test your backend model and global actions, or HTTP routes, you need to use an API client for your Gadget project. This is similar to the API client set up for you in <inline-code>frontend/api.js<inline-code> by default, but instead, we will use an API key to initialize our client.
This API key will be for your development environment. We don’t want it to be leaked or else anyone could use it to run queries against your development environment, so we want to store it as an environment variable in our local project.
- Create a <inline-code>.ignore<inline-code> file in your Gadget project root to prevent files from being picked up by FileSync
- Add <inline-code>.env.local<inline-code> to the <inline-code>.ignore<inline-code> file
NOTE: If you are also using source control like GitHub, you should also add <inline-code>.env.local<inline-code> to your <inline-code>.gitignore<inline-code> file.
- Create a <inline-code>.env.local<inline-code> file at the project root to store local env vars for testing
- In the Gadget web editor, create a new API key, assign it a role, and paste the API key as an environment variable inside <inline-code>.env.local<inline-code>
This will be picked up by <inline-code>dotenv<inline-code> and fed to <inline-code>vitest<inline-code>, so we can use this environment variable to initialize the API client we use for testing.
- Add a folder to your Gadget project root called test
- Add a file to the test folder named <inline-code>api.js<inline-code>
- Initialize and export an API client you can use for testing on your Development environment using the <inline-code>GADGET_TEST_API_KEY<inline-code> environment variable
This API client can now be used to call your actions and HTTP routes. Let’s start writing some tests:
If you want to test an action in Gadget, you could do something like:
This will call the post model’s create action, and test to make sure that the response is correct. When you call a create action, it creates a record in your Development environment database. Because of this, you can add a beforeAll to clean up any records from previous test runs. Note that you need to make sure your API key has <inline-code>system-admin<inline-code> privileges to call the internal <inline-code>deleteMany<inline-code> API. For more information on <inline-code>deleteMany<inline-code>, see our Internal API docs.
You can test global actions using a similar pattern.
The API client can also be used to test HTTP routes using <inline-code>api.fetch<inline-code>. Here’s an example that tests the default <inline-code>GET-hello.js<inline-code> route included when you create a new Gadget app:
These are just some examples of how to unit test your Gadget project. Feel free to ask in our developer Discord if you have any questions or test cases you want to run by us.
Running tests as part of a CI/CD pipeline
Once you have written some unit tests that you are happy with, you might want to configure a CI/CD pipeline such as GitHub actions to run them every time you push to main or open a pull request.
Here are some setup steps for running your test suite as a GitHub Action:
- If you don’t already have one, create a <inline-code>.gitignore<inline-code> file and add <inline-code.env.local<inline-code>
- You need to pass in a Gadget API key as a secret so that the API client in tests can be initialized. Google has some documentation on setting up and using encrypted secrets. Add the entire contents of your <inline-code>.env.local<inline-code> to an encrypted secret for your repo
- Create a <inline-code>.github/workflows<inline-code> folder at your Gadget project root
- Add a YAML file to the <inline-code>.github/workflows<inline-code> folder, for example <inline-code>.github/workflows/run_tests.yml<inline-code>
- Write some config that selects an environment, downloads dependencies, injects the environment variables into the project, and then runs your tests
This file is an example. It:
- Defines when actions will run - whenever a PR is made against main, or code is merged into main
- Selects Ubuntu as the OS that the suite is running on
- Sets up Node 18
- Creates a <inline-code>.env<inline-code> file and writes the contents of the encrypted secret to this new file
- Runs yarn to install dependencies
- Finally, runs the test suite using <inline-code>yarn test<inline-code>
And just like that, GitHub Actions will run unit tests every time you open a PR against main, or merge into the main branch.
Questions?
If you have questions about setting up a unit test framework or running tests for your Gadget project, take a look at the sample GitHub repo or reach out to us on our developer Discord!


